Build package
Build Z-Bot (Zeroth Bot)
K-Scale Labs · Humanoid · orphaned · 2025
Small 3D-printed open-source humanoid (~46 cm, 18 motors) from K-Scale Labs, community-developed as Zeroth Bot; sold as Z-Bot at $999 before K-Scale shut down.
Build is partial: Files are public but the maker is gone; uncertified, some parts may need alternates.
Two ways to get Z-Bot (Zeroth Bot)
Compare all →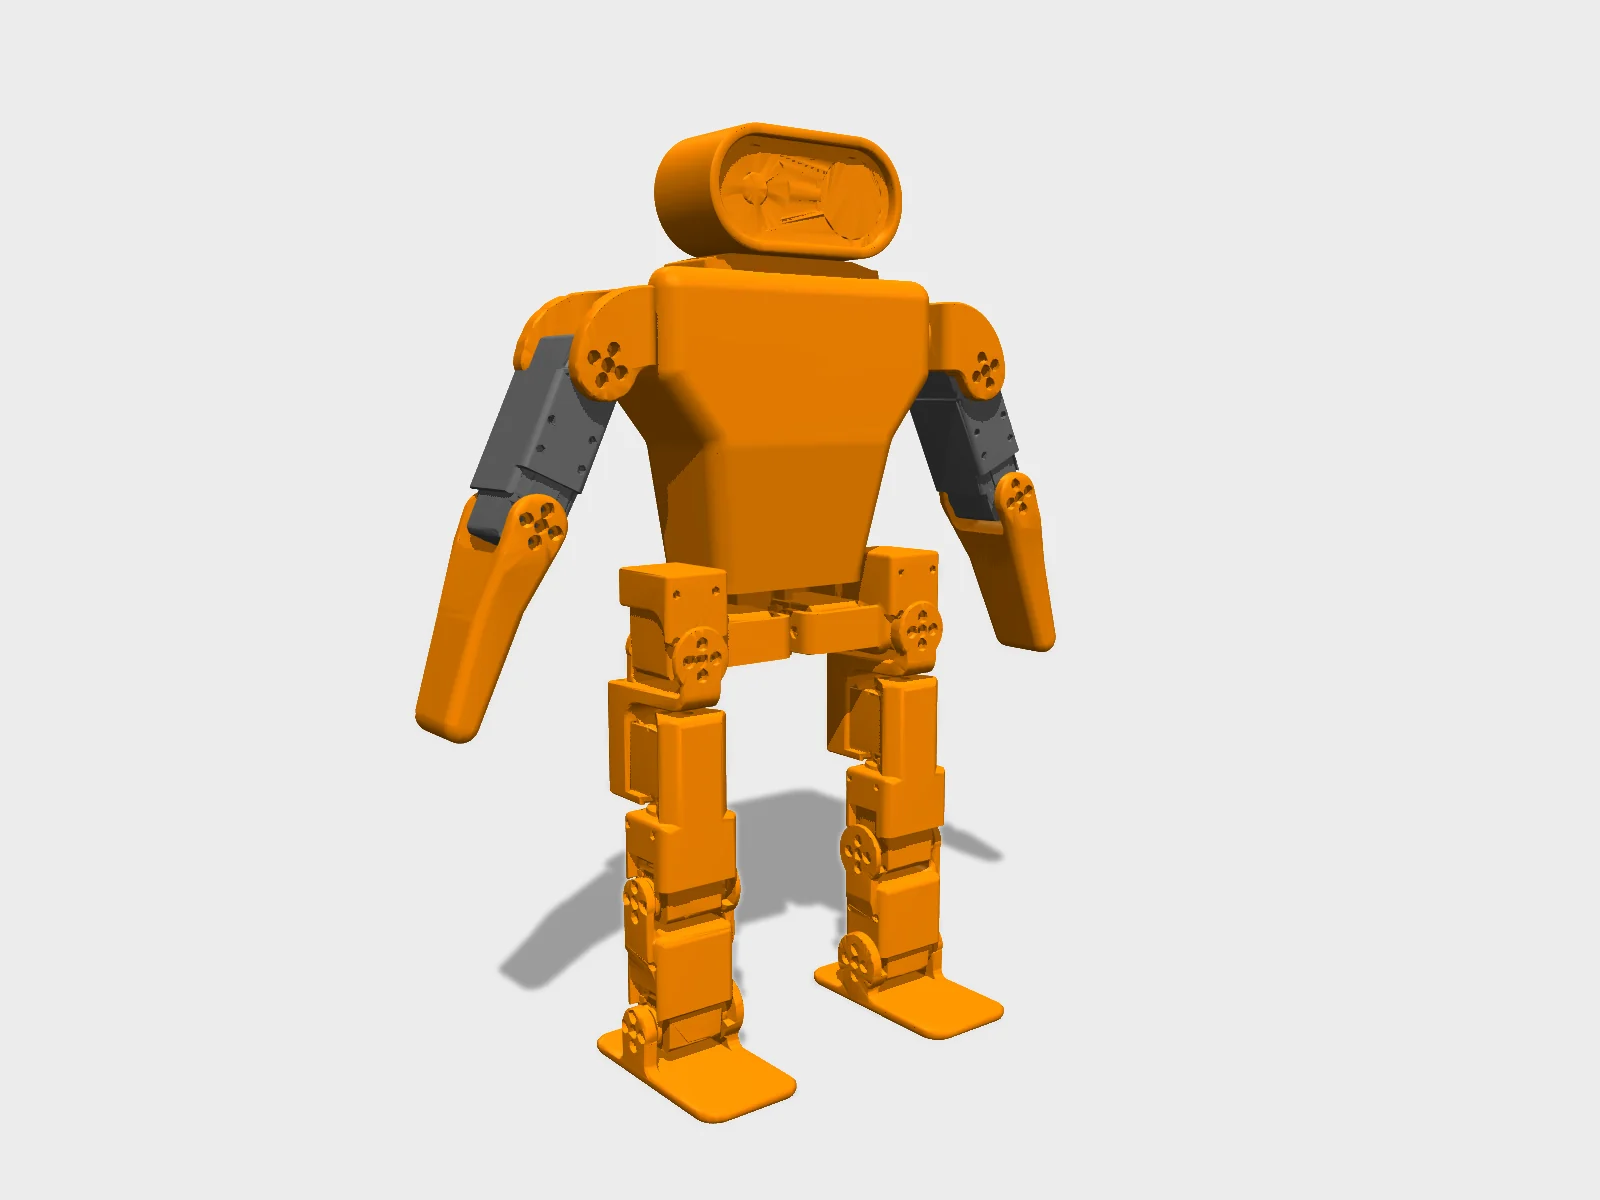
- Drawing
- /kscale/zbot
- Maker
- K-Scale Labs
- Country
- Palo Alto, US
- Package rev
- v0.1.0
- Level
- L1 Compiled
- Availability
- DIY
- Openness
- 90/100
- HW licence
- MIT
- Last checked
- 2026-09-24
- Height
- 46 cm
- DOF
- 18
- Actuators
- 18 servo motors
K-Scale Labs shut down in Nov 2025; the repositories (zeroth-bot, MIT) remain public and community-maintained. No maintainer can certify it until someone adopts it. github.com/kscalelabs/zbot does not exist; the project repo is zeroth-bot. ksim-gym-zbot and zbot-policy-walking contain train.py/convert.py only (no checkpoints), so policies=false.
Configure
Saved in the URL. Share the link to share the build.Source
One cart across 6 vendors · prices in USD as listed21 lines · 293 parts · 11 without an offer in US · 4/21 lines sourced in 2+ regions (L3 gate)
| # | Part | Category | Qty | Unit | Line | Offer |
|---|---|---|---|---|---|---|
Amazon4 lines · $55.00 | ||||||
| 1 | RC LiPo battery (KBT 1200 mAh listing) power.lipo | power | 1 | $33.00 | $33.00 | Amazon |
| 2 | Electret microphone with amplifier electronics.mic-electret | electronics | 1 | $6.00 | $6.00 | Amazon |
| 3 | 3 W speaker (CQRobot, JST-PH2.0) electronics.speaker-3w | electronics | 1 | $8.00 | $8.00 | Amazon |
| 4 | LM386 mono audio amplifier module electronics.amp-lm386 · MPN LM386 | electronics | 1 | $8.00 | $8.00 | Amazon |
Adafruit1 line · $29.95 | ||||||
| 5 | Adafruit 9-DOF IMU, product 4646 (BNO055-based per kos-zbot driver) sensor.imu-9dof · MPN Adafruit 4646 | sensor | 1 | $29.95 | $29.95 | Adafruit |
Waveshare2 lines · $23.00 | ||||||
| 6 | Waveshare Bus Servo Adapter (A) electronics.waveshare-bus-servo-adapter | electronics | 1 | $7.00 | $7.00 | Waveshareships globally |
| 7 | Waveshare RP2040-LCD-1.28 MCU board ('LCD IMU', head display) electronics.rp2040-lcd-1.28 · MPN RP2040-LCD-1.28 | electronics | 1 | $16.00 | $16.00 | Waveshareships globally |
Milk-V1 line · $10.00 | ||||||
| 8 | Milk-V Duo S controller compute.milkv-duo-s · MPN Milk-V Duo S | compute | 1 | $10.00 | $10.00 | Milk-Vships globally |
Arace1 line · $4.00 | ||||||
| 9 | Milk-V CAM-GC2083 camera sensor.camera-gc2083 · MPN CAM-GC2083 | sensor | 1 | $4.00 | $4.00 | Araceships globally |
DigiKey1 line · $3.00 | ||||||
| 10 | DFRobot DFR0571 12V to 5V 3 A regulator (may need connectors) power.reg-12-5-dfr0571 · MPN DFR0571 | power | 1 | $3.00 | $3.00 | DigiKey |
No offer in this region11 lines · unpriced | ||||||
| 11 | Feetech STS3250 50 kg serial bus servo actuator.sts3250 · MPN STS3250 | actuator | 16 | unpriced | — | Offers in CN only |
| 12 | M3 x 10 mm button head cap screw (structural joints) fastener.m3x10-bhcs | fastener | 14 | unpriced | — | No offer found yet |
| 13 | M3 x 4.5 mm button head cap screw (motor outputs, motor axles) fastener.m3x4.5-bhcs | fastener | 129 | unpriced | — | No offer found yet |
| 14 | M2 x 5 mm button head cap screw (motor housings) fastener.m2x5-bhcs | fastener | 80 | unpriced | — | No offer found yet |
| 15 | M2 x 5 mm socket head cap screw (board mounts) fastener.m2x5-shcs | fastener | 12 | unpriced | — | No offer found yet |
| 16 | M3 heat-set insert (torso etc.) fastener.insert-m3 | fastener | 13 | unpriced | — | No offer found yet |
| 17 | M2 heat-set insert (electronics carriage) fastener.insert-m2 | fastener | 14 | unpriced | — | No offer found yet |
| 18 | Spring/split washers for all screws fastener.split-washers | fastener | 1 | unpriced | — | No offer found yet |
| 19 | Loctite Purple low-strength threadlocker (metal-on-metal joints) other.threadlocker-purple | other | 1 | unpriced | — | No offer found yet |
| 20 | 3-pin PH 2.0 mm cable, 150 mm cable.ph2-3pin-150mm | cable | 2 | unpriced | — | No offer found yet |
| 21 | Servo motor cables (included with servos; long twisted + short) cable.servo-cables | cable | 1 | unpriced | — | No offer found yet |
| Cart total · US | 293 | $124.95 | 11 lines unpriced, not in total | |||
Fabricate
Planned for a 256 mm bed- Fabricated parts
- 22
- Print time (sum)
- —
- Material (sum)
- —
- Plates · estimate
- —
No plate estimate: the package does not list grams per part yet, and we will not guess them. Slice the source files for your 256 mm bed.
| Part | Process | Material | Qty | h / part | g / part | Profile |
|---|---|---|---|---|---|---|
Hand (left + right) printed.hand | FDM | unspecified (docs give only a Bambu 0.16 mm, 5-wall, tree-support profile) | 2 | — | — | source |
Elbow bracket (left + right) printed.elbow-bracket | FDM | unspecified (docs give only a Bambu 0.16 mm, 5-wall, tree-support profile) | 2 | — | — | source |
Shoulder yaw (left + right) printed.shoulder-yaw | FDM | unspecified (docs give only a Bambu 0.16 mm, 5-wall, tree-support profile) | 2 | — | — | source |
Head (head back plate / head case) printed.head | FDM | unspecified (docs give only a Bambu 0.16 mm, 5-wall, tree-support profile) | 1 | — | — | source |
Neck (neck back plate / neck adaptor) printed.neck | FDM | unspecified (docs give only a Bambu 0.16 mm, 5-wall, tree-support profile) | 1 | — | — | source |
Mounting back plate (backpack) printed.mounting-back-plate | FDM | unspecified (docs give only a Bambu 0.16 mm, 5-wall, tree-support profile) | 1 | — | — | source |
Torso printed.torso | FDM | unspecified (docs give only a Bambu 0.16 mm, 5-wall, tree-support profile) | 1 | — | — | source |
Electronics mount printed.electronics-mount | FDM | unspecified (docs give only a Bambu 0.16 mm, 5-wall, tree-support profile) | 1 | — | — | source |
Hip pitch dual carry printed.hip-pitch-dual-carry | FDM | unspecified (docs give only a Bambu 0.16 mm, 5-wall, tree-support profile) | 1 | — | — | source |
Hip yaw (left + right) printed.hip-yaw | FDM | unspecified (docs give only a Bambu 0.16 mm, 5-wall, tree-support profile) | 2 | — | — | source |
Hip roll (left + right) printed.hip-roll | FDM | unspecified (docs give only a Bambu 0.16 mm, 5-wall, tree-support profile) | 2 | — | — | source |
Knee pitch (left + right) printed.knee-pitch | FDM | unspecified (docs give only a Bambu 0.16 mm, 5-wall, tree-support profile) | 2 | — | — | source |
Ankle pitch (left + right) printed.ankle-pitch | FDM | unspecified (docs give only a Bambu 0.16 mm, 5-wall, tree-support profile) | 2 | — | — | source |
Foot (left + right) printed.foot | FDM | unspecified (docs give only a Bambu 0.16 mm, 5-wall, tree-support profile) | 2 | — | — | source |
Assemble
Every step ends in a check- Steps
- 13
- Subassemblies
- 7
- Hands-on time (sum)
- —
- Critical path
- —
- Your progress · this device
- —
13 steps have no time estimate; times above are lower bounds.
Steps, in build order
- fabrication01
Print and clean parts
Print all parts from the 2024-11-18 STL set or the Onshape CAD using the Bambu 0.16 mm process, 5 wall loops and auto tree supports. Remove all supports, especially inside the servo pockets and the rotor interfaces.
CHECKAll 14 part types (with left/right pairs) are printed, and a servo slides into each pocket without force.- Parts in
- Hand (left + right)printed.hand
- Elbow bracket (left + right)printed.elbow-bracket
- Shoulder yaw (left + right)printed.shoulder-yaw
- Head (head back plate / head case)printed.head
- Neck (neck back plate / neck adaptor)printed.neck
- Mounting back plate (backpack)printed.mounting-back-plate
- Torsoprinted.torso
- Electronics mountprinted.electronics-mount
- Hip pitch dual carryprinted.hip-pitch-dual-carry
- Hip yaw (left + right)printed.hip-yaw
- Hip roll (left + right)printed.hip-roll
- Knee pitch (left + right)printed.knee-pitch
- Ankle pitch (left + right)printed.ankle-pitch
- Foot (left + right)printed.foot
- Tools
- Bambu-class FDM printer
- Torque
- —
- Time
- —
- After
- Start
- Source
- github.com
- 02
Install heat-set inserts
Heat-set M3 inserts into the torso, neck and hips (4x M3), keeping the hip inserts as perpendicular as possible. Then set M2 inserts into the electronics mount (14), neck adaptor (4) and head case (4).
CHECKEvery insert is flush and square, and an M3 or M2 screw threads in fully by hand.- Parts in
- M3 heat-set insert (torso etc.)fastener.insert-m3
- M2 heat-set insert (electronics carriage)fastener.insert-m2
- Torsoprinted.torso
- Neck (neck back plate / neck adaptor)printed.neck
- Electronics mountprinted.electronics-mount
- Head (head back plate / head case)printed.head
- Tools
- soldering iron
- Torque
- —
- Time
- —
- After
- 01
- Source
- docs.google.com
- legs03
Mount ankle pitch servos to feet
Connect the left and right ankle pitch servos to the feet, then secure the servo casings. Use an M3 x 8 screw for the middle screw on every servo, and a spring washer on every screw.
CHECKEach foot pivots on its ankle servo output with no wobble in the rotor plates.- Parts in
- Feetech STS3250 50 kg serial bus servoactuator.sts3250
- Foot (left + right)printed.foot
- Ankle pitch (left + right)printed.ankle-pitch
- M2 x 5 mm button head cap screw (motor housings)fastener.m2x5-bhcs
- M3 x 4.5 mm button head cap screw (motor outputs, motor axles)fastener.m3x4.5-bhcs
- Tools
- 1.5 mm hex, 2.5 mm hex
- Torque
- —
- Time
- —
- After
- 02
- Source
- github.com
- electrical04
Build the electronics mount
Safety · human-verified requiredMount the Milk-V board, then the Milk-V hat, the servo driver board and the upward-facing speaker using M2 x 4 screws with split washers. Connect the hat's labelled motor connection cable to the servo board's logic pins as shown in the connection diagram.
CHECKBefore connecting the battery, confirm the logic cable pinout (GND/signal) matches the diagram with a continuity test.This step can hurt a person or ruin parts. Its instructions need sign-off by a human who has done it before relying on them. Stop and ask if anything differs from what you see.
- Parts in
- Milk-V Duo S controllercompute.milkv-duo-s
- Waveshare Bus Servo Adapter (A)electronics.waveshare-bus-servo-adapter
- 3 W speaker (CQRobot, JST-PH2.0)electronics.speaker-3w
- LM386 mono audio amplifier moduleelectronics.amp-lm386
- Electronics mountprinted.electronics-mount
- M2 x 5 mm socket head cap screw (board mounts)fastener.m2x5-shcs
- Tools
- —
- Torque
- —
- Time
- —
- After
- 02
- Source
- docs.google.com
- 05
Assemble head electronics
Wire the display/IMU board and the microphone with 3- and 4-pin PH2.0 cables, thread the cables through the cable hole, and mount the IMU and camera to the head plate with M2 x 4 screws and split washers. Fix the head to the neck with one M3 x 5 screw, slide on the head cover, and fasten it with four M2 x 6 screws.
CHECKThe head cover closes without pinching any cable, and the camera lens is centred in its opening.- Parts in
- Waveshare RP2040-LCD-1.28 MCU board ('LCD IMU', head display)electronics.rp2040-lcd-1.28
- Adafruit 9-DOF IMU, product 4646 (BNO055-based per kos-zbot driver)sensor.imu-9dof
- Milk-V CAM-GC2083 camerasensor.camera-gc2083
- Electret microphone with amplifierelectronics.mic-electret
- 3-pin PH 2.0 mm cable, 150 mmcable.ph2-3pin-150mm
- Head (head back plate / head case)printed.head
- Neck (neck back plate / neck adaptor)printed.neck
- Tools
- —
- Torque
- —
- Time
- —
- After
- 02
- Source
- docs.google.com
- legs06
Install knee pitch and hip roll servos
Attach the knee pitch servos. Plug the foot cable into the knee servo's left port and add a new cable to its right port, mirroring this on the left leg. Then attach the hip roll servos and the knee-back/hip-yaw connectors.
CHECKThe right-leg wiring matches the reference photos and the left leg is its mirror image.- Parts in
- Feetech STS3250 50 kg serial bus servoactuator.sts3250
- Knee pitch (left + right)printed.knee-pitch
- Hip roll (left + right)printed.hip-roll
- Servo motor cables (included with servos; long twisted + short)cable.servo-cables
- Tools
- —
- Torque
- —
- Time
- —
- After
- 03
- Source
- github.com
- 07
Attach hip yaw servos to legs
Connect the hip yaw servos to the legs and hip connectors, but do not attach the torso-side servos yet. You should end up with two legs of four servos each.
CHECKTwo separate legs, each with 4 servos daisy-chained into one cable chain.- Parts in
- Feetech STS3250 50 kg serial bus servoactuator.sts3250
- Hip yaw (left + right)printed.hip-yaw
- Tools
- —
- Torque
- —
- Time
- —
- After
- 06
- Source
- github.com
- torso08
Mount hip pitch servos and join legs to torso
Secure the torso with four M3 x 12 screws and nuts. Fit a short and a long cable to each hip pitch servo, running the long cable up toward the head and the short one through the back hole (the reference photo shows the ports swapped). Fix the hip pitch servos to the torso first, then attach the legs.
CHECKThe legs swing on the hip pitch servos, and no cable is pinched through the full range.- Parts in
- Feetech STS3250 50 kg serial bus servoactuator.sts3250
- Torsoprinted.torso
- Hip pitch dual carryprinted.hip-pitch-dual-carry
- M3 x 10 mm button head cap screw (structural joints)fastener.m3x10-bhcs
- Tools
- —
- Torque
- —
- Time
- —
- After
- 07
- Source
- github.com
- arms09
Install shoulder pitch servos and shoulders
Fix the shoulder pitch servos (black-striped) to the torso, with the rotor only on the outward face. Then screw the shoulders on with the rotor notches facing the front of the robot.
CHECKEach shoulder rotates freely, and the notches face forward on both sides.- Parts in
- Feetech STS3250 50 kg serial bus servoactuator.sts3250
- Shoulder yaw (left + right)printed.shoulder-yaw
- Tools
- —
- Torque
- —
- Time
- —
- After
- 08
- Source
- github.com
- 10
Assemble arms and attach hands
Screw the shoulder yaw and elbow yaw servos together and attach them to the shoulders. Route the long cables from the body-side ports up toward the head and link the elbow servos with short cables. Then attach the hands.
CHECKThe arm servo chain is continuous from the torso to each elbow, and the left/right hands are on the correct sides.- Parts in
- Feetech STS3250 50 kg serial bus servoactuator.sts3250
- Elbow bracket (left + right)printed.elbow-bracket
- Hand (left + right)printed.hand
- Servo motor cables (included with servos; long twisted + short)cable.servo-cables
- Tools
- —
- Torque
- —
- Time
- —
- After
- 09
- Source
- github.com
- electrical11
Install battery and close up the body
Safety · human-verified requiredPlace the battery in the body cavity (four servo cables should be exposed) and route the long cable path along the right inside of the body. Fix the electronics mount with 2x M3 x 10, connect all cables, then screw in the neck and the backpack.
CHECKWith the battery connected, the Milk-V powers up and the servo adapter LED is lit, with no heat at the regulator.This step can hurt a person or ruin parts. Its instructions need sign-off by a human who has done it before relying on them. Stop and ask if anything differs from what you see.
- Parts in
- RC LiPo battery (KBT 1200 mAh listing)power.lipo
- DFRobot DFR0571 12V to 5V 3 A regulator (may need connectors)power.reg-12-5-dfr0571
- Mounting back plate (backpack)printed.mounting-back-plate
- Tools
- —
- Torque
- —
- Time
- —
- Source
- docs.google.com
- software12
Flash OpenLCH image and connect
Flash the OpenLCH buildroot image from the Zeroth-Robotics releases to the SD card with balenaEtcher. Boot the robot and connect over USB (ssh root@192.168.42.1, password milkv), then optionally set up Wi-Fi.
CHECK`ssh root@192.168.42.1` gives a shell on the robot.- Parts in
- Milk-V Duo S controllercompute.milkv-duo-s
- Tools
- balenaEtcher, microSD card
- Torque
- —
- Time
- —
- After
- 11
- Source
- github.com
- bring-up13
Run demo inference
Safety · human-verified requiredOn the host, clone zeroth-robotics/zeroth-bot recursively, create a Python 3.12 conda environment and pip install experiments/requirements.txt. Ping 192.168.42.1, then run experiments/run.py to execute the premade model.
CHECK`ping 192.168.42.1` succeeds, and the robot moves under experiments/run.py (hold or gantry it first).This step can hurt a person or ruin parts. Its instructions need sign-off by a human who has done it before relying on them. Stop and ask if anything differs from what you see.
- Parts in
- —
- Tools
- —
- Torque
- —
- Time
- —
- After
- 12
- Source
- github.com
Progress is stored in this browser only (localStorage). Nothing is sent anywhere.
Bring-up
Flash · calibrate · first policy- A
Flash firmware
TargetsMilk-V Duo S (SG2000) running OpenLCH buildroot image (Zeroth-01 BOM), Raspberry Pi 4B running zbot-os-pi4b / kos-zbot (later K-Scale Z-Bot revision), Feetech STS3250 servos (ID/zero config over serial bus, 1 Mbaud), RP2040-LCD-1.28 head display
Repogithub.com/kscalelabs/kos-zbot
Zeroth-01 path: OpenLCH image from https://github.com/Zeroth-Robotics/OpenLCH-buildroot/releases, SSH over USB gadget 192.168.42.1. K-Scale path: Raspberry Pi OS 64-bit + kos-zbot (Python 3.12), servo UART /dev/ttyAMA5 at 1,000,000 baud, 50 Hz control loop default, BNO055 IMU over I2C, policies in .kinfer format run with `kos zbot infer --model`.
- B
Calibrate
Calibrationkos-zbot CLI: `kos actuator zero all` (or comma-separated IDs) to zero servos; robot-specific service `kos zbot` loads gains and limits. Actuator IDs used in kos-zbot scripts: 11-14, 21-24 (arms), 31-36, 41-46 (legs), 20 total. Older zeroth-bot tree has Rust bins feetech_calibrate / feetech_change_id / feetech_scan.Log the output. It goes in your build report.
- C
First policy
- Z-Bot joystick/velocity walking (RL benchmark template)ksim (JAX/MuJoCo) + kinfer source
- Basic Z-Bot walking policyksim + kinfer source
- Standing policy (Zeroth-01, TPU)PyTorch -> CVITEK TPU (Milk-V) source
- Demo inference (Zeroth-01 first run)Python SDK source
- Scripted demos: wave, salute; voice conversationkos-zbot source
Try the policy in the browser sim before it touches hardware. Keep a hand near the power switch the first time a policy runs on the real robot.
Report your build
Moves Z-Bot (Zeroth Bot) toward L4 · BuiltA build report is the only thing that proves a package works. It raises the level, puts a point on the map, and tells the Foreman which steps to rewrite.
Level gate
Holds L1 · evidence, not confidence- L0Indexed
Known to exist. Atlas page only.
- 3 sources on record(met)
- L1Compiled
Package validates against the spec; every fact has a source.
- Build package compiled(met)
- 16 sources across robot and package(met)
- L2Sim-verified
Loads in browser and GPU sim, mass within tolerance of the BOM, holds a stand. Unlocks .training.
- URDF/MJCF is public(met)
- Sim load, mass tolerance and stand are checked on .training(checked elsewhere)
- L3Sourced
Every BOM line resolves to a live offer in at least two regions. Unlocks the one-click cart.
- 0/21 BOM lines have offers in 2+ regions(not met)
- L4Built
At least one community build report with photos and bring-up logs. Unlocks Build it as the main action.
- 0 reviewed build reports(not met)
- Review feed unreachable at last refresh; count is registry-only(checked elsewhere)
- L5Certified
The robot's maintainer signs the package. Unlocks certified teams and kit sales.
- Orphaned: no maintainer left to sign(not met)
Levels are cumulative and set by the registry from reviewed evidence. This panel shows what can be measured from the package today.
Same robot, other verbs
- Know ithumanoidrobots.systems/kscale/zbot
- Build itpartialhumanoidrobot.build/kscale/zbotFiles are public but the maker is gone; uncertified, some parts may need alternates.
- Train ithumanoidrobots.training/kscale/zbot
- Find its crewpartialhumanoidrobots.team/kscale/zbot
- See it on the mappartialhumanoidrobots.earth/kscale/zbot
Revisions and sources
Every fact on this sheet traces to one of these| Rev | Description | Checked |
|---|---|---|
| PKG | Build package, current revision 0.1.0 | — |
| S1 | Zeroth Bot repogithub.com | 2026-09-24 |
| S2 | TechEBlog $999 Z-Bottecheblog.com | 2026-09-24 |
| S3 | Humanoids Daily shutdownhumanoidsdaily.com | 2026-09-24 |
| S4 | K-Scale docs source: Zeroth-01 Bill of Materials (incl. fastener counts)github.com | 2026-09-24 |
| S5 | Zeroth Bot docs source: BoM (2024-11-28)github.com | 2026-09-24 |
| S6 | Zeroth Bot docs source: 3D printing guidegithub.com | 2026-09-24 |
| S7 | Zeroth Bot docs source: Step-by-step assemblygithub.com | 2026-09-24 |
| S8 | ZBot assembly Google Doc (linked from K-Scale docs intro)docs.google.com | 2026-09-24 |
| S9 | Zeroth Bot docs source: Software setupgithub.com | 2026-09-24 |
| S10 | Zeroth Bot docs source: First rungithub.com | 2026-09-24 |
| S11 | Onshape CADcad.onshape.com | 2026-09-24 |
| S12 | kscalelabs/zeroth-bot (fork)github.com | 2026-09-24 |
| S13 | zeroth-robotics/zeroth-bot (upstream)github.com | 2026-09-24 |
| S14 | kos-zbot OS / CLIgithub.com | 2026-09-24 |
| S15 | Z-Bot RL benchmarkgithub.com | 2026-09-24 |
| S16 | K-Scale shutdown newshumanoidsdaily.com | 2026-09-24 |