Build package
Build LEAP Hand
Carnegie Mellon University · Hand · active · 2023
Low-cost 16-DOF, four-finger anthropomorphic research hand built from Dynamixel servos and readily available parts, assemblable in under 4 hours.
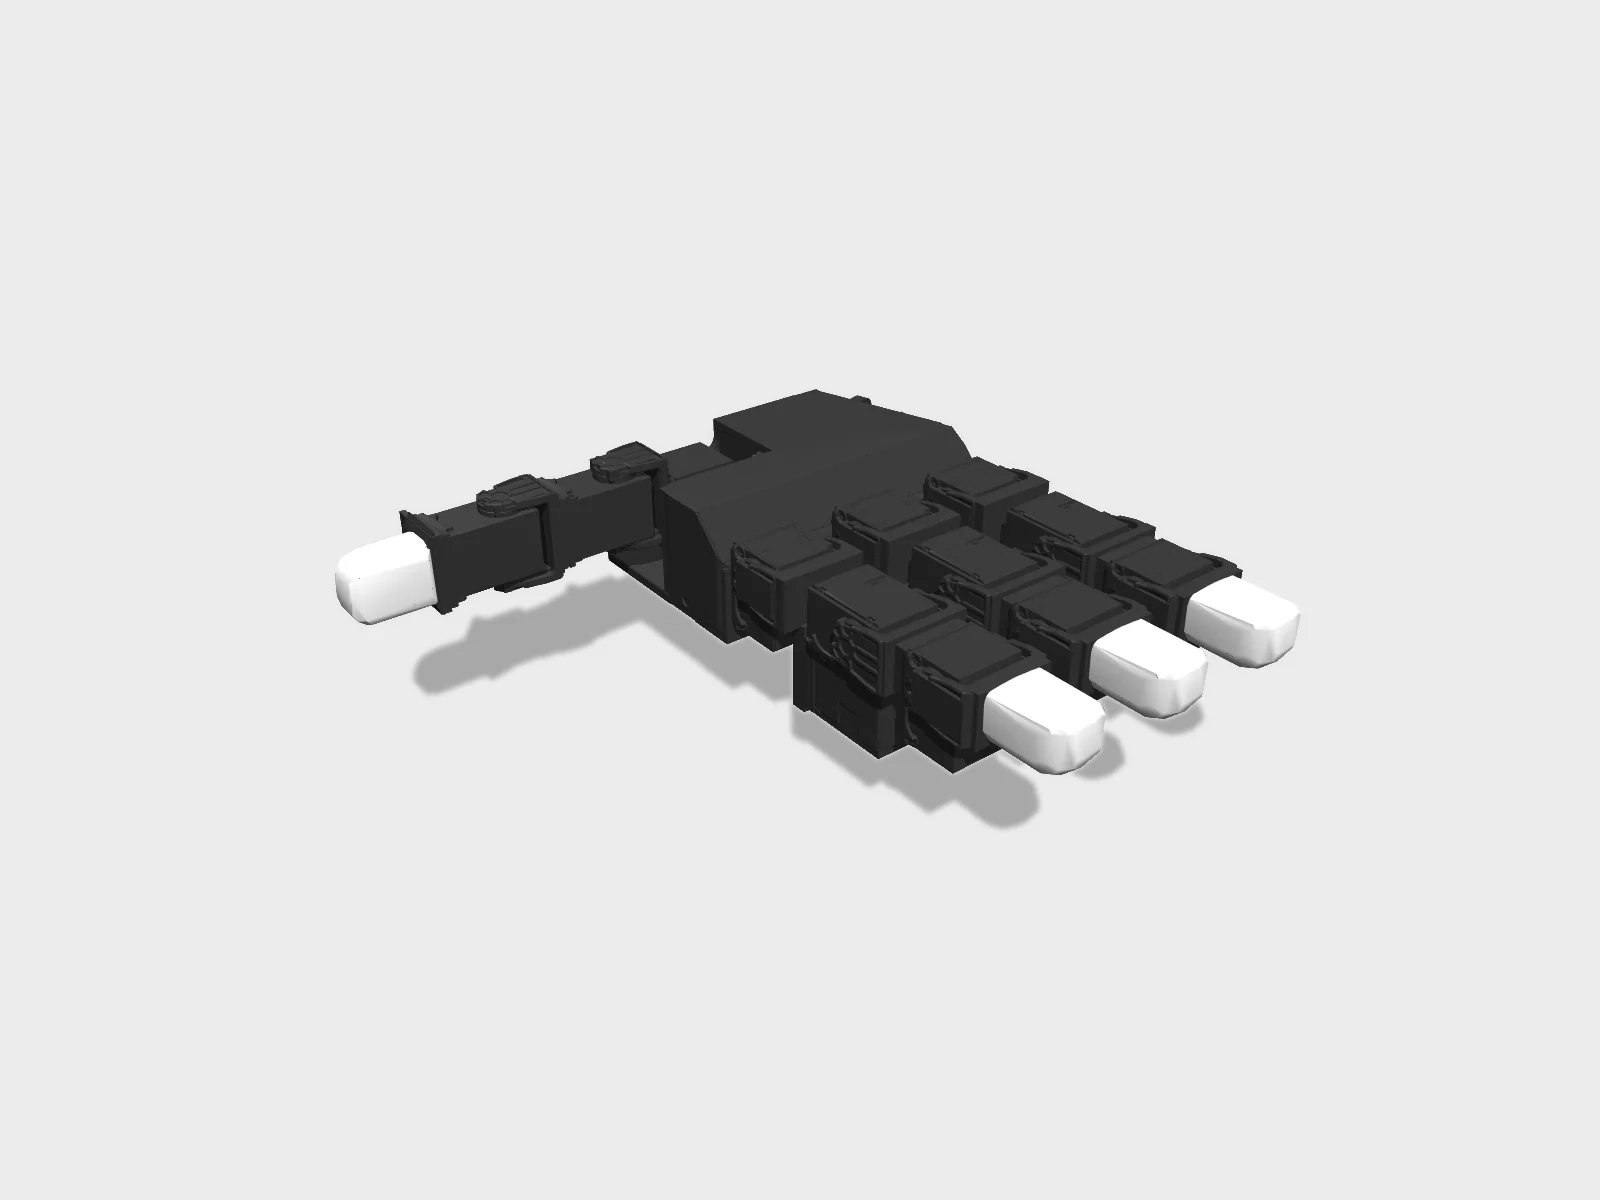
- Drawing
- /cmu/leap-hand
- Maker
- Carnegie Mellon University
- Country
- Pittsburgh, US
- Package rev
- v0.1.0
- Level
- L2 Sim-verified
- Availability
- DIY
- Openness
- 75/100
- HW licence
- CC-BY-NC-4.0
- Last checked
- 2026-09-25
- DOF
- 16
- Actuators
- 16x Dynamixel XC330 + U2D2
LEAP Hand v2 (hybrid rigid-soft) also exists. CAD is non-commercial: the LEAP_Hand_API LICENSE file is CC BY-NC 4.0, while its README says CAD is CC BY-NC-SA (no version given) and code is MIT; LEAP_Hand_Sim is MIT. Uses stock Dynamixel firmware. The LEAP purchase page says the ROBOTIS/Dexbotics partnership has ended, so kits and assembled hands are no longer sold through it (the ROBOTIS bundle page still loads); availability is DIY from the Parts list. Third-party assembled hands are not affiliated with LEAP.
Configure
Saved in the URL. Share the link to share the build.Source
One cart across 3 vendors · prices in USD as listedCarnegie Mellon University sells this robot. Buying from the maker funds the people who opened the design. No BOM line below lists them as a vendor yet, so check their store before ordering parts one by one.
17 lines · 41 parts · 0 without an offer in US · 1/17 lines sourced in 2+ regions (L3 gate)
| # | Part | Category | Qty | Unit | Line | Offer |
|---|---|---|---|---|---|---|
ROBOTIS US6 lines · $1,569.34 | ||||||
| 1 | DYNAMIXEL XC330-M288-T (Full hand); Lite hand uses XL330-M288-T instead actuator.xc330-m288-t · MPN XC330-M288-T · 1 alt | actuator | 16 | $89.99list price | $1,439.84 | ROBOTIS US$89.99 per LEAP Parts page (Aug 2023) |
| 2 | DYNAMIXEL FPX330-H101 horn, 4-pc set (11 horns needed) structure.fpx330-h101 · MPN FPX330-H101 | structure | 3 | $9.80list price | $29.40 | ROBOTIS US |
| 3 | DYNAMIXEL FPX330-S101 bracket, 4-pc set (10 brackets needed; designed to break first in a crash, buy spares) structure.fpx330-s101 · MPN FPX330-S101 | structure | 3 | $9.80list price | $29.40 | ROBOTIS US |
| 4 | DYNAMIXEL FPX330-S102 bracket, 4-pc set (6 brackets needed) structure.fpx330-s102 · MPN FPX330-S102 | structure | 2 | $9.80list price | $19.60 | ROBOTIS US |
| 5 | DYNAMIXEL U2D2 USB-to-TTL interface electronics.u2d2 · MPN U2D2 | electronics | 1 | $32.10list price | $32.10 | ROBOTIS US |
| 6 | DYNAMIXEL U2D2 Power Hub board set (or a custom 5-lead power cable, or the LEAP Power board) electronics.u2d2-power-hub · 2 alt | electronics | 1 | $19.00list price | $19.00 | ROBOTIS US |
Amazon10 lines · $152.96 + 1 unpriced | ||||||
| 7 | Custom power cable parts: XT30 pigtail, JST EH cables (15x) and JST EH housings (5x) (optional, replaces the Power Hub) cable.custom-power-kit | cable | 1 | $9.00list price | $9.00 | AmazonXT30 pigtail, $9.00 per LEAP Parts page |
| 8 | Heat-set brass insert variety pack (uses 5x M3 6 mm and 24x M2 6 mm) fastener.inserts-variety | fastener | 1 | $19.00list price | $19.00 | AmazonShort link from the LEAP Parts page |
| 9 | M2 x 8 mm hex screws, variety pack (16 used) fastener.m2-screws-8mm | fastener | 1 | $19.00list price | $19.00 | AmazonShort link from the LEAP Parts page |
| 10 | M2 x 10 mm hex screws, variety pack (24 used; plus 4x M2 6 mm from the same pack) fastener.m2-screws-10mm | fastener | 1 | $19.00list price | $19.00 | AmazonSame link as the M2 8 mm line on the Parts page |
| 11 | M3 x 6 mm screws (5 used, palm mount) fastener.m3-screws-6mm | fastener | 5 | unpriced | — | AmazonVariety pack, no separate price on the Parts page |
| 12 | Polymaker PLA Pro filament (~200 g used) printed.pla-pro | printed | 1 | $19.99list price | $19.99 | AmazonShort link from the LEAP Parts page |
| 13 | 5 V 30 A power supply power.psu-5v-30a | power | 1 | $19.99list price | $19.99 | AmazonShort link from the LEAP Parts page |
| 14 | AC power cable (change for your country) power.ac-cable | power | 1 | $7.00list price | $7.00 | AmazonUS plug; pick your country's cable |
| 15 | 14 AWG cable for the 5 V feed cable.14awg-5v | cable | 1 | $9.99list price | $9.99 | AmazonShort link from the LEAP Parts page |
| 16 | Grip tape (palm and finger surfaces) other.grip-tape | other | 1 | $29.99list price | $29.99 | AmazonShort link from the LEAP Parts page |
NinjaTek1 line · $49.44 | ||||||
| 17 | NinjaTek NinjaFlex Edge filament, 100 g (optional soft fingertips) printed.ninjaflex-edge | printed | 1 | $49.44list price | $49.44 | NinjaTek |
| Cart total · US | 41 | $1,771.74 | 1 line unpriced, not in total | |||
Fabricate
Planned for a 256 mm bed- Fabricated parts
- 17
- Print time (sum)
- —
- Material (sum)
- —
- Plates · estimate
- —
No plate estimate: the package does not list grams per part yet, and we will not guess them. Slice the source files for your 256 mm bed.
| Part | Process | Material | Qty | h / part | g / part | Profile |
|---|---|---|---|---|---|---|
Palm Lower (left hand prints a left palm) printed.palm-lower | FDM | PLA Pro | 1 | — | — | Cura 5 regular quality, 60% infill, supports, 200 °C nozzle / 60 °C bed |
Palm Upper / mounting lid (xArm mount provided, or a blank to adapt to your arm) printed.palm-upper | FDM | PLA Pro | 1 | — | — | Cura 5 regular quality, 60% infill, supports, 200 °C nozzle / 60 °C bed |
Cable Spacer printed.cable-spacer | FDM | PLA Pro | 5 | — | — | 100% infill, no supports, 200 °C nozzle / 60 °C bed |
MCP Bracket printed.mcp-bracket | FDM | PLA Pro | 3 | — | — | 100% infill, no supports, 200 °C nozzle / 60 °C bed |
DIP Spacer printed.dip-spacer | FDM | PLA Pro | 3 | — | — | 100% infill, no supports, 200 °C nozzle / 60 °C bed |
Fingertip, soft (NinjaFlex Edge) or hard (PLA) printed.fingertip | FDM | NinjaFlex Edge or PLA Pro | 4 | — | — | Soft: 20% infill, no supports, 240 °C nozzle / 60 °C bed, ~25 mm/s, direct-drive extruder required. Hard: PLA 100% infill |
Assemble
Every step ends in a check- Steps
- 13
- Subassemblies
- 8
- Hands-on time (sum)
- —
- Critical path
- —
- Your progress · this device
- —
13 steps have no time estimate; times above are lower bounds.
Steps, in build order
- Fabrication01
Download the CAD
Fill in the CAD request form on the LEAP site (it records acceptance of the CC BY-NC-SA licence) and download the STL set. Pick the Palm Upper that matches your arm (xArm mount or the blank to modify). For a left hand, print the left palm.
CHECKYou have STLs for Palm Lower, Palm Upper, Cable Spacer, MCP Bracket, DIP Spacer and Fingertip, for the correct hand side.- Parts in
- —
- Tools
- —
- Torque
- —
- Time
- —
- After
- Start
- Source
- v1.leaphand.com
- Preparation02
Confirm every motor horn is at the home mark
The dot-and-dash marks on the Dynamixel horn show the home position, which the hand commands (180°) at power-up; most motors ship in it. Keep every horn at home while you attach it to a joint, so the hand's home pose matches the CAD. Sort the three screw types first: serrated TAP screws (with the brackets), plain Dynamixel M2x4, and hex screws.
CHECKAll 16 horns show the dot/dash aligned to home before assembly starts, and the three screw types are in separate trays.- Parts in
- DYNAMIXEL XC330-M288-T (Full hand); Lite hand uses XL330-M288-T insteadactuator.xc330-m288-t
- Tools
- —
- Torque
- —
- Time
- —
- After
- Start
- Source
- v1.leaphand.com
- Fabrication03
Print palm, brackets, spacers and fingertips
Slice in Cura 5 at the regular quality setting. PLA: palm at 60% infill with supports, everything else 100% infill without supports, 200 °C nozzle, 60 °C bed. Optional soft fingertips in NinjaFlex Edge: 20% infill, no supports, 240 °C nozzle, ~25 mm/s. Upstream says all parts print in under 24 hours.
CHECK1 palm lower, 1 palm upper, 5 cable spacers, 3 MCP brackets, 3 DIP spacers and 4 fingertips, with clean screw holes and no warping on the palm.- Parts in
- Polymaker PLA Pro filament (~200 g used)printed.pla-pro
- NinjaTek NinjaFlex Edge filament, 100 g (optional soft fingertips)printed.ninjaflex-edge
- Palm Lower (left hand prints a left palm)printed.palm-lower
- Palm Upper / mounting lid (xArm mount provided, or a blank to adapt to your arm)printed.palm-upper
- Cable Spacerprinted.cable-spacer
- MCP Bracketprinted.mcp-bracket
- DIP Spacerprinted.dip-spacer
- Fingertip, soft (NinjaFlex Edge) or hard (PLA)printed.fingertip
- Tools
- FDM printer (Ender 3 S1 used upstream; direct drive needed for flexible filament), Cura 5
- Torque
- —
- Time
- —
- After
- 01
- Source
- v1.leaphand.com
- Electronics04
Set motor IDs one by one
Safety · human-verified requiredConnect one motor at a time to the U2D2 with 5 V power and set its ID in Dynamixel Wizard. IDs: index 0-3, middle 4-7, ring 8-11, thumb 12-15, in the order MCP side, MCP forward, PIP, DIP. The MCP side motors are 0, 4 and 8. Close Wizard afterwards: the API cannot open the port while it is running.
CHECKEach motor answers alone at its assigned ID; a scan of the full chain later shows IDs 0-15 exactly once.This step can hurt a person or ruin parts. Its instructions need sign-off by a human who has done it before relying on them. Stop and ask if anything differs from what you see.
- Parts in
- DYNAMIXEL XC330-M288-T (Full hand); Lite hand uses XL330-M288-T insteadactuator.xc330-m288-t
- DYNAMIXEL U2D2 USB-to-TTL interfaceelectronics.u2d2
- 5 V 30 A power supplypower.psu-5v-30a
- Tools
- Dynamixel Wizard 2.0
- Torque
- —
- Time
- —
- After
- 02
- Source
- v1.leaphand.com
- Fabrication05
Set brass inserts in fingertips and palm
Safety · human-verified requiredPress the M2 6 mm inserts into the fingertips (6 per tip) and five M3 6 mm inserts into the palm and your chosen mounting lid with the iron at 250 °C. Hot tip: use a stand and keep the part clamped.
CHECKEvery insert sits flush and square; an M2 screw threads in fully by hand without the insert spinning.This step can hurt a person or ruin parts. Its instructions need sign-off by a human who has done it before relying on them. Stop and ask if anything differs from what you see.
- Parts in
- Heat-set brass insert variety pack (uses 5x M3 6 mm and 24x M2 6 mm)fastener.inserts-variety
- Fingertip, soft (NinjaFlex Edge) or hard (PLA)printed.fingertip
- Palm Lower (left hand prints a left palm)printed.palm-lower
- Palm Upper / mounting lid (xArm mount provided, or a blank to adapt to your arm)printed.palm-upper
- Tools
- Soldering iron (250 °C)
- Torque
- —
- Time
- —
- After
- 03
- Source
- v1.leaphand.com
- Fingers06
MCP joint assembly (x4)
1) Fix an H101 horn to the MCP bracket with 4 M2 4 mm screws and nuts. 2) Attach idler and horn to a motor (upward orientation) with 4 black M2 4 mm TAP screws. 3) Put 6 nuts in the top of an S101 bracket and fix it to the motor with 4 long M2 8 mm TAP screws. 4) On top of the MCP bracket add a cable spacer and an S102 bracket, 4 M2 10 mm screws into the bracket nuts. 5) Fix a second motor, top toward the MCP bracket, with long M2 8 mm TAP screws. The thumb has its own sequence.
CHECKThe two MCP motors are rigidly joined and the side-to-side and forward axes each swing by hand without the brackets touching.- Parts in
- MCP Bracketprinted.mcp-bracket
- Cable Spacerprinted.cable-spacer
- DYNAMIXEL FPX330-H101 horn, 4-pc set (11 horns needed)structure.fpx330-h101
- DYNAMIXEL FPX330-S101 bracket, 4-pc set (10 brackets needed; designed to break first in a crash, buy spares)structure.fpx330-s101
- DYNAMIXEL FPX330-S102 bracket, 4-pc set (6 brackets needed)structure.fpx330-s102
- DYNAMIXEL XC330-M288-T (Full hand); Lite hand uses XL330-M288-T insteadactuator.xc330-m288-t
- M2 x 8 mm hex screws, variety pack (16 used)fastener.m2-screws-8mm
- M2 x 10 mm hex screws, variety pack (24 used; plus 4x M2 6 mm from the same pack)fastener.m2-screws-10mm
- Tools
- PH00 Phillips screwdriver (a motorised one is recommended), M2/M3 hex keys
- Torque
- —
- Time
- —
- Source
- v1.leaphand.com
- 07
PIP and DIP assembly, fingertip (x3 fingers)
1) S101 bracket onto the MCP-side motor, 4 short black 4 mm TAP screws. 2) PIP motor onto the S101 with 4 long M2 8 mm TAP screws. 3) Stack H101 horn, DIP spacer and an S101, 4 M2 10 mm screws into nuts inside the S101. 4) DIP assembly onto the PIP motor with an idler and 4 black M2 4 mm TAP screws. 5) DIP motor into the open S101 with 4 long 8 mm TAP screws. 6) Fingertip onto an H101 horn with 6 M2 screws into the inserts, then horn onto the DIP motor with idler and 4 short 4 mm TAP screws. Repeat for index, middle and ring.
CHECKThree identical fingers; each joint moves through its range by hand and, with horns at home, the finger is straight as in the CAD.- Parts in
- DYNAMIXEL FPX330-S101 bracket, 4-pc set (10 brackets needed; designed to break first in a crash, buy spares)structure.fpx330-s101
- DYNAMIXEL FPX330-H101 horn, 4-pc set (11 horns needed)structure.fpx330-h101
- DIP Spacerprinted.dip-spacer
- Fingertip, soft (NinjaFlex Edge) or hard (PLA)printed.fingertip
- DYNAMIXEL XC330-M288-T (Full hand); Lite hand uses XL330-M288-T insteadactuator.xc330-m288-t
- M2 x 10 mm hex screws, variety pack (24 used; plus 4x M2 6 mm from the same pack)fastener.m2-screws-10mm
- Tools
- PH00 Phillips screwdriver
- Torque
- —
- Time
- —
- Source
- v1.leaphand.com
- 08
Thumb assembly
1) S102 with 8 nuts onto the end of a motor, 4 long 8 mm TAP screws. 2) S101 onto that motor's horn, 4 short 4 mm TAP screws (left hand: mount this S101 the opposite way round). 3) Next motor onto the S101, 4 long TAP screws. 4) H101 horn onto it, then another motor to the horn with idler and 4 short TAP screws. 5) Stack S102, cable spacer and H101, 4 M2 6 mm screws and nuts. 6) Finger into the S102 with 4 long TAP screws; new motor into the H101 with idler and 4 short TAP screws. 7) Stack S102, cable spacer and fingertip with 6 M2 6 mm screws and fix to the motor with 4 long TAP screws.
CHECKThe thumb has 4 motors, its S101 orientation matches the hand side, and all joints move by hand without collision.- Parts in
- DYNAMIXEL FPX330-S101 bracket, 4-pc set (10 brackets needed; designed to break first in a crash, buy spares)structure.fpx330-s101
- DYNAMIXEL FPX330-S102 bracket, 4-pc set (6 brackets needed)structure.fpx330-s102
- DYNAMIXEL FPX330-H101 horn, 4-pc set (11 horns needed)structure.fpx330-h101
- Cable Spacerprinted.cable-spacer
- Fingertip, soft (NinjaFlex Edge) or hard (PLA)printed.fingertip
- DYNAMIXEL XC330-M288-T (Full hand); Lite hand uses XL330-M288-T insteadactuator.xc330-m288-t
- M2 x 8 mm hex screws, variety pack (16 used)fastener.m2-screws-8mm
- M2 x 10 mm hex screws, variety pack (24 used; plus 4x M2 6 mm from the same pack)fastener.m2-screws-10mm
- Tools
- PH00 Phillips screwdriver
- Torque
- —
- Time
- —
- Source
- v1.leaphand.com
- Palm09
Mount the fingers on the palm
Fix each of the 4 fingers to the palm with 4 M2 8 mm screws. Close the palm with the mounting lid (M3 6 mm screws into the inserts). Add grip tape where you want friction.
CHECKAll four fingers are rigid on the palm and the lid is secured by 5 M3 screws.- Parts in
- Palm Lower (left hand prints a left palm)printed.palm-lower
- Palm Upper / mounting lid (xArm mount provided, or a blank to adapt to your arm)printed.palm-upper
- M2 x 8 mm hex screws, variety pack (16 used)fastener.m2-screws-8mm
- M3 x 6 mm screws (5 used, palm mount)fastener.m3-screws-6mm
- Grip tape (palm and finger surfaces)other.grip-tape
- Tools
- M2/M3 hex keys
- Torque
- —
- Time
- —
- Source
- v1.leaphand.com
- Electronics10
Build the 5 V feed and chain all motors
Safety · human-verified requiredWire the 5 V 30 A supply to the Power Hub (or to the custom XT30/JST EH cable, or the LEAP Power board) with 14 AWG cable, and connect each finger chain plus the U2D2. The supply is mains-powered: close its terminal cover and never work on the AC side while plugged in. Check polarity before connecting any motor.
CHECKWith the motors unplugged the hub output reads +5 V with correct polarity; after plugging in, all 16 Dynamixel LEDs blink once at boot.This step can hurt a person or ruin parts. Its instructions need sign-off by a human who has done it before relying on them. Stop and ask if anything differs from what you see.
- Parts in
- DYNAMIXEL U2D2 Power Hub board set (or a custom 5-lead power cable, or the LEAP Power board)electronics.u2d2-power-hub
- Custom power cable parts: XT30 pigtail, JST EH cables (15x) and JST EH housings (5x) (optional, replaces the Power Hub)cable.custom-power-kit
- 14 AWG cable for the 5 V feedcable.14awg-5v
- 5 V 30 A power supplypower.psu-5v-30a
- AC power cable (change for your country)power.ac-cable
- Tools
- Soldering iron, Multimeter
- Torque
- —
- Time
- —
- Source
- v1.leaphand.com
- Software11
Install the Python API and find the port
Clone LEAP_Hand_API, then in python/: `python -m venv test_env`, activate it, `pip install dynamixel_sdk numpy`. On Ubuntu use the persistent `/dev/serial/by-id/...` path and `sudo chmod 666` it; on Windows find the COM port in Dynamixel Wizard. Put the port in `main.py`. Optional: set Return Delay Time (register 9) to 0 µs and lower USB latency.
CHECKThe port opens from Python with Wizard closed and reading positions returns 16 values.- Parts in
- DYNAMIXEL U2D2 USB-to-TTL interfaceelectronics.u2d2
- Tools
- Python 3, Micro-USB cable (avoid chained USB extensions)
- Torque
- —
- Time
- —
- After
- 10
- Source
- github.com
- Bring-up12
First motion: home pose
Safety · human-verified requiredRun `python main.py`. The node enables torque with PID position control (kP 600, side-to-side motors at 0.75x) and a 350 mA current limit, and commands the 180° home pose. Keep fingers out of the joints. On a Full hand (XC330) you may raise `curr_lim` to 550 mA; leave Lite hands at the default.
CHECKThe hand moves to the CAD home pose with every finger straight. A finger off by 90/180/270° means that horn was mounted wrong: remount it. Red-flashing motors mean overload: power-cycle and lower the current limit.This step can hurt a person or ruin parts. Its instructions need sign-off by a human who has done it before relying on them. Stop and ask if anything differs from what you see.
- Parts in
- —
- Tools
- —
- Torque
- —
- Time
- —
- After
- 11
- Source
- github.com
- Policy13
Optional: run the pretrained in-hand rotation policy
Install LEAP_Hand_Sim with Isaac Gym Preview 4, then in leapsim/ run `python3 train.py wandb_activate=false num_envs=1 headless=false test=true task=LeapHandRot checkpoint=runs/pretrained/nn/LeapHand.pth`. For the real hand, start the ROS module (`roslaunch example.launch`), then run `deploy.py` with the same arguments.
CHECKIn sim the hand reorients the cube continuously; on hardware the hand goes to the pre-grasp pose and rotates a 7.5 cm cube.- Parts in
- —
- Tools
- NVIDIA GPU, Isaac Gym Preview 4, ROS 1 (for real-hand deployment)
- Torque
- —
- Time
- —
- After
- 12
- Source
- github.com
Progress is stored in this browser only (localStorage). Nothing is sent anywhere.
Bring-up
Flash · calibrate · first policy- A
Flash firmware
TargetsDYNAMIXEL XC330-M288-T (x16, IDs 0-15), U2D2 (USB-TTL)
Repogithub.com/leap-hand/LEAP_Hand_API
Stock Dynamixel firmware; the host API (Python, C++, ROS, ROS 2) sets PID gains and current limit (default 350 mA in main.py, up to 550 mA on XC330 Full hands, ~300 mA on Lite). Position, velocity and current can be read at up to about 500 Hz.
- B
Calibrate
CalibrationNo encoder calibration: assemble with every horn at its home mark, set IDs 0-15 in Dynamixel Wizard 2.0, then run python/main.py, which commands the 180° home pose. A joint off by a multiple of 90° means a remounted horn is needed.Log the output. It goes in your build report.
- C
First policy
- in-hand cube reorientation (LeapHandRot)Isaac Gym Preview 4 + rl_games PPO (LEAP_Hand_Sim) source
Try the policy in the browser sim before it touches hardware. Keep a hand near the power switch the first time a policy runs on the real robot.
Report your build
Moves LEAP Hand toward L4 · BuiltA build report is the only thing that proves a package works. It raises the level, puts a point on the map, and tells the Foreman which steps to rewrite.
Level gate
Holds L2 · evidence, not confidence- L0Indexed
Known to exist. Atlas page only.
- 6 sources on record(met)
- L1Compiled
Package validates against the spec; every fact has a source.
- Build package compiled(met)
- 15 sources across robot and package(met)
- L2Sim-verified
Loads in browser and GPU sim, mass within tolerance of the BOM, holds a stand. Unlocks .training.
- URDF/MJCF is public(met)
- Sim load, mass tolerance and stand are checked on .training(checked elsewhere)
- L3Sourced
Every BOM line resolves to a live offer in at least two regions. Unlocks the one-click cart.
- 0/17 BOM lines have offers in 2+ regions(not met)
- L4Built
At least one community build report with photos and bring-up logs. Unlocks Build it as the main action.
- 0 reviewed build reports(not met)
- Review feed unreachable at last refresh; count is registry-only(checked elsewhere)
- L5Certified
The robot's maintainer signs the package. Unlocks certified teams and kit sales.
- Maintainer signature not recorded(not met)
Levels are cumulative and set by the registry from reviewed evidence. This panel shows what can be measured from the package today.
Same robot, other verbs
Revisions and sources
Every fact on this sheet traces to one of these| Rev | Description | Checked |
|---|---|---|
| PKG | Build package, current revision 0.1.0 | — |
| S1 | LEAP Hand v1 sitev1.leaphand.com | 2026-09-24 |
| S2 | RSS 2023 paperroboticsproceedings.org | 2026-09-24 |
| S3 | API repo (license note)github.com | 2026-09-24 |
| S4 | ROBOTIS bundlerobotis.us | 2026-09-24 |
| S5 | LEAP Hand purchase page (ROBOTIS/Dexbotics partnership ended)v1.leaphand.com | 2026-09-25 |
| S6 | LEAP Hand parts list (costs as of Aug 2023)v1.leaphand.com | 2026-09-25 |
| S7 | LEAP Hand parts listv1.leaphand.com | 2026-09-25 |
| S8 | LEAP Hand assembly instructionsv1.leaphand.com | 2026-09-25 |
| S9 | LEAP Hand purchase optionsv1.leaphand.com | 2026-09-25 |
| S10 | LEAP Hand CAD request (CC BY-NC-SA)v1.leaphand.com | 2026-09-25 |
| S11 | LEAP_Hand_API READMEgithub.com | 2026-09-25 |
| S12 | LEAP_Hand_API python/ (main.py)github.com | 2026-09-25 |
| S13 | LEAP_Hand_Sim (URDF, Isaac Gym env, pretrained policy)github.com | 2026-09-25 |
| S14 | LEAP Power hubgithub.com | 2026-09-25 |
| S15 | LEAP Hand paper (RSS 2023)arxiv.org | 2026-09-25 |