Build package
Build LeKiwi
SIGRobotics UIUC / Hugging Face LeRobot · Rover · active
Low-cost mobile manipulator combining a three-omni-wheel holonomic base with an SO-101 arm, a Raspberry Pi 5 and two RGB cameras, supported in LeRobot.
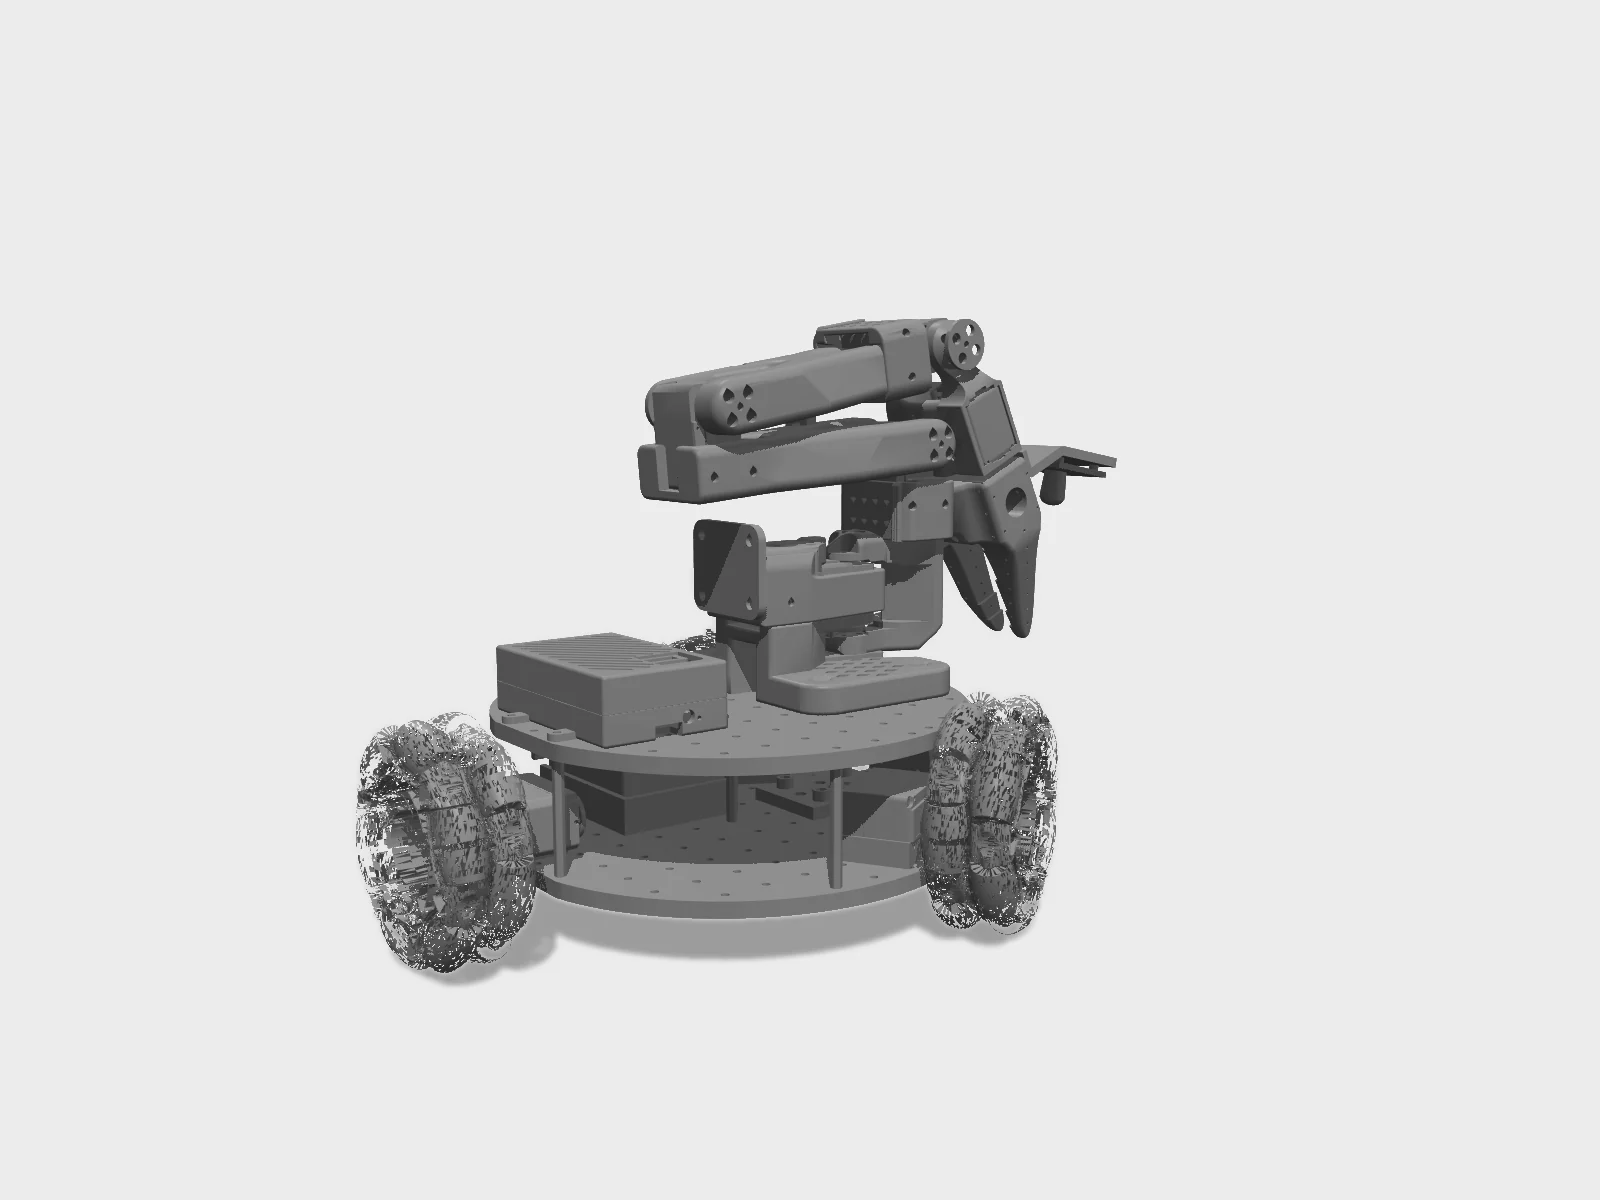
- Drawing
- /uiuc/lekiwi
- Maker
- SIGRobotics UIUC / Hugging Face LeRobot
- Country
- Urbana, US
- Package rev
- v0.1.0
- Level
- L1 Compiled
- Availability
- DIY
- Openness
- 90/100
- HW licence
- Apache-2.0
- Last checked
- 2026-09-25
- Size
- No sourced height, mass or DOF yet
Mobile manipulator (wheeled base + arm), classed as rover. Fusion 360 CAD public. Dynamixel variant uses Koch v1.1 arm. City = UIUC campus. Three upstream variants: 5 V (power bank), 12 V and wired. Seeed Studio sells a 12 V full kit, listed in the repo BOM.
Configure
Saved in the URL. Share the link to share the build.Source
One cart across 7 vendors · prices in USD as listedSIGRobotics UIUC / Hugging Face LeRobot sells this robot. Buying from the maker funds the people who opened the design. No BOM line below lists them as a vendor yet, so check their store before ordering parts one by one.
15 lines · 32 parts · 0 without an offer in US · 15/15 lines sourced in 2+ regions (L3 gate)
| # | Part | Category | Qty | Unit | Line | Offer |
|---|---|---|---|---|---|---|
Alibaba (6-pack listing)2 lines · $225.00 | ||||||
| 1 | Feetech STS3215 servo, 7.4 V: 3 wheel drives (continuous rotation, IDs 7 left / 8 back / 9 right) actuator.sts3215-wheel · MPN STS3215 · 1 alt | actuator | 3 | $15.00list price | $45.00 | Alibaba (6-pack listing) |
| 2 | Feetech STS3215 servo, 7.4 V: SO-101 follower (on the base) + leader (on the laptop), 6 + 6 actuator.sts3215-arm · MPN STS3215 · 2 alt | actuator | 12 | $15.00list price | $180.00 | Alibaba (6-pack listing) |
Amazon8 lines · $115.18 | ||||||
| 3 | M2 / M3 / M4 assorted screw set (covers m2x5 tapping, m3x6/12/16/20, m4x12 and M3 nuts used in assembly) fastener.screw-assortment | fastener | 1 | $14.99list price | $14.99 | Amazon |
| 4 | USB camera (front base camera + wrist camera) sensor.usb-camera · 1 alt | sensor | 2 | $12.98list price | $25.96 | Amazon |
| 5 | microSD card (Raspberry Pi OS) electronics.microsd | electronics | 1 | $11.23list price | $11.23 | Amazon |
| 6 | Table clamp, 4 pcs (leader arm) other.table-clamps | other | 1 | $18.00list price | $18.00 | Amazon |
| 7 | Precision screwdriver set other.screwdriver-set | other | 1 | $6.00list price | $6.00 | Amazon |
| 8 | USB-C to USB-A cable, 2 pcs (servo boards to Pi / laptop) cable.usb-c-to-a · 1 alt | cable | 1 | $7.00list price | $7.00 | Amazon |
| 9 | Motor control board: Waveshare serial bus servo driver (one on LeKiwi for arm + wheels, one for the leader) electronics.bus-servo-adapter | electronics | 2 | $11.00list price | $22.00 | Amazon |
| 10 | DC power supply, 5 V, 5.5x2.1 mm barrel (leader arm on the desk) power.psu-leader · 1 alt | power | 1 | $10.00list price | $10.00 | Amazon |
Adafruit1 line · $60.00 | ||||||
| 11 | Raspberry Pi 5, 4 GB compute.rpi5 · MPN SC1111 · 1 alt | compute | 1 | $60.00list price | $60.00 | Adafruit |
Amazon (CUKTECH)1 line · $42.00 | ||||||
| 12 | 20000 mAh 85 W USB-C power bank (5 V version: powers the Pi and the servo board) power.power-bank · 1 alt | power | 1 | $42.00list price | $42.00 | Amazon (CUKTECH) |
VEX Robotics1 line · $29.97 | ||||||
| 13 | 4 in (100 mm) omni wheel structure.omni-wheel | structure | 3 | $9.99list price | $29.97 | VEX Robotics |
Amazon (DSD TECH)1 line · $10.00 | ||||||
| 14 | USB-C to DC barrel cable (power bank to servo board) cable.usb-c-to-dc | cable | 1 | $10.00list price | $10.00 | Amazon (DSD TECH) |
Amazon (INIU)1 line · $8.00 | ||||||
| 15 | USB-C cable, 2 pcs, 1 ft / 0.5 m (power bank to Pi) cable.usb-c-short | cable | 1 | $8.00list price | $8.00 | Amazon (INIU) |
| Cart total · US | 32 | $490.15 | All lines priced | |||
Fabricate
Planned for a 256 mm bed- Fabricated parts
- 18
- Print time (sum)
- —
- Material (sum)
- —
- Plates · estimate
- —
No plate estimate: the package does not list grams per part yet, and we will not guess them. Slice the source files for your 256 mm bed.
| Part | Process | Material | Qty | h / part | g / part | Profile |
|---|---|---|---|---|---|---|
Base plate bottom (base_plate_layer1.stl) printed.base-plate-bottom | FDM | PLA | 1 | — | — | PLA; 0.2 mm layers; 15% infill; 150 mm/s; auto-orient and auto-arrange in the slicer; enable supports only where the parts table says so (tested on a Bambu Lab P1S) |
Base plate top (base_plate_layer2.stl) printed.base-plate-top | FDM | PLA | 1 | — | — | PLA; 0.2 mm layers; 15% infill; 150 mm/s; auto-orient and auto-arrange in the slicer; enable supports only where the parts table says so (tested on a Bambu Lab P1S) |
Drive motor mount (drive_motor_mount_v2.stl) printed.drive-motor-mount | FDM | PLA | 3 | — | — | PLA; 0.2 mm layers; 15% infill; 150 mm/s; auto-orient and auto-arrange in the slicer; enable supports only where the parts table says so (tested on a Bambu Lab P1S) |
Servo wheel hub (servo_wheel_hub.stl, modified VEX VersaHub) printed.servo-wheel-hub | FDM | PLA | 3 | — | — | PLA; 0.2 mm layers; 15% infill; 150 mm/s; auto-orient and auto-arrange in the slicer; enable supports only where the parts table says so (tested on a Bambu Lab P1S). Supports required. |
Servo controller mount (servo_controller_mount.stl) printed.servo-controller-mount | FDM | PLA | 1 | — | — | PLA; 0.2 mm layers; 15% infill; 150 mm/s; auto-orient and auto-arrange in the slicer; enable supports only where the parts table says so (tested on a Bambu Lab P1S) |
5 V power bank holder (5v_specific/5v_power_bank_holder.stl); 12 V builds print battery_mount.stl or battery_mount_eu.stl instead printed.power-mount | FDM | PLA | 1 | — | — | PLA; 0.2 mm layers; 15% infill; 150 mm/s; auto-orient and auto-arrange in the slicer; enable supports only where the parts table says so (tested on a Bambu Lab P1S) |
Raspberry Pi 5 case top (pi_case_top.stl) printed.pi-case-top | FDM | PLA | 1 | — | — | PLA; 0.2 mm layers; 15% infill; 150 mm/s; auto-orient and auto-arrange in the slicer; enable supports only where the parts table says so (tested on a Bambu Lab P1S) |
Raspberry Pi 5 case bottom (pi_case_bottom.stl) printed.pi-case-bottom | FDM | PLA | 1 | — | — | PLA; 0.2 mm layers; 15% infill; 150 mm/s; auto-orient and auto-arrange in the slicer; enable supports only where the parts table says so (tested on a Bambu Lab P1S) |
Webcam base mount (webcam_mount/webcam_mount.stl); Arducam builds use base_camera_mount.stl printed.webcam-base-mount | FDM | PLA | 1 | — | — | PLA; 0.2 mm layers; 15% infill; 150 mm/s; auto-orient and auto-arrange in the slicer; enable supports only where the parts table says so (tested on a Bambu Lab P1S) |
Gripper with M3 nut insert for the wrist webcam (webcam_mount/so100_gripper_cam_mount_insert.stl) printed.webcam-gripper-insert | FDM | PLA | 1 | — | — | PLA; 0.2 mm layers; 15% infill; 150 mm/s; auto-orient and auto-arrange in the slicer; enable supports only where the parts table says so (tested on a Bambu Lab P1S) |
Webcam wrist mount (webcam_mount/webcam_mount_wrist.stl); Arducam builds use wrist_camera_mount.stl printed.webcam-wrist-mount | FDM | PLA | 1 | — | — | PLA; 0.2 mm layers; 15% infill; 150 mm/s; auto-orient and auto-arrange in the slicer; enable supports only where the parts table says so (tested on a Bambu Lab P1S) |
Modified follower arm base (modified_base_arm.stl), optional but recommended if you have not built an SO-100/101 yet printed.modified-arm-base | FDM | PLA | 1 | — | — | PLA; 0.2 mm layers; 15% infill; 150 mm/s; auto-orient and auto-arrange in the slicer; enable supports only where the parts table says so (tested on a Bambu Lab P1S). Tree supports. |
SO-101 follower arm parts (SO-ARM100 STL/SO101 follower plate) printed.so101-follower | FDM | PLA+ (per SO-ARM100) | 1 | — | — | SO-ARM100 settings: 0.2 mm layers, 15% infill, supports except slopes steeper than 45° |
SO-101 leader arm parts (SO-ARM100 STL/SO101 leader plate) printed.so101-leader | FDM | PLA+ (per SO-ARM100) | 1 | — | — | SO-ARM100 settings: 0.2 mm layers, 15% infill, supports except slopes steeper than 45° |
Assemble
Every step ends in a check- Steps
- 16
- Subassemblies
- 10
- Hands-on time (sum)
- —
- Critical path
- —
- Your progress · this device
- —
16 steps have no time estimate; times above are lower bounds.
Steps, in build order
- Fabrication01
Print the base, mounts and both SO-101 arms
Load each STL, auto-rotate and auto-arrange, and enable supports for the wheel hubs (normal) and the modified arm base (tree). 0.2 mm layers, 15% infill, 150 mm/s. Upstream estimates about 34 printer-hours in total. Print the arm plates from SO-ARM100.
CHECK3 motor mounts and 3 wheel hubs, both base plates, the power-bank holder, Pi case, camera mounts and both arm part sets are printed with supports removed. An M3 nut presses into the controller-mount and holder nut traps.- Parts in
- Base plate bottom (base_plate_layer1.stl)printed.base-plate-bottom
- Base plate top (base_plate_layer2.stl)printed.base-plate-top
- Drive motor mount (drive_motor_mount_v2.stl)printed.drive-motor-mount
- Servo wheel hub (servo_wheel_hub.stl, modified VEX VersaHub)printed.servo-wheel-hub
- Servo controller mount (servo_controller_mount.stl)printed.servo-controller-mount
- 5 V power bank holder (5v_specific/5v_power_bank_holder.stl); 12 V builds print battery_mount.stl or battery_mount_eu.stl insteadprinted.power-mount
- Raspberry Pi 5 case top (pi_case_top.stl)printed.pi-case-top
- Raspberry Pi 5 case bottom (pi_case_bottom.stl)printed.pi-case-bottom
- Webcam base mount (webcam_mount/webcam_mount.stl); Arducam builds use base_camera_mount.stlprinted.webcam-base-mount
- Gripper with M3 nut insert for the wrist webcam (webcam_mount/so100_gripper_cam_mount_insert.stl)printed.webcam-gripper-insert
- Webcam wrist mount (webcam_mount/webcam_mount_wrist.stl); Arducam builds use wrist_camera_mount.stlprinted.webcam-wrist-mount
- Modified follower arm base (modified_base_arm.stl), optional but recommended if you have not built an SO-100/101 yetprinted.modified-arm-base
- SO-101 follower arm parts (SO-ARM100 STL/SO101 follower plate)printed.so101-follower
- SO-101 leader arm parts (SO-ARM100 STL/SO101 leader plate)printed.so101-leader
- Tools
- FDM printer (tested on Bambu Lab P1S), PLA filament
- Torque
- —
- Time
- —
- After
- Start
- Source
- github.com
- Compute02
Flash Raspberry Pi OS and enable SSH
Write Raspberry Pi OS (or Ubuntu) to the microSD with Raspberry Pi Imager, boot the Pi and enable SSH (`sudo raspi-config`, Interfacing Options > SSH). Wired version: skip this step and run everything on the laptop.
CHECK`hostname -I` on the Pi shows its IP and `ssh <user>@<pi-ip>` from the laptop logs in.- Parts in
- Raspberry Pi 5, 4 GBcompute.rpi5
- microSD card (Raspberry Pi OS)electronics.microsd
- Tools
- Raspberry Pi Imager, Laptop on the same network
- Torque
- —
- Time
- —
- After
- Start
- Source
- huggingface.co
- Arms03
Build the SO-101 follower and leader arms
Follow the SO-101 guide (see therobotstudio/so-101): set leader IDs with `lerobot-setup-motors --teleop.type=so101_leader --teleop.port=<port>`, then assemble both arms joint by joint with M2x6 and M3x6 screws. Leave the follower off its own driver board: on LeKiwi its chain plugs into the single board on the base together with the wheels.
CHECKBoth arms move freely by hand through every joint, and the leader's six motors answer with IDs 1-6 on its own board.- Parts in
- Feetech STS3215 servo, 7.4 V: SO-101 follower (on the base) + leader (on the laptop), 6 + 6actuator.sts3215-arm
- SO-101 follower arm parts (SO-ARM100 STL/SO101 follower plate)printed.so101-follower
- SO-101 leader arm parts (SO-ARM100 STL/SO101 leader plate)printed.so101-leader
- Motor control board: Waveshare serial bus servo driver (one on LeKiwi for arm + wheels, one for the leader)electronics.bus-servo-adapter
- DC power supply, 5 V, 5.5x2.1 mm barrel (leader arm on the desk)power.psu-leader
- Tools
- Phillips #0, Phillips #1
- Torque
- —
- Time
- —
- After
- 01
- Source
- huggingface.co
- Compute04
Install LeRobot with the LeKiwi extra on Pi and laptop
On both machines: install LeRobot per the installation guide (conda env, Python 3.12, `git clone https://github.com/huggingface/lerobot.git`), then `pip install -e ".[lekiwi]"` (Feetech SDK + ZeroMQ).
CHECK`python -c "import lerobot.robots.lekiwi"` runs without error on both the Pi and the laptop.- Parts in
- —
- Tools
- —
- Torque
- —
- Time
- —
- After
- 02
- Source
- huggingface.co
- Mobile base05
Assemble the three wheel modules
For each module: drive servo into the motor mount with 4 m2x5 tapping screws; mount onto the bottom base plate with 4 m3x12; wheel hub to omni wheel with 2 m4x12; servo horn to wheel hub with 2 m3x16; horn to the servo with 1 m3x6.
CHECKAll three wheels sit at 120° spacing, spin freely by hand with no wobble at the hub, and the robot rests level on all three.- Parts in
- Precision screwdriver setother.screwdriver-set
- Feetech STS3215 servo, 7.4 V: 3 wheel drives (continuous rotation, IDs 7 left / 8 back / 9 right)actuator.sts3215-wheel
- Drive motor mount (drive_motor_mount_v2.stl)printed.drive-motor-mount
- Servo wheel hub (servo_wheel_hub.stl, modified VEX VersaHub)printed.servo-wheel-hub
- 4 in (100 mm) omni wheelstructure.omni-wheel
- Base plate bottom (base_plate_layer1.stl)printed.base-plate-bottom
- M2 / M3 / M4 assorted screw set (covers m2x5 tapping, m3x6/12/16/20, m4x12 and M3 nuts used in assembly)fastener.screw-assortment
- Tools
- Phillips #1, Hex key set
- Torque
- —
- Time
- —
- After
- 01
- Source
- github.com
- 06
Bottom plate: servo board and power mount
Press M3 nuts into the servo-controller mount and the power-bank (or battery) mount and screw both to the bottom plate with 4 m3x12. Fit the servo driver board and connect the three drive servos to it.
CHECKThe board sits firmly in its mount and each wheel servo cable reaches the board without tension.- Parts in
- Servo controller mount (servo_controller_mount.stl)printed.servo-controller-mount
- 5 V power bank holder (5v_specific/5v_power_bank_holder.stl); 12 V builds print battery_mount.stl or battery_mount_eu.stl insteadprinted.power-mount
- Motor control board: Waveshare serial bus servo driver (one on LeKiwi for arm + wheels, one for the leader)electronics.bus-servo-adapter
- M2 / M3 / M4 assorted screw set (covers m2x5 tapping, m3x6/12/16/20, m4x12 and M3 nuts used in assembly)fastener.screw-assortment
- Tools
- Phillips #1
- Torque
- —
- Time
- —
- After
- 05
- Source
- github.com
- 07
Top plate: Pi and follower arm
Put the Pi 5 in the case bottom and snap on the top. Fix the case to the top plate with 2 m3x12. Mount the SO-101 follower with 4 m3x20; the plate has holes for both the modified and the original SO-101 base.
CHECKThe arm base does not rock on the plate when you push the arm sideways.- Parts in
- Raspberry Pi 5, 4 GBcompute.rpi5
- Raspberry Pi 5 case top (pi_case_top.stl)printed.pi-case-top
- Raspberry Pi 5 case bottom (pi_case_bottom.stl)printed.pi-case-bottom
- Base plate top (base_plate_layer2.stl)printed.base-plate-top
- Modified follower arm base (modified_base_arm.stl), optional but recommended if you have not built an SO-100/101 yetprinted.modified-arm-base
- M2 / M3 / M4 assorted screw set (covers m2x5 tapping, m3x6/12/16/20, m4x12 and M3 nuts used in assembly)fastener.screw-assortment
- Tools
- Phillips #1
- Torque
- —
- Time
- —
- Source
- github.com
- Electrical08
Power wiring (5 V or 12 V)
Safety · human-verified required5 V: seat the power bank in its holder at the back of the lower plate; run USB-C to DC barrel into the servo board and a short USB-C cable to the Pi, as in the upstream wiring diagram. 12 V: join the battery leads, the 12 V to 5 V converter leads and the DC barrel adapter in the Wago lever connectors, then fix the converter to the bottom plate with 2 m3x16 and 2 M3 nuts. Keep everything unplugged until final assembly.
CHECKWith a multimeter the barrel plug reads about 5 V (5 V build) or about 12 V (12 V build), and the converter's USB-C output reads about 5 V. Nothing gets warm with the loads unplugged.This step can hurt a person or ruin parts. Its instructions need sign-off by a human who has done it before relying on them. Stop and ask if anything differs from what you see.
- Parts in
- 20000 mAh 85 W USB-C power bank (5 V version: powers the Pi and the servo board)power.power-bank
- USB-C to DC barrel cable (power bank to servo board)cable.usb-c-to-dc
- USB-C cable, 2 pcs, 1 ft / 0.5 m (power bank to Pi)cable.usb-c-short
- Tools
- Multimeter
- Torque
- —
- Time
- —
- After
- 06
- Source
- github.com
- Mobile base09
Close the base
Feed the servo board's USB-C to USB-A cable, the 5 V USB-C power cable and the follower arm's servo cable through the hole in the top plate. Mount the top plate on the motor mounts with 4 m3x12. Plug the follower chain into the base servo board so arm and wheels share one bus.
CHECKThe top plate sits flat on all mounts and no cable is pinched between the plates.- Parts in
- USB-C to USB-A cable, 2 pcs (servo boards to Pi / laptop)cable.usb-c-to-a
- M2 / M3 / M4 assorted screw set (covers m2x5 tapping, m3x6/12/16/20, m4x12 and M3 nuts used in assembly)fastener.screw-assortment
- Tools
- Phillips #1
- Torque
- —
- Time
- —
- Source
- github.com
- Cameras10
Mount the front and wrist cameras
Webcam option: print the gripper with the M3 nut insert, fit the nut, refit the gripper motor and jaw. Screw the wrist mount on with an M3x12 until it locks into the nut, seat the camera and lock it with 2 M3x35 bolts and nuts in the rear slots. Mount the base webcam at the front of the base the same way. Arducam option: base_camera_mount on the bottom plate and wrist_camera_mount on the static gripper (4 M2x5 tapping screws; camera with 2 M2.5x12).
CHECKBoth cameras plug into the Pi USB ports, and in the default LeKiwi config they enumerate as /dev/video0 (front) and /dev/video2 (wrist). If they don't, pass `index_or_path` for each camera.- Parts in
- USB camera (front base camera + wrist camera)sensor.usb-camera
- Webcam base mount (webcam_mount/webcam_mount.stl); Arducam builds use base_camera_mount.stlprinted.webcam-base-mount
- Gripper with M3 nut insert for the wrist webcam (webcam_mount/so100_gripper_cam_mount_insert.stl)printed.webcam-gripper-insert
- Webcam wrist mount (webcam_mount/webcam_mount_wrist.stl); Arducam builds use wrist_camera_mount.stlprinted.webcam-wrist-mount
- Tools
- Phillips #1, Hex key
- Torque
- —
- Time
- —
- After
- 09
- Source
- github.com
- Motor setup11
Set arm and wheel motor IDs on the single base bus
Safety · human-verified requiredOn the Pi: `lerobot-find-port`, then `lerobot-setup-motors --robot.type=lekiwi --robot.port=<port>`. It prompts one motor at a time: arm IDs 6 down to 1, then wheels 9, 8, 7. Connect only the prompted motor each time. Wheel IDs must match position: 7 left, 8 back, 9 right.
CHECKEvery prompt ends with the motor id set message and no error. Afterwards all nine servos respond on one daisy chain.This step can hurt a person or ruin parts. Its instructions need sign-off by a human who has done it before relying on them. Stop and ask if anything differs from what you see.
- Parts in
- Feetech STS3215 servo, 7.4 V: SO-101 follower (on the base) + leader (on the laptop), 6 + 6actuator.sts3215-arm
- Feetech STS3215 servo, 7.4 V: 3 wheel drives (continuous rotation, IDs 7 left / 8 back / 9 right)actuator.sts3215-wheel
- Motor control board: Waveshare serial bus servo driver (one on LeKiwi for arm + wheels, one for the leader)electronics.bus-servo-adapter
- Tools
- —
- Torque
- —
- Time
- —
- Source
- huggingface.co
- Calibration12
Calibrate follower (on the Pi) and leader (on the laptop)
Safety · human-verified requiredOver SSH on the Pi: `lerobot-calibrate --robot.type=lekiwi --robot.id=my_awesome_kiwi`: middle-of-range pose, Enter, sweep each arm joint, Enter. The wheels need no calibration. Clamp the leader to the desk and run on the laptop `lerobot-calibrate --teleop.type=so100_leader --teleop.port=<port> --teleop.id=my_awesome_leader_arm` (so100_leader and so101_leader are the same class in lerobot 0.6.x).
CHECKTwo calibration JSONs exist, one per id, under `~/.cache/huggingface/lerobot/calibration/` on the respective machines.This step can hurt a person or ruin parts. Its instructions need sign-off by a human who has done it before relying on them. Stop and ask if anything differs from what you see.
- Parts in
- Table clamp, 4 pcs (leader arm)other.table-clamps
- Tools
- —
- Torque
- —
- Time
- —
- After
- 11
- Source
- huggingface.co
- First motion13
First motion: drive and teleoperate
Safety · human-verified requiredOn the Pi: `python -m lerobot.robots.lekiwi.lekiwi_host --robot.id=my_awesome_kiwi`. On the laptop, set `remote_ip` in `examples/lekiwi/teleoperate.py` and run `python examples/lekiwi/teleoperate.py`. The leader drives the arm; W/A/S/D translate, Z/X rotate, R/F change speed (slow 0.1 m/s / 30 deg/s, medium 0.25 / 60, fast 0.4 / 90). Start on the floor in slow mode with space around the robot. Keyboard base control needs X11, Windows or macOS with Input Monitoring, not Wayland.
CHECKThe laptop logs `Connected to remote robot at tcp://<pi-ip>:5555 and video stream at tcp://<pi-ip>:5556`, the follower mirrors the leader, and W moves the base forward in a straight line.This step can hurt a person or ruin parts. Its instructions need sign-off by a human who has done it before relying on them. Stop and ask if anything differs from what you see.
- Parts in
- —
- Tools
- —
- Torque
- —
- Time
- —
- After
- 12
- Source
- huggingface.co
- Policy14
Record a dataset
`hf auth login --token ${HUGGINGFACE_TOKEN} --add-to-git-credential`, then set `remote_ip`, `repo_id`, `port` and `task` in `examples/lekiwi/record.py` and run `python examples/lekiwi/record.py` with lekiwi_host running on the Pi. Upstream suggests at least 50 episodes, 10 per object location, with fixed cameras.
CHECKThe dataset is at `~/.cache/huggingface/lerobot/<repo-id>` and on the Hub, and `python examples/lekiwi/replay.py` replays episode 0 on the robot.- Parts in
- —
- Tools
- Hugging Face account with a write token
- Torque
- —
- Time
- —
- After
- 13
- Source
- huggingface.co
- 15
Train a policy
`lerobot-train --dataset.repo_id=${HF_USER}/<lekiwi dataset> --policy.type=act --output_dir=outputs/train/act_lekiwi --job_name=act_lekiwi --policy.device=cuda --policy.repo_id=${HF_USER}/my_lekiwi_policy` (or `--policy.path=lerobot/smolvla_base` to fine-tune SmolVLA). Add `--job.target=a10g-small` to train on Hugging Face Jobs.
CHECKCheckpoints appear under outputs/train/act_lekiwi/checkpoints and the model is pushed to the Hub.- Parts in
- —
- Tools
- CUDA GPU, Apple silicon, Colab or HF Jobs
- Torque
- —
- Time
- —
- After
- 14
- Source
- huggingface.co
- 16
Run the policy on LeKiwi
Safety · human-verified requiredWith lekiwi_host running on the Pi, set `remote_ip`, `port` and the model id in `examples/lekiwi/evaluate.py` and run `python examples/lekiwi/evaluate.py`. Stay within reach of the power bank or battery lead: the policy also drives the wheels.
CHECKThe robot attempts the recorded task from a start pose seen in training and stops at the end of the evaluation episodes.This step can hurt a person or ruin parts. Its instructions need sign-off by a human who has done it before relying on them. Stop and ask if anything differs from what you see.
- Parts in
- —
- Tools
- —
- Torque
- —
- Time
- —
- After
- 15
- Source
- huggingface.co
Progress is stored in this browser only (localStorage). Nothing is sent anywhere.
Bring-up
Flash · calibrate · first policy- A
Flash firmware
TargetsFeetech STS3215 x9 on one bus (arm IDs 1-6, wheels 7 left / 8 back / 9 right), Waveshare serial bus servo driver (USB bridge, no user firmware), Raspberry Pi 5 running lerobot.robots.lekiwi.lekiwi_host (ZeroMQ, ports 5555 cmd / 5556 observations)
Repogithub.com/huggingface/lerobot
No custom firmware. LeKiwi runs as a host/client pair: lekiwi_host on the Pi owns the servo bus and cameras (default front=/dev/video0 640x480, wrist=/dev/video2 480x640, 30 fps), and LeKiwiClient on the laptop sends actions and receives observations. Kinematics use wheel radius 0.05 m and base radius 0.125 m. The wired version runs everything on the laptop. A Dynamixel variant (Koch v1.1 arm, U2D2, XL430 wheels) lives in DynamixelLeKiwi/ and is not covered here.
- B
Calibrate
Calibrationlerobot-calibrate --robot.type=lekiwi --robot.id=<id> on the Pi (arm only; wheels need none), then lerobot-calibrate --teleop.type=so100_leader --teleop.port=<port> --teleop.id=<id> on the laptop.Log the output. It goes in your build report.
- C
First policy
- LeKiwi pick and place (community SmolVLA fine-tune)LeRobot (SmolVLA) source
Try the policy in the browser sim before it touches hardware. Keep a hand near the power switch the first time a policy runs on the real robot.
Report your build
Moves LeKiwi toward L4 · BuiltA build report is the only thing that proves a package works. It raises the level, puts a point on the map, and tells the Foreman which steps to rewrite.
Level gate
Holds L1 · evidence, not confidence- L0Indexed
Known to exist. Atlas page only.
- 4 sources on record(met)
- L1Compiled
Package validates against the spec; every fact has a source.
- Build package compiled(met)
- 17 sources across robot and package(met)
- L2Sim-verified
Loads in browser and GPU sim, mass within tolerance of the BOM, holds a stand. Unlocks .training.
- URDF/MJCF is public(met)
- Sim load, mass tolerance and stand are checked on .training(checked elsewhere)
- L3Sourced
Every BOM line resolves to a live offer in at least two regions. Unlocks the one-click cart.
- 15/15 BOM lines have offers in 2+ regions(met)
- L4Built
At least one community build report with photos and bring-up logs. Unlocks Build it as the main action.
- 0 reviewed build reports(not met)
- Review feed unreachable at last refresh; count is registry-only(checked elsewhere)
- L5Certified
The robot's maintainer signs the package. Unlocks certified teams and kit sales.
- Maintainer signature not recorded(not met)
Levels are cumulative and set by the registry from reviewed evidence. This panel shows what can be measured from the package today.