Build package
Build SO-101 (SO-ARM101)
The Robot Studio / Hugging Face · Arm · active · 2025
Low-cost 3D-printable 6-DOF leader/follower arm pair built for Hugging Face's LeRobot framework; successor to the SO-100 with improved wiring and easier assembly.
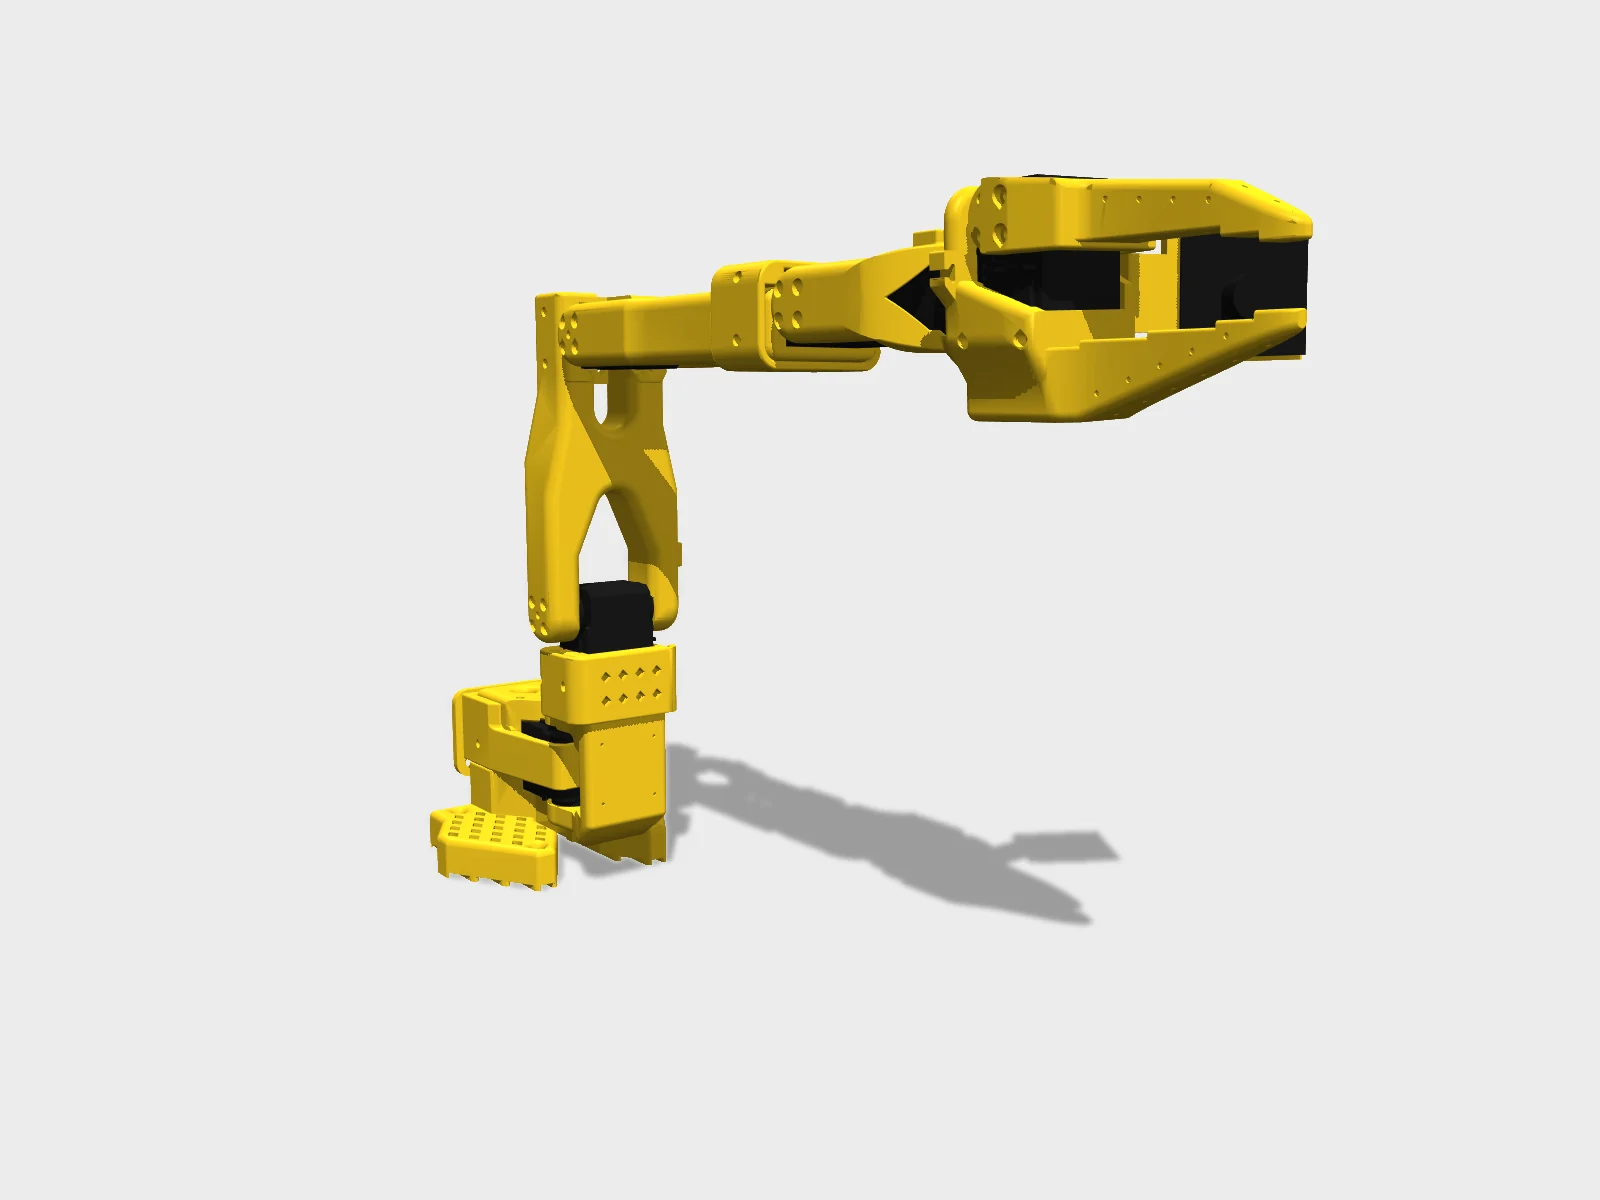
- Drawing
- /therobotstudio/so-101
- Maker
- The Robot Studio / Hugging Face
- Country
- FR
- Package rev
- v0.1.0
- Level
- L2 Sim-verified
- Availability
- Kit
- Openness
- 100/100
- HW licence
- Apache-2.0
- Last checked
- 2026-09-25
- DOF
- 6
- Actuators
- Feetech STS3215 serial bus servos (7.4 V or 12 V follower options)
Reference arm of the LeRobot ecosystem; many community-trained policies for it are on the Hugging Face Hub. Repo very active (pushed Sep 2026). Maker city not public on GitHub (country FR only).
Configure
Saved in the URL. Share the link to share the build.Source
One cart across 3 vendors · prices in USD as listedThe Robot Studio / Hugging Face sells a kit. Buying from the maker funds the people who opened the design. No BOM line below lists them as a vendor yet, so check their store before ordering parts one by one.
10 lines · 21 parts · 0 without an offer in US · 8/10 lines sourced in 2+ regions (L3 gate)
| # | Part | Category | Qty | Unit | Line | Offer |
|---|---|---|---|---|---|---|
Alibaba3 lines · $166.68 | ||||||
| 1 | Feetech STS3215 servo, 7.4 V, 1/345 gear (C001): all 6 follower joints + leader joint 2 (shoulder lift) actuator.sts3215-c001 · MPN STS3215 (C001) · 1 alt | actuator | 7 | $13.89list price | $97.23 | Alibaba |
| 2 | Feetech STS3215 servo, 7.4 V, 1/191 gear (C044): leader joints 1 (shoulder pan) and 3 (elbow flex) actuator.sts3215-c044 · MPN STS3215 (C044) · 1 alt | actuator | 2 | $13.89list price | $27.78 | Alibaba |
| 3 | Feetech STS3215 servo, 7.4 V, 1/147 gear (C046): leader joints 4 (wrist flex), 5 (wrist roll), 6 (gripper) actuator.sts3215-c046 · MPN STS3215 (C046) · 1 alt | actuator | 3 | $13.89list price | $41.67 | Alibaba |
Amazon6 lines · $63.20 + 1 unpriced | ||||||
| 4 | Motor control board: Waveshare serial bus servo driver (USB-C), one per arm electronics.bus-servo-adapter · 1 alt | electronics | 2 | $10.60list price | $21.20 | Amazon |
| 5 | USB-C cable, 2-pack (board to computer) cable.usb-c | cable | 1 | $7.00list price | $7.00 | Amazon |
| 6 | DC power supply, 5 V, 5.5x2.1 mm barrel (one per arm, for the 7.4 V servos) power.psu-5v · 1 alt | power | 2 | $10.00list price | $20.00 | Amazon |
| 7 | Table clamp, 4 pcs (holds both arm bases to the table edge) other.table-clamps | other | 1 | $9.00list price | $9.00 | Amazon |
| 8 | Precision screwdriver set with Phillips #0 and #1 other.screwdriver-set · 1 alt | other | 1 | $6.00list price | $6.00 | Amazon |
| 9 | Overhead / scene camera (optional): USB webcam sensor.scene-camera-optional · 1 alt | sensor | 1 | unpriced | — | AmazonRecommended model in the overhead webcam mount guide |
Amazon (innomaker)1 line · unpriced | ||||||
| 10 | Wrist camera (optional): 32x32 mm USB UVC camera module, min 720p / 30 fps sensor.wrist-camera-optional | sensor | 1 | unpriced | — | Amazon (innomaker)Recommended model in the wrist-mount guide; any 32x32 mm UVC module should fit |
| Cart total · US | 21 | $229.88 | 2 lines unpriced, not in total | |||
Fabricate
Planned for a 256 mm bed- Fabricated parts
- 29
- Print time (sum)
- —
- Material (sum)
- —
- Plates · estimate
- —
No plate estimate: the package does not list grams per part yet, and we will not guess them. Slice the source files for your 256 mm bed.
| Part | Process | Material | Qty | h / part | g / part | Profile |
|---|---|---|---|---|---|---|
Base_SO101 (arm base, clamps to the table) printed.base | FDM | PLA+ | 2 | — | — | 0.4 mm nozzle at 0.2 mm layers (or 0.6 mm nozzle at 0.4 mm); 15% infill; supports everywhere except slopes steeper than 45° from horizontal; no supports inside horizontal screw holes |
Base_motor_holder_SO101 (motor 1 holder) printed.base-motor-holder | FDM | PLA+ | 2 | — | — | Same as Base_SO101 |
Rotation_Pitch_SO101 (shoulder part) printed.rotation-pitch | FDM | PLA+ | 2 | — | — | Same as Base_SO101 |
Motor_holder_SO101_Base (shoulder motor holder) printed.motor-holder-base | FDM | PLA+ | 2 | — | — | Same as Base_SO101 |
Upper_arm_SO101 printed.upper-arm | FDM | PLA+ | 2 | — | — | Same as Base_SO101 |
Under_arm_SO101 (forearm) printed.under-arm | FDM | PLA+ | 2 | — | — | Same as Base_SO101 |
Motor_holder_SO101_Wrist (motor 4 holder) printed.motor-holder-wrist | FDM | PLA+ | 2 | — | — | Same as Base_SO101 |
Wrist_Roll_Pitch_SO101 (wrist holder for motor 5) printed.wrist-roll-pitch | FDM | PLA+ | 2 | — | — | Same as Base_SO101 |
WaveShare_Mounting_Plate_SO101 (or Seeedstudio_Mounting_Plate_SO101 to match your board; print one type only) printed.driver-plate | FDM | PLA+ | 2 | — | — | Same as Base_SO101 |
Wrist_Roll_SO101 (leader holder, leader only) printed.leader-wrist-roll | FDM | PLA+ | 1 | — | — | Same as Base_SO101 |
Handle_SO101 (leader only) printed.leader-handle | FDM | PLA+ | 1 | — | — | Same as Base_SO101 |
Trigger_SO101 (leader only) printed.leader-trigger | FDM | PLA+ | 1 | — | — | Same as Base_SO101 |
Wrist_Roll_Follower_SO101 (static gripper jaw, follower only) printed.follower-wrist-roll | FDM | PLA+ | 1 | — | — | Same as Base_SO101 |
Moving_Jaw_SO101 (follower only) printed.follower-moving-jaw | FDM | PLA+ | 1 | — | — | Same as Base_SO101 |
Fit gauges: Gauge_0 + Gauge_tight_1 (against an STS3215), or Lego_Size_Test_02_zero + _minuspoint1 (against a 4x2 Lego brick) printed.gauges | FDM | PLA+ | 2 | — | — | Same settings as the arm parts; print before the arm |
Wrist camera mount (optional): Wrist_Cam_Mount_32x32_UVC_Module_SO101.stl, replaces the follower Wrist_Roll printed.wrist-cam-mount-optional | FDM | PLA+ | 1 | — | — | source |
Overhead webcam mount set (optional): arm_base, cam_mount_bottom, cam_mount_top printed.overhead-cam-mount-optional | FDM | PLA+ | 3 | — | — | source |
Assemble
Every step ends in a check- Steps
- 21
- Subassemblies
- 9
- Hands-on time (sum)
- 1 h
- Critical path
- 1 h
- Your progress · this device
- —
20 steps have no time estimate; times above are lower bounds.
Steps, in build order
- Fabrication01
Check printer accuracy with the fit gauges
Level and clean the bed, then print Gauge_0 and Gauge_tight_1 from STL/Gauges (or the two Lego gauges if you have no servo yet) at the arm settings: PLA+, 0.4 mm nozzle at 0.2 mm layers, 15% infill.
CHECKAn STS3215 (or a 4x2 Lego brick) slides into Gauge_0 with the snug fit shown in the upstream fit video. If it is loose or will not go in, adjust flow or XY compensation and reprint before printing the arm.- Parts in
- Fit gauges: Gauge_0 + Gauge_tight_1 (against an STS3215), or Lego_Size_Test_02_zero + _minuspoint1 (against a 4x2 Lego brick)printed.gauges
- Tools
- FDM printer, 220x220 mm bed or larger, PLA+ filament
- Torque
- —
- Time
- 1 h
- After
- Start
- Source
- github.com
- Software02
Install LeRobot with the Feetech SDK
`conda create -y -n lerobot python=3.12 && conda activate lerobot`, `conda install ffmpeg -c conda-forge`, then `git clone https://github.com/huggingface/lerobot.git && cd lerobot && pip install -e ".[feetech]"`. Add `".[core_scripts]"` for record/replay and `".[training]"` (or `".[smolvla]"`) for training.
CHECK`lerobot-setup-motors --help` and `lerobot-calibrate --help` print their usage without import errors.- Parts in
- —
- Tools
- Linux, macOS or Windows computer, conda (miniforge) or uv
- Torque
- —
- Time
- —
- After
- Start
- Source
- huggingface.co
- Motor setup03
Sort and label the 12 servos by gear ratio
Follower: six C001 (1/345). Leader, per joint: 1 shoulder pan = 1/191 (C044), 2 shoulder lift = 1/345 (C001), 3 elbow flex = 1/191 (C044), 4 wrist flex = 1/147 (C046), 5 wrist roll = 1/147 (C046), 6 gripper = 1/147 (C046). The mixed ratios let the leader hold its own weight yet move with little force. Label each servo with arm and joint number now; they look identical once assembled.
CHECK12 labelled servos: F1-F6 all C001; L1 and L3 C044, L2 C001, L4-L6 C046, matching the sticker on each case.- Parts in
- Feetech STS3215 servo, 7.4 V, 1/345 gear (C001): all 6 follower joints + leader joint 2 (shoulder lift)actuator.sts3215-c001
- Feetech STS3215 servo, 7.4 V, 1/191 gear (C044): leader joints 1 (shoulder pan) and 3 (elbow flex)actuator.sts3215-c044
- Feetech STS3215 servo, 7.4 V, 1/147 gear (C046): leader joints 4 (wrist flex), 5 (wrist roll), 6 (gripper)actuator.sts3215-c046
- Tools
- Marker or labels
- Torque
- —
- Time
- —
- After
- Start
- Source
- huggingface.co
- Fabrication04
Print the leader and follower part plates
Print one follower plate and one leader plate, already oriented Z-up: Ender_Follower_SO101.stl / Ender_Leader_SO101.stl for 220x220 mm beds, Prusa_*_SO101.stl for 205x250 mm beds, or BambuLabA1mini_*_SO101.stl. Supports everywhere except slopes steeper than 45°, no supports inside horizontal screw holes. No printer: upload the 14 individual STLs to Craftcloud (PLA+, 20% infill; shared parts qty 2; skip `SO101 Assembly.stl`) or the two Ender plates to PCBWay.
CHECKYou have 9 shared parts x2 (base, base motor holder, rotation pitch, shoulder motor holder, upper arm, under arm, wrist motor holder, wrist roll pitch, driver plate), plus Wrist_Roll/Handle/Trigger for the leader and Wrist_Roll_Follower/Moving_Jaw for the follower.- Parts in
- Base_SO101 (arm base, clamps to the table)printed.base
- Base_motor_holder_SO101 (motor 1 holder)printed.base-motor-holder
- Rotation_Pitch_SO101 (shoulder part)printed.rotation-pitch
- Motor_holder_SO101_Base (shoulder motor holder)printed.motor-holder-base
- Upper_arm_SO101printed.upper-arm
- Under_arm_SO101 (forearm)printed.under-arm
- Motor_holder_SO101_Wrist (motor 4 holder)printed.motor-holder-wrist
- Wrist_Roll_Pitch_SO101 (wrist holder for motor 5)printed.wrist-roll-pitch
- WaveShare_Mounting_Plate_SO101 (or Seeedstudio_Mounting_Plate_SO101 to match your board; print one type only)printed.driver-plate
- Wrist_Roll_SO101 (leader holder, leader only)printed.leader-wrist-roll
- Handle_SO101 (leader only)printed.leader-handle
- Trigger_SO101 (leader only)printed.leader-trigger
- Wrist_Roll_Follower_SO101 (static gripper jaw, follower only)printed.follower-wrist-roll
- Moving_Jaw_SO101 (follower only)printed.follower-moving-jaw
- Tools
- FDM printer, Slicer (Bambu Studio, PrusaSlicer or Cura)
- Torque
- —
- Time
- —
- After
- 01
- Source
- github.com
- Motor setup05
Power the boards and find each arm's USB port
Safety · human-verified requiredOn the Waveshare board set both jumpers to channel `B` (USB). Plug in the 5 V supply (mains adapter) and USB-C. Run `lerobot-find-port` and unplug the board when prompted; repeat for the second board. On Linux you may need `sudo chmod 666 /dev/ttyACM0 /dev/ttyACM1`.
CHECK`lerobot-find-port` prints `The port of this MotorsBus is /dev/ttyACM1` (or `/dev/tty.usbmodem...` on macOS, `COMx` on Windows) for each board, and you have written down which port is leader and which is follower.This step can hurt a person or ruin parts. Its instructions need sign-off by a human who has done it before relying on them. Stop and ask if anything differs from what you see.
- Parts in
- Motor control board: Waveshare serial bus servo driver (USB-C), one per armelectronics.bus-servo-adapter
- USB-C cable, 2-pack (board to computer)cable.usb-c
- DC power supply, 5 V, 5.5x2.1 mm barrel (one per arm, for the 7.4 V servos)power.psu-5v
- Tools
- —
- Torque
- —
- Time
- —
- After
- 02
- Source
- huggingface.co
- Fabrication06
Remove supports
Scrape the plates off the bed with a putty knife and lever the support material out with a small screwdriver. Clear every screw hole and servo pocket.
CHECKAn STS3215 drops into each servo pocket without force and every M2/M3 hole is clear of support.- Parts in
- —
- Tools
- Putty knife, Small flat screwdriver
- Torque
- —
- Time
- —
- After
- 04
- Source
- huggingface.co
- Motor setup07
Set follower motor IDs and baudrate
Safety · human-verified required`lerobot-setup-motors --robot.type=so101_follower --robot.port=<follower port>`. The script asks for one motor at a time, starting with 'gripper': connect only that servo to the board with a 3-pin cable (no daisy chain), press Enter, then move on to wrist_roll, wrist_flex, elbow_flex, shoulder_lift and shoulder_pan. IDs are written to EEPROM, so this is done once.
CHECKThe script prints `'gripper' motor id set to 6` and so on down to shoulder_pan = 1 with no communication error. Write the ID on each servo label.This step can hurt a person or ruin parts. Its instructions need sign-off by a human who has done it before relying on them. Stop and ask if anything differs from what you see.
- Parts in
- Feetech STS3215 servo, 7.4 V, 1/345 gear (C001): all 6 follower joints + leader joint 2 (shoulder lift)actuator.sts3215-c001
- Tools
- —
- Torque
- —
- Time
- —
- Source
- huggingface.co
- 08
Set leader motor IDs and baudrate
Safety · human-verified required`lerobot-setup-motors --teleop.type=so101_leader --teleop.port=<leader port>`. Same one-at-a-time procedure, but connect the servo with the right gear ratio for each prompt: gripper, wrist_roll and wrist_flex = 1/147; elbow_flex = 1/191; shoulder_lift = 1/345; shoulder_pan = 1/191.
CHECKIDs 6 to 1 are set without error and each ID matches the gear-ratio label (ID 1 and 3 on C044, ID 2 on C001, IDs 4-6 on C046).This step can hurt a person or ruin parts. Its instructions need sign-off by a human who has done it before relying on them. Stop and ask if anything differs from what you see.
- Parts in
- Feetech STS3215 servo, 7.4 V, 1/345 gear (C001): all 6 follower joints + leader joint 2 (shoulder lift)actuator.sts3215-c001
- Feetech STS3215 servo, 7.4 V, 1/191 gear (C044): leader joints 1 (shoulder pan) and 3 (elbow flex)actuator.sts3215-c044
- Feetech STS3215 servo, 7.4 V, 1/147 gear (C046): leader joints 4 (wrist flex), 5 (wrist roll), 6 (gripper)actuator.sts3215-c046
- Tools
- —
- Torque
- —
- Time
- —
- Source
- huggingface.co
- Follower arm09
Joint 1: base, shoulder pan motor and shoulder part
Fit a 3-pin cable into each motor as you place it. Install both horns on motor 1 (top horn with an M3x6 screw, bottom horn without screw). Place it in the base and fix with 4 M2x6 (two top, two bottom). Slide on the first motor holder and fix with 2 M2x6. Attach the shoulder part with 4 M3x6 on top and 4 M3x6 underneath, then add the shoulder motor holder.
CHECKThe shoulder rotates smoothly by hand through the full pan range with no rubbing, and the motor 1 cable exits toward the driver-board side.- Parts in
- Precision screwdriver set with Phillips #0 and #1other.screwdriver-set
- Feetech STS3215 servo, 7.4 V, 1/345 gear (C001): all 6 follower joints + leader joint 2 (shoulder lift)actuator.sts3215-c001
- Base_SO101 (arm base, clamps to the table)printed.base
- Base_motor_holder_SO101 (motor 1 holder)printed.base-motor-holder
- Rotation_Pitch_SO101 (shoulder part)printed.rotation-pitch
- Motor_holder_SO101_Base (shoulder motor holder)printed.motor-holder-base
- Tools
- Phillips #0, Phillips #1
- Torque
- —
- Time
- —
- Source
- huggingface.co
- Leader arm10
Leader joints 1-5 with the mixed-ratio motors
Repeat the follower joint 1 to 5 procedure (same screws) with the leader motors: joint 1 = C044 (1/191), joint 2 = C001 (1/345), joint 3 = C044 (1/191), joints 4 and 5 = C046 (1/147). Unlike the SO-100, no gears are removed from any SO-101 servo.
CHECKHolding the leader by the wrist and letting go, the arm stays roughly where it is left instead of dropping, and each joint can be back-driven with light finger force.- Parts in
- Feetech STS3215 servo, 7.4 V, 1/191 gear (C044): leader joints 1 (shoulder pan) and 3 (elbow flex)actuator.sts3215-c044
- Feetech STS3215 servo, 7.4 V, 1/345 gear (C001): all 6 follower joints + leader joint 2 (shoulder lift)actuator.sts3215-c001
- Feetech STS3215 servo, 7.4 V, 1/147 gear (C046): leader joints 4 (wrist flex), 5 (wrist roll), 6 (gripper)actuator.sts3215-c046
- Base_SO101 (arm base, clamps to the table)printed.base
- Base_motor_holder_SO101 (motor 1 holder)printed.base-motor-holder
- Rotation_Pitch_SO101 (shoulder part)printed.rotation-pitch
- Motor_holder_SO101_Base (shoulder motor holder)printed.motor-holder-base
- Upper_arm_SO101printed.upper-arm
- Under_arm_SO101 (forearm)printed.under-arm
- Motor_holder_SO101_Wrist (motor 4 holder)printed.motor-holder-wrist
- Wrist_Roll_Pitch_SO101 (wrist holder for motor 5)printed.wrist-roll-pitch
- Tools
- Phillips #0, Phillips #1
- Torque
- —
- Time
- —
- Source
- huggingface.co
- Follower arm11
Joints 2 and 3: shoulder lift, upper arm, elbow, forearm
Motor 2: horns on (top M3x6 horn screw), slide in from the top, fix with 4 M2x6, attach the upper arm with 4 M3x6 per side. Motor 3: horns on, insert and fix with 4 M2x6, connect the forearm with 4 M3x6 per side. Daisy-chain the 3-pin cables 1-2-3 as you go.
CHECKShoulder lift and elbow move freely by hand over their range with no cable pinched between printed parts.- Parts in
- Feetech STS3215 servo, 7.4 V, 1/345 gear (C001): all 6 follower joints + leader joint 2 (shoulder lift)actuator.sts3215-c001
- Upper_arm_SO101printed.upper-arm
- Under_arm_SO101 (forearm)printed.under-arm
- Tools
- Phillips #0, Phillips #1
- Torque
- —
- Time
- —
- After
- 09
- Source
- huggingface.co
- Leader arm12
Leader holder, handle, gripper motor and trigger
Mount the leader holder on the wrist with 4 M3x6. Attach the handle with 1 M2x6. Insert the gripper motor (1/147), fix with 2 M2x6 per side and fit a horn with an M3x6 horn screw. Attach the trigger with 4 M3x6. Chain all six motors and mount the driver board on its plate.
CHECKSqueezing the trigger turns the gripper motor over its travel and it springs back without catching; all six leader motors are chained to the board.- Parts in
- Feetech STS3215 servo, 7.4 V, 1/147 gear (C046): leader joints 4 (wrist flex), 5 (wrist roll), 6 (gripper)actuator.sts3215-c046
- Wrist_Roll_SO101 (leader holder, leader only)printed.leader-wrist-roll
- Handle_SO101 (leader only)printed.leader-handle
- Trigger_SO101 (leader only)printed.leader-trigger
- WaveShare_Mounting_Plate_SO101 (or Seeedstudio_Mounting_Plate_SO101 to match your board; print one type only)printed.driver-plate
- Motor control board: Waveshare serial bus servo driver (USB-C), one per armelectronics.bus-servo-adapter
- Tools
- Phillips #0, Phillips #1
- Torque
- —
- Time
- —
- After
- 10
- Source
- huggingface.co
- Follower arm13
Joints 4 and 5: wrist flex and wrist roll
Motor 4: horns on, slide over motor holder 4, slide in motor 4 and fix with 4 M2x6. Motor 5: insert into the wrist holder with 2 front M2x6, fit only one horn (M3x6 horn screw), then fix the wrist to motor 4 with 4 M3x6 on both sides.
CHECKWrist flex and wrist roll turn by hand without binding; cables 3-4-5 are connected.- Parts in
- Feetech STS3215 servo, 7.4 V, 1/345 gear (C001): all 6 follower joints + leader joint 2 (shoulder lift)actuator.sts3215-c001
- Motor_holder_SO101_Wrist (motor 4 holder)printed.motor-holder-wrist
- Wrist_Roll_Pitch_SO101 (wrist holder for motor 5)printed.wrist-roll-pitch
- Tools
- Phillips #0, Phillips #1
- Torque
- —
- Time
- —
- After
- 11
- Source
- huggingface.co
- Calibration14
Calibrate the leader
`lerobot-calibrate --teleop.type=so101_leader --teleop.port=<leader port> --teleop.id=my_awesome_leader_arm`. Same procedure: middle pose, Enter, sweep every joint through its range, Enter. Reuse exactly the same ids later; the id selects the calibration file.
CHECKA leader calibration JSON is written and re-running the command offers to reuse it instead of recalibrating.- Parts in
- Table clamp, 4 pcs (holds both arm bases to the table edge)other.table-clamps
- Tools
- —
- Torque
- —
- Time
- —
- After
- 12
- Source
- huggingface.co
- Follower arm15
Follower gripper, driver board and wiring
Attach the gripper to the motor 5 horn with 4 M3x6. Insert the gripper motor and fix with 2 M2x6 per side, fit both horns (top M3x6), then the moving jaw with 4 M3x6 per side. Chain cable 5-6, connect motor 1 to the board and mount the board on its plate at the base.
CHECKThe jaw opens and closes fully by hand, and every motor is in a single daisy chain from ID 1 at the board to ID 6 at the gripper.- Parts in
- Feetech STS3215 servo, 7.4 V, 1/345 gear (C001): all 6 follower joints + leader joint 2 (shoulder lift)actuator.sts3215-c001
- Wrist_Roll_Follower_SO101 (static gripper jaw, follower only)printed.follower-wrist-roll
- Moving_Jaw_SO101 (follower only)printed.follower-moving-jaw
- WaveShare_Mounting_Plate_SO101 (or Seeedstudio_Mounting_Plate_SO101 to match your board; print one type only)printed.driver-plate
- Motor control board: Waveshare serial bus servo driver (USB-C), one per armelectronics.bus-servo-adapter
- Tools
- Phillips #0, Phillips #1
- Torque
- —
- Time
- —
- After
- 13
- Source
- huggingface.co
- Calibration16
Calibrate the follower
Safety · human-verified requiredClamp the base to the table edge. `lerobot-calibrate --robot.type=so101_follower --robot.port=<follower port> --robot.id=my_awesome_follower_arm`. Move the arm to the middle of every joint's range (pose shown in the terminal diagram and the calibration video) and press Enter, then move every joint except wrist_roll through its full range and press Enter. Wrist roll is treated as a full-turn joint (0-4095).
CHECKThe live min/max table shows each joint's range growing as you move it, and a JSON named after the robot id is written under `~/.cache/huggingface/lerobot/calibration/`.This step can hurt a person or ruin parts. Its instructions need sign-off by a human who has done it before relying on them. Stop and ask if anything differs from what you see.
- Parts in
- Table clamp, 4 pcs (holds both arm bases to the table edge)other.table-clamps
- Tools
- —
- Torque
- —
- Time
- —
- After
- 15
- Source
- huggingface.co
- First motion17
First motion: leader-follower teleoperation
Safety · human-verified requiredClamp both arms, clear the follower's reach and keep a hand on its power plug. `lerobot-teleoperate --robot.type=so101_follower --robot.port=<follower port> --robot.id=my_awesome_follower_arm --teleop.type=so101_leader --teleop.port=<leader port> --teleop.id=my_awesome_leader_arm`. Start with slow leader moves. The follower config also accepts `--robot.max_relative_target=<n>` to cap per-step motion.
CHECKThe follower tracks the leader joint for joint in the same direction, the gripper follows the trigger, and nothing hits a hard stop at the range ends.This step can hurt a person or ruin parts. Its instructions need sign-off by a human who has done it before relying on them. Stop and ask if anything differs from what you see.
- Parts in
- Table clamp, 4 pcs (holds both arm bases to the table edge)other.table-clamps
- Tools
- —
- Torque
- —
- Time
- —
- Source
- huggingface.co
- Cameras18
Cameras (optional): mount and check streams
Swap the follower Wrist_Roll for the wrist-camera version (move the gripper servo across, 6 M3 screws to the servo and 4 to the next joint) and fix the camera module with 4 of the spare M2 servo screws. Mount the overhead camera on its printed stand. Run `lerobot-find-cameras opencv` to list indices, then teleoperate with `--robot.cameras="{front: {type: opencv, index_or_path: 0, width: 640, height: 480, fps: 30}}" --display_data=true`.
CHECK`lerobot-find-cameras opencv` lists each camera, and the rerun viewer shows every stream updating at about 30 fps with joint plots during teleoperation.- Parts in
- Wrist camera (optional): 32x32 mm USB UVC camera module, min 720p / 30 fpssensor.wrist-camera-optional
- Overhead / scene camera (optional): USB webcamsensor.scene-camera-optional
- Wrist camera mount (optional): Wrist_Cam_Mount_32x32_UVC_Module_SO101.stl, replaces the follower Wrist_Rollprinted.wrist-cam-mount-optional
- Overhead webcam mount set (optional): arm_base, cam_mount_bottom, cam_mount_topprinted.overhead-cam-mount-optional
- Tools
- Phillips #0, Phillips #1
- Torque
- —
- Time
- —
- After
- 17
- Source
- huggingface.co
- Policy19
Record a dataset
`hf auth login --token ${HUGGINGFACE_TOKEN} --add-to-git-credential`, `HF_USER=$(NO_COLOR=1 hf auth whoami | awk -F': *' 'NR==1 {print $2}')`, then `lerobot-record --robot.type=so101_follower --robot.port=<port> --robot.id=my_awesome_follower_arm --robot.cameras="{ front: {type: opencv, index_or_path: 0, width: 1920, height: 1080, fps: 30}}" --teleop.type=so101_leader --teleop.port=<port> --teleop.id=my_awesome_leader_arm --display_data=true --dataset.repo_id=${HF_USER}/record-test --dataset.num_episodes=5 --dataset.single_task="Grab the black cube"`. Right arrow / `n` ends an episode, left arrow / `r` re-records, Esc / `q` stops. Upstream suggests at least 50 episodes (10 per object location) for a real task.
CHECKThe end-of-run cadence summary reports close to 30 Hz, and the dataset appears at `https://huggingface.co/datasets/${HF_USER}/record-test` and replays with `lerobot-replay --robot.type=so101_follower ... --dataset.repo_id=${HF_USER}/record-test --dataset.episode=0`.- Parts in
- —
- Tools
- Hugging Face account with a write token
- Torque
- —
- Time
- —
- After
- 18
- Source
- huggingface.co
- 20
Train ACT (or fine-tune SmolVLA)
ACT: `lerobot-train --dataset.repo_id=${HF_USER}/so101_test --policy.type=act --output_dir=outputs/train/act_so101_test --job_name=act_so101_test --policy.device=cuda --wandb.enable=true --policy.repo_id=${HF_USER}/my_policy`. SmolVLA: `lerobot-train --policy.path=lerobot/smolvla_base --dataset.repo_id=${HF_USER}/mydataset --batch_size=64 --steps=20000 ...` (about 4 h on one A100 per the docs). No local GPU: add `--job.target=a10g-small` to run on Hugging Face Jobs.
CHECKCheckpoints appear under `outputs/train/act_so101_test/checkpoints/` and the training loss curve has flattened; the final model is pushed to `${HF_USER}/my_policy`.- Parts in
- —
- Tools
- NVIDIA GPU (CUDA) or Apple silicon (mps), or HF Jobs / Colab
- Torque
- —
- Time
- —
- After
- 19
- Source
- huggingface.co
- 21
Run the policy on the arm
Safety · human-verified required`lerobot-rollout --strategy.type=base --policy.path=${HF_USER}/my_policy --robot.type=so101_follower --robot.port=<port> --robot.id=my_awesome_follower_arm --robot.cameras="<same camera names and settings as the dataset>" --task="Grab the black cube" --duration=60`. Use `--strategy.type=sentry --dataset.repo_id=${HF_USER}/eval_so101` to record evaluation episodes; add `--inference.type=rtc` for slow VLA policies. Keep a hand on the power plug.
CHECKThe follower reaches for the object within a few seconds of start and completes the task in most trials from the positions seen in training.This step can hurt a person or ruin parts. Its instructions need sign-off by a human who has done it before relying on them. Stop and ask if anything differs from what you see.
- Parts in
- Table clamp, 4 pcs (holds both arm bases to the table edge)other.table-clamps
- Tools
- —
- Torque
- —
- Time
- —
- After
- 20
- Source
- huggingface.co
Progress is stored in this browser only (localStorage). Nothing is sent anywhere.
Bring-up
Flash · calibrate · first policy- A
Flash firmware
TargetsFeetech STS3215 servo (EEPROM: ID 1-6 and bus baudrate, written by lerobot-setup-motors), Waveshare / Seeed serial bus servo driver board (USB serial bridge, no user firmware)
Repogithub.com/huggingface/lerobot
No custom firmware: servos keep Feetech firmware and LeRobot (lerobot.robots.so_follower, lerobot.teleoperators.so_leader) talks to them over the serial bus. so100_follower and so101_follower are the same config class in LeRobot 0.6.x. Optional debug tools: Feetech FD software (Windows, https://www.feetechrc.com/software.html) or FT_SCServo_Debug_Qt (Ubuntu). The repo also has a WebUI 3-point calibration guide (Software/WEBUI_CALIBRATION.md) that references a pi_servo_studio.py script and a --webui flag not found in the repo or in lerobot 0.6.2.
- B
Calibrate
Calibrationlerobot-calibrate --robot.type=so101_follower --robot.port=<port> --robot.id=<id>, then lerobot-calibrate --teleop.type=so101_leader --teleop.port=<port> --teleop.id=<id>. Middle-of-range pose, Enter, sweep all joints except wrist_roll, Enter.Log the output. It goes in your build report.
- C
First policy
- Generalist SO-101 pick and place (world action model, fine-tune with the included LoRA recipe)LeRobot (Flux3Policy) source
- SO-100/101 language-conditioned manipulation (VLA, zero-shot or fine-tune)LeRobot (MolmoAct2) source
- SmolVLA base (pretrained VLA to fine-tune on your own SO-101 dataset)LeRobot (SmolVLA) source
Try the policy in the browser sim before it touches hardware. Keep a hand near the power switch the first time a policy runs on the real robot.
Report your build
Moves SO-101 (SO-ARM101) toward L4 · BuiltA build report is the only thing that proves a package works. It raises the level, puts a point on the map, and tells the Foreman which steps to rewrite.
Level gate
Holds L2 · evidence, not confidence- L0Indexed
Known to exist. Atlas page only.
- 4 sources on record(met)
- L1Compiled
Package validates against the spec; every fact has a source.
- Build package compiled(met)
- 20 sources across robot and package(met)
- L2Sim-verified
Loads in browser and GPU sim, mass within tolerance of the BOM, holds a stand. Unlocks .training.
- URDF/MJCF is public(met)
- Sim load, mass tolerance and stand are checked on .training(checked elsewhere)
- L3Sourced
Every BOM line resolves to a live offer in at least two regions. Unlocks the one-click cart.
- 8/10 BOM lines have offers in 2+ regions(not met)
- L4Built
At least one community build report with photos and bring-up logs. Unlocks Build it as the main action.
- 0 reviewed build reports(not met)
- Review feed unreachable at last refresh; count is registry-only(checked elsewhere)
- L5Certified
The robot's maintainer signs the package. Unlocks certified teams and kit sales.
- Maintainer signature not recorded(not met)
Levels are cumulative and set by the registry from reviewed evidence. This panel shows what can be measured from the package today.