Build package
Build JPL Open Source Rover
NASA Jet Propulsion Laboratory · Rover · active · 2017
Build-it-yourself scaled-down six-wheel rocker-bogie rover modeled on JPL's Mars rovers, built mostly from goBILDA COTS parts with a Raspberry Pi.
Two ways to get JPL Open Source Rover
Compare all →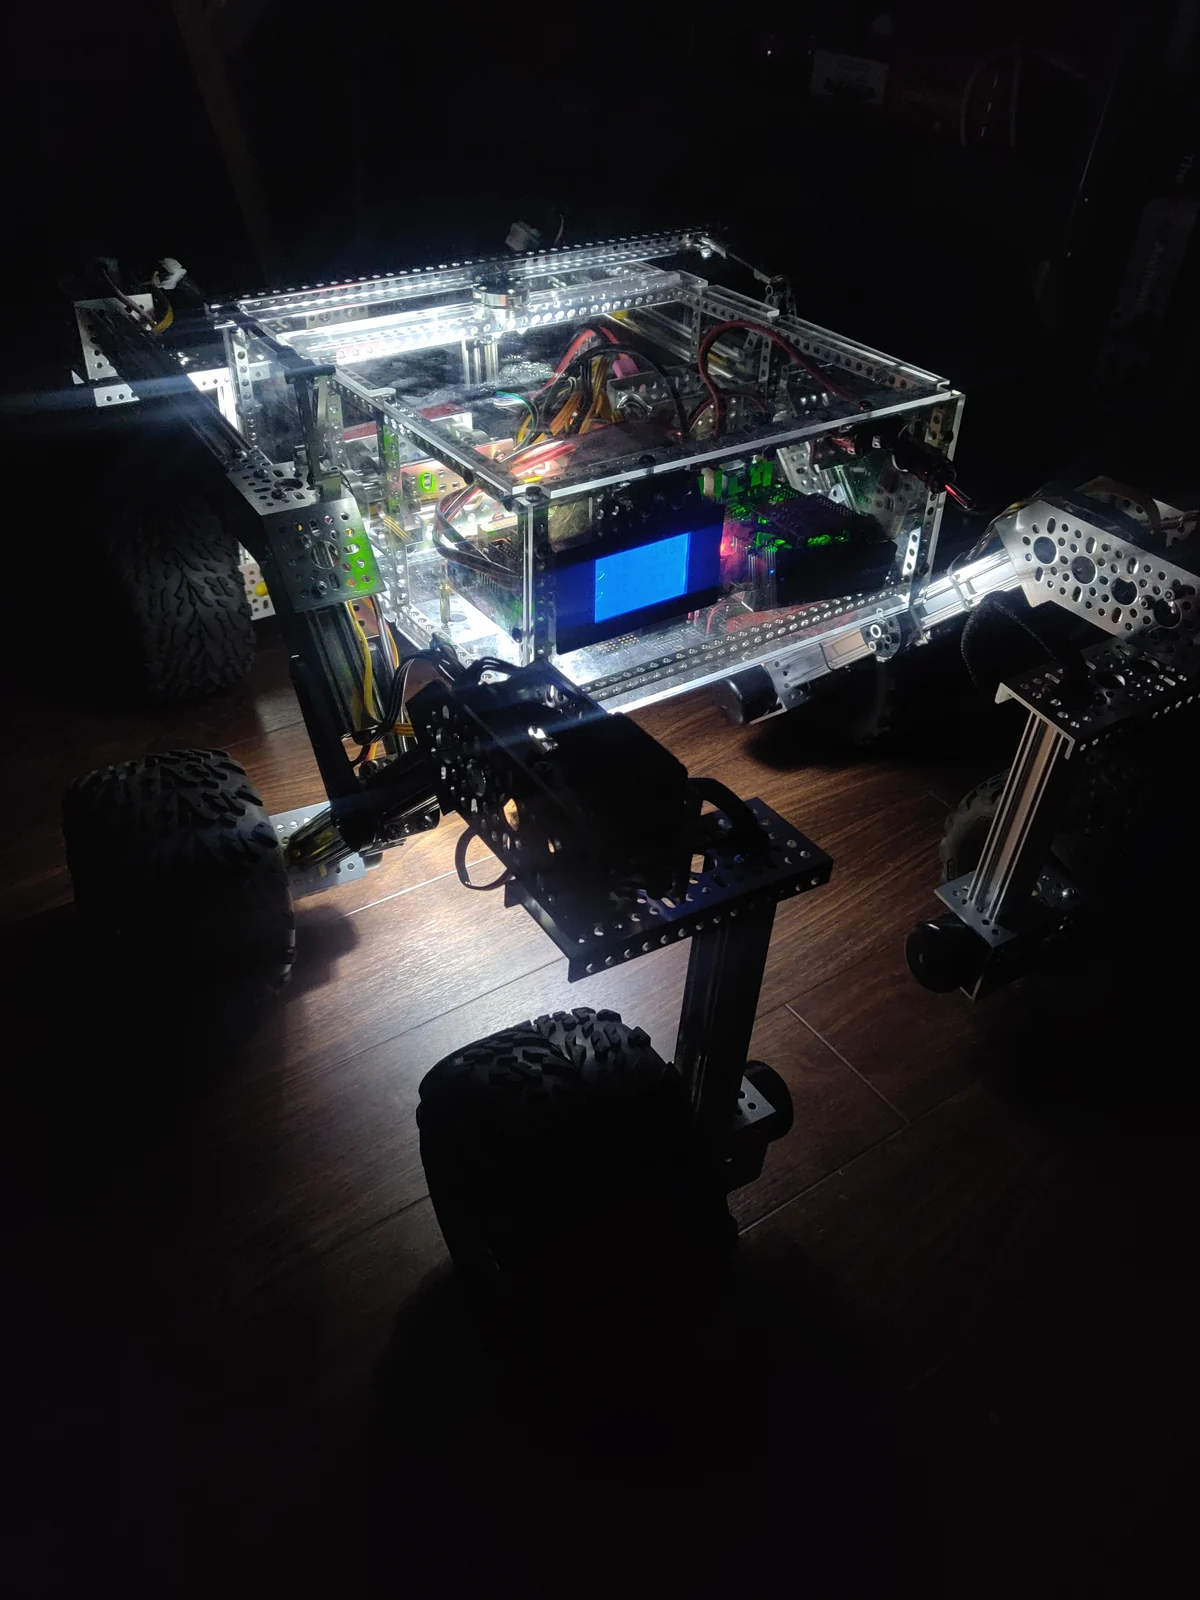

- Drawing
- /jpl/open-source-rover
- Maker
- NASA Jet Propulsion Laboratory
- Country
- Pasadena, US
- Package rev
- v0.1.0
- Level
- L1 Compiled
- Availability
- DIY
- Openness
- 90/100
- HW licence
- Apache-2.0
- Last checked
- 2026-09-25
- Actuators
- 10 motors
OSHWA certified (US002551). Runtime 'at least 3 hours' with a 7.2 Ah battery. Onshape CAD public. Around since 2017, many iterations. Rover software (ROS 2) is in nasa-jpl/osr-rover-code, which includes osr_gazebo: an osr.urdf.xacro model and a Gazebo simulation. No MJCF and no learned policies.
Configure
Saved in the URL. Share the link to share the build.Source
One cart across 10 vendors · prices in USD as listed117 lines · 440 parts · 2 without an offer in US · 3/117 lines sourced in 2+ regions (L3 gate)
| # | Part | Category | Qty | Unit | Line | Offer |
|---|---|---|---|---|---|---|
goBILDA62 lines · $1,330.38 + 4 unpriced | ||||||
| 1 | Wasteland Wheel (144mm Diameter, 52mm Width) structure.wasteland-wheel-144 · MPN 3616-0014-0144 | structure | 6 | $24.99list price | $149.94 | goBILDA$24.99 per unit/pack in the upstream parts list; goBILDA ships internationally |
| 2 | 1401 Series 2-Side, 2-Post Clamping Mount (43mm Width, 36mm Bore) structure.clamping-mount-43-36 · MPN 1401-0043-0036 | structure | 6 | $6.99list price | $41.94 | goBILDA$6.99 per unit/pack in the upstream parts list; goBILDA ships internationally |
| 3 | 5203 Series Yellow Jacket Planetary Gear Motor (26.9:1, 24mm length 8mm REX shaft, 223 RPM, 3.3-5V encoder) actuator.yellow-jacket-5203-223rpm · MPN 5203-2402-0027 | actuator | 6 | $42.99list price | $257.94 | goBILDA$42.99 per unit/pack in the upstream parts list; goBILDA ships internationally |
| 4 | 1310 Series Hyper Hub (8mm REX Bore) structure.hyper-hub-8mm-rex · MPN 1310-0016-4008 | structure | 6 | $7.99list price | $47.94 | goBILDA$7.99 per unit/pack in the upstream parts list; goBILDA ships internationally |
| 5 | 1120 Series U-Channel (2 Hole, 72mm Length) (6 for the wheels + 2 for the body) structure.u-channel-2h-72 · MPN 1120-0002-0072 | structure | 8 | $4.99list price | $39.92 | goBILDA$4.99 per unit/pack in the upstream parts list; goBILDA ships internationally |
| 6 | 1109 Series goRAIL (144mm Length) structure.gorail-144 · MPN 1109-0024-0144 | structure | 4 | $5.49list price | $21.96 | goBILDA$5.49 per unit/pack in the upstream parts list; goBILDA ships internationally |
| 7 | 1121 Series Low-Side U-Channel (4 Hole, 120mm Length) structure.low-side-u-channel-4h-120 · MPN 1121-0004-0120 | structure | 4 | $5.99list price | $23.96 | goBILDA$5.99 per unit/pack in the upstream parts list; goBILDA ships internationally |
| 8 | 1120 Series U-Channel (1 Hole, 48mm Length) structure.u-channel-1h-48 · MPN 1120-0001-0048 | structure | 2 | $3.69list price | $7.38 | goBILDA$3.69 per unit/pack in the upstream parts list; goBILDA ships internationally |
| 9 | ServoBlock (Standard Size, 25 Tooth Spline, Hub Shaft) structure.servoblock-25t · MPN 3202-0001-2501 | structure | 4 | $29.99list price | $119.96 | goBILDA$29.99 per unit/pack in the upstream parts list; goBILDA ships internationally |
| 10 | 2000 Series Dual Mode Servo (25-2, Torque) (corner steering) actuator.servo-2000-25-2 · MPN 2000-0025-0002 | actuator | 4 | $31.99list price | $127.96 | goBILDA$31.99 per unit/pack in the upstream parts list; goBILDA ships internationally |
| 11 | 1309 Series Sonic Hub (8mm Bore) structure.sonic-hub-8mm · MPN 1309-0016-0008 | structure | 2 | $6.99list price | $13.98 | goBILDA$6.99 per unit/pack in the upstream parts list; goBILDA ships internationally |
| 12 | 1611 Series Flanged Ball Bearing (8mm ID x 14mm OD, 5mm) - 2 Pack structure.flanged-bearing-8x14x5 · MPN 1611-0514-0008 | structure | 2 | $3.99list price | $7.98 | goBILDA$3.99 per unit/pack in the upstream parts list; goBILDA ships internationally |
| 13 | 1504 Series 32mm OD Pattern Spacer (2mm Length) structure.pattern-spacer-32-2mm · MPN 1504-0032-0020 | structure | 4 | $1.99list price | $7.96 | goBILDA$1.99 per unit/pack in the upstream parts list; goBILDA ships internationally |
| 14 | 2100 Series Stainless Steel Round Shaft (8mm Diameter, 50mm Length) structure.shaft-8x50 · MPN 2100-0008-0050 | structure | 2 | $1.49list price | $2.98 | goBILDA$1.49 per unit/pack in the upstream parts list; goBILDA ships internationally |
| 15 | 1102 Series Flat Beam (3 Hole, 24mm Length) - 2 Pack structure.flat-beam-3h-24 · MPN 1102-0003-0024 | structure | 4 | $1.89list price | $7.56 | goBILDA$1.89 per unit/pack in the upstream parts list; goBILDA ships internationally |
| 16 | 1221 Series 2-Side, 2-Post Pattern Mount (32-2) structure.pattern-mount-32-2 · MPN 1221-0032-0002 | structure | 4 | $4.99list price | $19.96 | goBILDA$4.99 per unit/pack in the upstream parts list; goBILDA ships internationally |
| 17 | 1126 Series Steel Flat Bracket (1-1) - 2 Pack structure.steel-flat-bracket-1-1 · MPN 1126-0001-0001 | structure | 2 | $2.49list price | $4.98 | goBILDA$2.49 per unit/pack in the upstream parts list; goBILDA ships internationally |
| 18 | 1116 Series Grid Plate (3 x 5 Hole, 24 x 40mm) (4 for the rocker-bogies + 4 for the body hinges) structure.grid-plate-3x5 · MPN 1116-0024-0040 | structure | 8 | $1.29list price | $10.32 | goBILDA$1.29 per unit/pack in the upstream parts list; goBILDA ships internationally |
| 19 | 1111 Series Angle Pattern Bracket (3-1) structure.angle-bracket-3-1 · MPN 1111-0003-0001 | structure | 2 | $5.99list price | $11.98 | goBILDA$5.99 per unit/pack in the upstream parts list; goBILDA ships internationally |
| 20 | 1118 Series Open goRAIL (96mm Length) structure.open-gorail-96 · MPN 1118-0024-0096 | structure | 6 | $3.39list price | $20.34 | goBILDA$3.39 per unit/pack in the upstream parts list; goBILDA ships internationally |
| 21 | 1118 Series Open goRAIL (288mm Length) structure.open-gorail-288 · MPN 1118-0024-0288 | structure | 2 | $5.89list price | $11.78 | goBILDA$5.89 per unit/pack in the upstream parts list; goBILDA ships internationally |
| 22 | 1111 Series Angle Pattern Bracket (1-1) (45 degree bracket) structure.angle-bracket-1-1 · MPN 1111-0001-0001 | structure | 4 | $2.99list price | $11.96 | goBILDA$2.99 per unit/pack in the upstream parts list; goBILDA ships internationally |
| 23 | 1137 Series Steel Flat Grid Bracket (1-1) - 2 Pack structure.steel-flat-grid-bracket-1-1 · MPN 1137-0001-0001 | structure | 1 | $3.49list price | $3.49 | goBILDA$3.49 per unit/pack in the upstream parts list; goBILDA ships internationally |
| 24 | Plastic Hub-Mount Control Arm (72mm Length) structure.control-arm-72 · MPN 1916-0014-0072 | structure | 4 | $4.99list price | $19.96 | goBILDA$4.99 per unit/pack in the upstream parts list; goBILDA ships internationally |
| 25 | 1522 Series 8mm ID Spacer (10mm OD, 6mm Length) - 4 Pack structure.spacer-8id-6mm · MPN 1522-0010-0060 | structure | 1 | $3.49list price | $3.49 | goBILDA$3.49 per unit/pack in the upstream parts list; goBILDA ships internationally |
| 26 | 1522 Series 8mm ID Spacer (10mm OD, 4mm Length) - 4 Pack structure.spacer-8id-4mm · MPN 1522-0010-0040 | structure | 1 | $2.99list price | $2.99 | goBILDA$2.99 per unit/pack in the upstream parts list; goBILDA ships internationally |
| 27 | goRAIL Nut (5 Hole) - 2 Pack fastener.gorail-nut-5h · MPN 2805-0004-0038 | fastener | 2 | $5.99list price | $11.98 | goBILDA$5.99 per unit/pack in the upstream parts list; goBILDA ships internationally |
| 28 | 1118 Series Open goRAIL (120mm Length) structure.open-gorail-120 · MPN 1118-0024-0120 | structure | 2 | $4.99list price | $9.98 | goBILDA$4.99 per unit/pack in the upstream parts list; goBILDA ships internationally |
| 29 | 1604 Series 2-Side, 2-Post Pillow Block (32mm Bore) structure.pillow-block-32 · MPN 1604-0043-0032 | structure | 4 | $12.99list price | $51.96 | goBILDA$12.99 per unit/pack in the upstream parts list; goBILDA ships internationally |
| 30 | 1506 Series 32mm ID Spacer (36mm OD, 6mm Length) - 2 Pack structure.spacer-32id-6mm · MPN 1506-0032-0006 | structure | 3 | $3.49list price | $10.47 | goBILDA$3.49 per unit/pack in the upstream parts list; goBILDA ships internationally |
| 31 | 1106 Series Square Beam (29 Hole, 232mm Length) structure.square-beam-29h · MPN 1106-0029-0232 | structure | 7 | $5.09list price | $35.63 | goBILDA$5.09 per unit/pack in the upstream parts list; goBILDA ships internationally |
| 32 | 1106 Series Square Beam (41 Hole, 328mm Length) structure.square-beam-41h · MPN 1106-0041-0328 | structure | 4 | $6.99list price | $27.96 | goBILDA$6.99 per unit/pack in the upstream parts list; goBILDA ships internationally |
| 33 | 1106 Series Square Beam (12 Hole, 96mm Length) structure.square-beam-12h · MPN 1106-0012-0096 | structure | 8 | $2.99list price | $23.92 | goBILDA$2.99 per unit/pack in the upstream parts list; goBILDA ships internationally |
| 34 | 1101 Series U-Beam (41 Hole, 328mm Length) structure.u-beam-41h · MPN 1101-0041-0328 | structure | 1 | $3.89list price | $3.89 | goBILDA$3.89 per unit/pack in the upstream parts list; goBILDA ships internationally |
| 35 | 1102 Series Flat Beam (7 Hole, 56mm Length) - 2 Pack structure.flat-beam-7h-56 · MPN 1102-0007-0056 | structure | 2 | $2.49list price | $4.98 | goBILDA$2.49 per unit/pack in the upstream parts list; goBILDA ships internationally |
| 36 | 1205 Series Dual Block Mount (1-4) - 2 Pack structure.dual-block-mount-1-4 · MPN 1205-0001-0004 | structure | 2 | $5.99list price | $11.98 | goBILDA$5.99 per unit/pack in the upstream parts list; goBILDA ships internationally |
| 37 | 1203 Series Block Mount (1-1) - 4 Pack structure.block-mount-1-1 · MPN 1203-0001-0001 | structure | 1 | $4.99list price | $4.99 | goBILDA$4.99 per unit/pack in the upstream parts list; goBILDA ships internationally |
| 38 | 2808 Series Stainless Steel Threaded Rod (M4 x 0.7mm, 50mm Length) - 2 Pack structure.threaded-rod-m4-50 · MPN 2808-0004-0050 | structure | 1 | $1.49list price | $1.49 | goBILDA$1.49 per unit/pack in the upstream parts list; goBILDA ships internationally |
| 39 | 2913 Series Steel Ball Linkage (Female M4 x 0.7mm, 24.1mm Length) - 2 Pack structure.ball-linkage-m4 · MPN 2913-0004-0241 | structure | 2 | $4.99list price | $9.98 | goBILDA$4.99 per unit/pack in the upstream parts list; goBILDA ships internationally |
| 40 | Idler Bearing-Hub (32mm OD, 16mm Height) structure.idler-bearing-hub-32 · MPN 1608-0001-0001 | structure | 1 | $12.99list price | $12.99 | goBILDA$12.99 per unit/pack in the upstream parts list; goBILDA ships internationally |
| 41 | Plastic Hinge - 2 Pack structure.plastic-hinge · MPN 2902-0003-0001 | structure | 2 | $4.99list price | $9.98 | goBILDA$4.99 per unit/pack in the upstream parts list; goBILDA ships internationally |
| 42 | 1501 Series M4 x 0.7mm Standoff (6mm OD, 8mm Length) - 4 Pack fastener.standoff-m4-8 · MPN 1501-0006-0080 | fastener | 2 | $2.49list price | $4.98 | goBILDA$2.49 per unit/pack in the upstream parts list; goBILDA ships internationally |
| 43 | 1501 Series M4 x 0.7mm Standoff (6mm OD, 22mm Length) - 4 Pack fastener.standoff-m4-22 · MPN 1501-0006-0220 | fastener | 2 | $3.49list price | $6.98 | goBILDA$3.49 per unit/pack in the upstream parts list; goBILDA ships internationally |
| 44 | 1500 Series Plastic Spacer (6mm ID x 8mm OD, 1mm Thickness) - 12 Pack fastener.plastic-spacer-6x8x1 · MPN 1500-0010-0006 | fastener | 1 | $2.79list price | $2.79 | goBILDA$2.79 per unit/pack in the upstream parts list; goBILDA ships internationally |
| 45 | 1102 Series Flat Beam (2 Hole, 16mm Length) - 2 Pack structure.flat-beam-2h-16 · MPN 1102-0002-0016 | structure | 2 | $1.79list price | $3.58 | goBILDA$1.79 per unit/pack in the upstream parts list; goBILDA ships internationally |
| 46 | Hurricane Nut for goRAIL - 25 Pack fastener.hurricane-nut-25 · MPN 2805-0004-0108 | fastener | 1 | $9.99list price | $9.99 | goBILDA$9.99 per unit/pack in the upstream parts list; goBILDA ships internationally |
| 47 | Plastic Grommet (14-1) - 12 Pack other.grommet-14-1 · MPN 2911-0014-0001 | other | 1 | $1.99list price | $1.99 | goBILDA$1.99 per unit/pack in the upstream parts list; goBILDA ships internationally |
| 48 | M4 washer (4mm ID x 8mm OD), zinc plated - 25 Pack fastener.m4-washer-25 · MPN 2801-0004-0008 | fastener | 1 | $1.99list price | $1.99 | goBILDA$1.99 per unit/pack in the upstream parts list; goBILDA ships internationally |
| 49 | M4 x 0.7 hex nut (7mm hex), zinc plated - 25 Pack fastener.m4-nut-25 · MPN 2811-0004-0007 | fastener | 4 | $2.49list price | $9.96 | goBILDA$2.49 per unit/pack in the upstream parts list; goBILDA ships internationally |
| 50 | M4 x 0.7 nylon-insert locknut (7mm hex) - 25 Pack fastener.m4-locknut-25 · MPN 2812-0004-0007 | fastener | 1 | $2.99list price | $2.99 | goBILDA$2.99 per unit/pack in the upstream parts list; goBILDA ships internationally |
| 51 | M4 x 6mm button head screw - 25 Pack fastener.m4x6-button-25 · MPN 2802-0004-0006 | fastener | 2 | $2.99list price | $5.98 | goBILDA$2.99 per unit/pack in the upstream parts list; goBILDA ships internationally |
| 52 | M4 x 10mm button head screw - 25 Pack fastener.m4x10-button-25 · MPN 2802-0004-0010 | fastener | 3 | $3.39list price | $10.17 | goBILDA$3.39 per unit/pack in the upstream parts list; goBILDA ships internationally |
| 53 | M4 x 16mm button head screw - 25 Pack fastener.m4x16-button-25 · MPN 2802-0004-0016 | fastener | 2 | $3.79list price | $7.58 | goBILDA$3.79 per unit/pack in the upstream parts list; goBILDA ships internationally |
| 54 | M4 x 8mm socket head screw - 25 Pack fastener.m4x8-socket-25 · MPN 2800-0004-0008 | fastener | 2 | $3.19list price | $6.38 | goBILDA$3.19 per unit/pack in the upstream parts list; goBILDA ships internationally |
| 55 | M4 x 10mm socket head screw - 25 Pack fastener.m4x10-socket-25 · MPN 2800-0004-0010 | fastener | 3 | $3.19list price | $9.57 | goBILDA$3.19 per unit/pack in the upstream parts list; goBILDA ships internationally |
| 56 | M4 x 12mm socket head screw - 25 Pack fastener.m4x12-socket-25 · MPN 2800-0004-0012 | fastener | 1 | $3.19list price | $3.19 | goBILDA$3.19 per unit/pack in the upstream parts list; goBILDA ships internationally |
| 57 | M4 x 16mm socket head screw - 25 Pack fastener.m4x16-socket-25 · MPN 2800-0004-0016 | fastener | 2 | $3.19list price | $6.38 | goBILDA$3.19 per unit/pack in the upstream parts list; goBILDA ships internationally |
| 58 | M4 x 20mm socket head screw - 25 Pack fastener.m4x20-socket-25 · MPN 2800-0004-0020 | fastener | 1 | $3.09list price | $3.09 | goBILDA$3.09 per unit/pack in the upstream parts list; goBILDA ships internationally |
| 59 | XT30 connectors (board power headers J1/J3/J4/J5, battery, switch and meter leads) cable.xt30 · 1 alt | cable | 1 | unpriced | — | goBILDA5 pairs M/F |
| 60 | 4-pin JST-XH encoder breakout cable to 4 x DuPont (premade, 300 mm) cable.jst-encoder-breakout · 1 alt | cable | 6 | unpriced | — | goBILDA |
| 61 | Insulated female 3.5 mm bullet connectors (drive motor power) cable.bullet-3-5mm | cable | 12 | unpriced | — | goBILDAOnly 5 female per pack: 3 packs needed |
| 62 | Blue (removable) threadlocker other.threadlocker-blue | other | 1 | unpriced | — | goBILDA |
DigiKey35 lines · $90.80 + 1 unpriced | ||||||
| 63 | A1: CAP CER 10000PF 50V X7R RADIAL electronics.dk-a1 · MPN C317C103K5R5TA7301 | electronics | 20 | $0.16list price | $3.28 | DigiKeyDigiKey 399-9865-1-ND; the whole CSV can be uploaded as a DigiKey cart |
| 64 | A2: CAP ALUM 100UF 20% 50V RADIAL electronics.dk-a2 · MPN ESK107M050AG3EA | electronics | 10 | $0.25list price | $2.48 | DigiKeyDigiKey 399-18272-1-ND; the whole CSV can be uploaded as a DigiKey cart |
| 65 | A3: CAP CER 0.1UF 50V X7R RADIAL electronics.dk-a3 · MPN C322C104K5R5TA7317 | electronics | 10 | $0.21list price | $2.11 | DigiKeyDigiKey 399-14065-1-ND; the whole CSV can be uploaded as a DigiKey cart |
| 66 | A4: CAP ALUM 10UF 20% 50V RADIAL electronics.dk-a4 · MPN ESK106M050AC3DA | electronics | 10 | $0.16list price | $1.62 | DigiKeyDigiKey 399-ESK106M050AC3DACT-ND; the whole CSV can be uploaded as a DigiKey cart |
| 67 | A5: DIODE SCHOTTKY 25V 10A TO220AC electronics.dk-a5 · MPN STPS10L25D | electronics | 2 | $1.93list price | $3.86 | DigiKeyDigiKey 497-2738-5-ND; the whole CSV can be uploaded as a DigiKey cart |
| 68 | A6: DIODE GEN PURP 75V 300MA DO35 electronics.dk-a6 · MPN 1N4148 | electronics | 10 | $0.11list price | $1.08 | DigiKeyDigiKey 1655-1N4148CT-ND; the whole CSV can be uploaded as a DigiKey cart |
| 69 | A7: FUSEHOLDER BLOCKS - PCB - CLIP C electronics.dk-a7 · MPN 696108003002 | electronics | 1 | $0.68list price | $0.68 | DigiKeyDigiKey 732-11376-ND; the whole CSV can be uploaded as a DigiKey cart |
| 70 | A10: CONN HEADER VERT 12POS 2.54MM electronics.dk-a10 · MPN TSW-104-07-F-T | electronics | 4 | $1.50list price | $6.00 | DigiKeyDigiKey TSW-104-07-F-T-ND; the whole CSV can be uploaded as a DigiKey cart |
| 71 | A11: CONN HEADER VERT 8POS 2.54MM electronics.dk-a11 · MPN PEC08SAAN | electronics | 4 | $0.47list price | $1.88 | DigiKeyDigiKey S1012E-08-ND; the whole CSV can be uploaded as a DigiKey cart |
| 72 | A12: CONN HDR 20POS 0.1 TIN PCB electronics.dk-a12 · MPN PPTC102LFBN-RC | electronics | 1 | $1.30list price | $1.30 | DigiKeyDigiKey S7078-ND; the whole CSV can be uploaded as a DigiKey cart |
| 73 | A13: CONN HEADER VERT 40POS 2.54MM electronics.dk-a13 · MPN SBH11-PBPC-D20-ST-BK | electronics | 2 | $0.73list price | $1.46 | DigiKeyDigiKey S9175-ND; the whole CSV can be uploaded as a DigiKey cart |
| 74 | A14: CONN HEADER VERT 6POS 2MM electronics.dk-a14 · MPN B6B-PH-K-S(LF)(SN) | electronics | 2 | $0.36list price | $0.72 | DigiKeyDigiKey 455-1708-ND; the whole CSV can be uploaded as a DigiKey cart |
| 75 | A16: CONN HEADER VERT 20POS 2.54MM electronics.dk-a16 · MPN 0702462001 | electronics | 1 | $2.52list price | $2.52 | DigiKeyDigiKey WM6548-ND; the whole CSV can be uploaded as a DigiKey cart |
| 76 | A17: CONN HDR 2POS 0.1 TIN PCB electronics.dk-a17 · MPN PPTC021LFBN-RC | electronics | 5 | $0.32list price | $1.60 | DigiKeyDigiKey S7000-ND; the whole CSV can be uploaded as a DigiKey cart |
| 77 | A19: TERM BLK 2P SIDE ENT 5.08MM PCB electronics.dk-a19 · MPN OSTTA024163 | electronics | 2 | $0.73list price | $1.46 | DigiKeyDigiKey ED2580-ND; the whole CSV can be uploaded as a DigiKey cart |
| 78 | A20: CONN HEADER VERT 6POS 4.2MM (drive motor headers) electronics.dk-a20 · MPN 1726750613 | electronics | 6 | $2.27list price | $13.62 | DigiKeyDigiKey 1726750613-ND; the whole CSV can be uploaded as a DigiKey cart |
| 79 | A21: TRANS PNP 40V 0.2A TO92-3 electronics.dk-a21 · MPN 2N3906TA | electronics | 10 | $0.29list price | $2.85 | DigiKeyDigiKey 2N3906TAFSCT-ND; the whole CSV can be uploaded as a DigiKey cart |
| 80 | A22: RES 100 OHM 5% 1/4W AXIAL electronics.dk-a22 · MPN CF14JT100R | electronics | 10 | $0.06list price | $0.56 | DigiKeyDigiKey CF14JT100RCT-ND; the whole CSV can be uploaded as a DigiKey cart |
| 81 | A23: RES 10K OHM 5% 1/4W AXIAL electronics.dk-a23 · MPN CF14JT10K0 | electronics | 10 | $0.06list price | $0.56 | DigiKeyDigiKey CF14JT10K0CT-ND; the whole CSV can be uploaded as a DigiKey cart |
| 82 | A24: RES 4.7K OHM 5% 1/4W AXIAL electronics.dk-a24 · MPN CF14JT4K70 | electronics | 25 | $0.04list price | $1.01 | DigiKeyDigiKey CF14JT4K70CT-ND; the whole CSV can be uploaded as a DigiKey cart |
| 83 | A25: RES 0 OHM JUMPER 1/4W AXIAL electronics.dk-a25 · MPN CD14ZT0R00 | electronics | 10 | $0.08list price | $0.79 | DigiKeyDigiKey CD14ZT0R00CT-ND; the whole CSV can be uploaded as a DigiKey cart |
| 84 | A26: RES 68 OHM 5% 1/8W AXIAL electronics.dk-a26 · MPN CF18JT68R0 | electronics | 10 | $0.05list price | $0.45 | DigiKeyDigiKey CF18JT68R0CT-ND; the whole CSV can be uploaded as a DigiKey cart |
| 85 | A27: RES 82 OHM 5% 1/4W AXIAL electronics.dk-a27 · MPN CF14JT82R0 | electronics | 10 | $0.06list price | $0.56 | DigiKeyDigiKey CF14JT82R0CT-ND; the whole CSV can be uploaded as a DigiKey cart |
| 86 | A28: RES 1K OHM 5% 1/4W AXIAL electronics.dk-a28 · MPN CF14JT1K00 | electronics | 10 | $0.06list price | $0.56 | DigiKeyDigiKey CF14JT1K00CT-ND; the whole CSV can be uploaded as a DigiKey cart |
| 87 | A29: RES 680 OHM 5% 1/4W AXIAL electronics.dk-a29 · MPN CF14JT680R | electronics | 10 | $0.06list price | $0.56 | DigiKeyDigiKey CF14JT680RCT-ND; the whole CSV can be uploaded as a DigiKey cart |
| 88 | A30: RES 220 OHM 5% 1/4W AXIAL electronics.dk-a30 · MPN CF14JT220R | electronics | 10 | $0.06list price | $0.56 | DigiKeyDigiKey CF14JT220RCT-ND; the whole CSV can be uploaded as a DigiKey cart |
| 89 | A32: SWITCH SLIDE DIP SPDT 50MA 24V electronics.dk-a32 · MPN 206-124 | electronics | 1 | $1.25list price | $1.25 | DigiKeyDigiKey CT206124-ND; the whole CSV can be uploaded as a DigiKey cart |
| 90 | A37: LED BAR GRAPH 10SEG 570NM GRN electronics.dk-a37 · MPN DC10CGKWA | electronics | 2 | $3.26list price | $6.52 | DigiKeyDigiKey 754-2186-ND; the whole CSV can be uploaded as a DigiKey cart |
| 91 | A38: IC REG LINEAR 3.3V 750MA TO220-3 electronics.dk-a38 · MPN MIC2937A-3.3WT | electronics | 2 | $3.02list price | $6.04 | DigiKeyDigiKey 576-2235-ND; the whole CSV can be uploaded as a DigiKey cart |
| 92 | B1: FUSE GLASS 10A 125VAC 5X20MM (main fuse, 1 used + 1 spare) electronics.dk-b1 · MPN 0233010.MXP | power | 2 | $1.21list price | $2.42 | DigiKeyDigiKey F3631-ND; the whole CSV can be uploaded as a DigiKey cart |
| 93 | B9: SWITCH TOGGLE ON-OFF-ON (main power switch) electronics.dk-b9 · MPN C3920BAAAA | power | 1 | $3.28list price | $3.28 | DigiKeyDigiKey 708-3060-ND; the whole CSV can be uploaded as a DigiKey cart |
| 94 | B11: TERM BLOCK HDR 24POS VERT 5MM (break up for PCA9685 / INA260 power pins) electronics.dk-b11 · MPN EDSTL130/24 | electronics | 1 | $3.33list price | $3.33 | DigiKeyDigiKey ED1682-24-ND; the whole CSV can be uploaded as a DigiKey cart |
| 95 | A9: TERM BLOCK HDR 6POS VERT 3.5MM (RoboClaw headers J16-J18) electronics.dk-a9 · MPN 0395016006 | electronics | 3 | $2.02list price | $6.06 | DigiKeyDigiKey WM25701-ND; the whole CSV can be uploaded as a DigiKey cart |
| 96 | B2: TERM BLOCK PLUG 6POS STR 3.5MM (RoboClaw terminal plugs) electronics.dk-b2 · MPN 0395005006 | electronics | 3 | $2.59list price | $7.77 | DigiKeyDigiKey WM13033-ND; the whole CSV can be uploaded as a DigiKey cart |
| 97 | 6-pin Molex PCI-E housings + female pins (6 drive-motor connectors) cable.molex-pcie-6pin | cable | 6 | unpriced | — | DigiKeyHousing |
JLCPCB2 lines · unpriced | ||||||
| 98 | OSR Motor Board PCB v2.0.3 (gerber zip) electronics.pcb-motor-board | electronics | 1 | unpriced | — | JLCPCBships globallySuggested fab; minimum order is 10 boards; upload motor_board_v2.0.3.zip with the settings image in gerbers/ |
| 99 | OSR Brain Board PCB v2.0.3 (gerber zip) electronics.pcb-brain-board | electronics | 1 | unpriced | — | JLCPCBships globallyUpload brain_board_v2.0.3.zip separately from the motor board |
Basicmicro1 line · unpriced | ||||||
| 100 | RoboClaw 2x7A motor controller (one per two drive motors) electronics.roboclaw-2x7a · MPN RoboClaw 2x7A | electronics | 3 | unpriced | — | Basicmicro |
Pololu2 lines · unpriced | ||||||
| 101 | Pololu 5 V step-down regulator (product 2881; U4, powers the 5 V motor bus) power.reg-5v | power | 1 | unpriced | — | Pololu |
| 102 | Pololu 12 V step-down regulator (product 2855; U3) power.reg-12v | power | 1 | unpriced | — | Pololu |
Adafruit2 lines · unpriced | ||||||
| 103 | INA260 current/voltage/power breakout (optional; bypass with a 0 ohm link in R30 if absent) sensor.ina260 · MPN INA260 | sensor | 1 | unpriced | — | AdafruitUpstream says the DigiKey part is sold out and points here |
| 104 | Raspberry Pi GPIO ribbon cable (Pi to J22) cable.rpi-ribbon | cable | 1 | unpriced | — | Adafruitbom_v2.0.3_other_parts.csv says order 2 |
Mouser1 line · unpriced | ||||||
| 105 | PCA9685 16-channel PWM board (corner servo driver, U2) electronics.pca9685 · MPN Adafruit 815 | electronics | 1 | unpriced | — | Mouser |
Raspberry Pi1 line · unpriced | ||||||
| 106 | Raspberry Pi 3, 4 or 5 (any RAM) + microSD card; only the Pi 5 can run the RoboClaw serial link and Bluetooth at the same time compute.raspberry-pi | compute | 1 | unpriced | — | Raspberry Piships globallyPi 4B link from bom_v2.0.3_other_parts.csv (B7) |
Amazon8 lines · unpriced | ||||||
| 107 | 4S LiPo battery, over 14 V, 4000 mAh or more recommended, with XT30 (MH-FC) lead power.battery-4s-lipo · 1 alt | power | 1 | unpriced | — | AmazonZeee store page (not a single product) linked upstream |
| 108 | LiPo balance charger matching the battery chemistry and connector (e.g. B6) power.lipo-charger | power | 1 | unpriced | — | AmazonB6 LiPo balance charger, short link from extra_parts.md |
| 109 | DC power meter with LCD (voltage, current, power, energy; mounts in the rear plate cut-out; MM Load/MM DC XT30 headers) sensor.dc-power-meter | sensor | 1 | unpriced | — | Amazon |
| 110 | USB-C cable with power/ground broken out (Raspberry Pi 5 only; feeds the Pi from the board's 5 V test points) cable.usbc-power-breakout | cable | 1 | unpriced | — | Amazon |
| 111 | DuPont connector kit (4x 3-pin and 8x 4-pin housings, male and female crimps) cable.dupont-kit | cable | 1 | unpriced | — | Amazon |
| 112 | Cable sleeving / expandable braid and heat shrink cable.sleeve-heatshrink | cable | 1 | unpriced | — | AmazonBest-seller category page, not a product |
| 113 | Metric M2.5 standoff kit (30, 20, 15, 12, 10, 6 mm lengths used on the PCBs) fastener.m2-5-standoff-kit | fastener | 1 | unpriced | — | Amazon |
| 114 | Assorted female/male pin header kit (regulators, RoboClaws, INA260, PCA9685) electronics.header-kit | electronics | 1 | unpriced | — | AmazonB8 in bom_v2.0.3_other_parts.csv |
Spektrum1 line · unpriced | ||||||
| 115 | USB gamepad or RC transmitter with USB dongle (Xbox controller, or Spektrum WS2000 + DXs) other.gamepad | other | 1 | unpriced | — | SpektrumWS2000 dongle |
No offer in this region2 lines · unpriced | ||||||
| 116 | Fireproof LiPo battery bag (recommended) other.lipo-fire-bag | other | 1 | unpriced | — | No offer found yet |
| 117 | Stranded wire: 18 AWG red/black (motor power), 20 AWG white/red/black (servo), 22 AWG in 4 colours (encoder), 16 AWG for RoboClaw headers; ribbon style preferred cable.wire-spools | cable | 1 | unpriced | — | No offer found yet |
| Cart total · US | 440 | $1,421.18 | 25 lines unpriced, not in total | |||
Fabricate
Planned for a 256 mm bed- Fabricated parts
- 9
- Print time (sum)
- —
- Material (sum)
- —
- Plates · estimate
- —
No plate estimate: the package does not list grams per part yet, and we will not guess them. Slice the source files for your 256 mm bed.
| Part | Process | Material | Qty | h / part | g / part | Profile |
|---|---|---|---|---|---|---|
Bottom plate (bottom_plate.dxf; PCB standoff holes) laser.bottom-plate | Laser | ~3 mm (1/8 in) acrylic, MDF or hardwood | 1 | — | — | source |
Side plate (side_plate.dxf; one file, cut two) laser.side-plate | Laser | ~3 mm (1/8 in) acrylic, MDF or hardwood | 2 | — | — | source |
Gap slat (gap_slat.dxf; one file, cut two) laser.gap-slat | Laser | ~3 mm (1/8 in) acrylic, MDF or hardwood | 2 | — | — | source |
Top front plate (top_front.dxf; optional mission-patch engraving PDFs) laser.top-front | Laser | ~3 mm (1/8 in) acrylic, MDF or hardwood | 1 | — | — | source |
Top rear plate (top_rear.dxf) laser.top-rear | Laser | ~3 mm (1/8 in) acrylic, MDF or hardwood | 1 | — | — | source |
Front plate (front_plate_standoff.dxf) laser.front-plate | Laser | ~3 mm (1/8 in) acrylic, MDF or hardwood | 1 | — | — | source |
Back plate (back_plate_standoff.dxf; switch hole and power-meter cut-out) laser.back-plate | Laser | ~3 mm (1/8 in) acrylic, MDF or hardwood | 1 | — | — | source |
Assemble
Every step ends in a check- Steps
- 26
- Subassemblies
- 11
- Hands-on time (sum)
- 5 h
- Critical path
- 5 h
- Your progress · this device
- —
25 steps have no time estimate; times above are lower bounds.
Steps, in build order
- Procurement01
Order goBILDA, DigiKey and extra parts
Order from the parts list early: goBILDA mechanical parts (parts_list.csv), the DigiKey cart (upload digikey_bom.csv directly at DigiKey), and the extra parts (RoboClaws, regulators, PCA9685, INA260, battery, charger, connectors, wire). Educational builders can apply for the 15% goBILDA discount through the form linked in the main README before ordering.
CHECKEvery row of parts_list.csv and digikey_bom.csv is in a cart at the listed quantity, and extra_parts.md items are ticked off.- Parts in
- —
- Tools
- —
- Torque
- —
- Time
- —
- After
- Start
- Source
- github.com
- 02
Order the two control-board PCBs
Upload motor_board_v2.0.3.zip and brain_board_v2.0.3.zip from electrical/pcb/control_board/gerbers/gerber_files/ to JLCPCB one at a time, with the settings shown in jlcpcb_ordering.png. Minimum order is 10 of each; ask on the OSR Slack about group orders or spares.
CHECKTwo bare boards match the v2.0.3 silkscreen (motor board with RC1-RC3 footprints, brain board with J22/J23 ribbon headers).- Parts in
- OSR Motor Board PCB v2.0.3 (gerber zip)electronics.pcb-motor-board
- OSR Brain Board PCB v2.0.3 (gerber zip)electronics.pcb-brain-board
- Tools
- —
- Torque
- —
- Time
- —
- After
- Start
- Source
- github.com
- Fabrication03
Laser cut the body plates
Cut the DXF files from mechanical/body/laser_cut_parts/dxf/ in ~3 mm material. The side plate and gap slat are single files: cut two of each. Optionally engrave the top front plate from the Opaque or Clear PDF.
CHECKNine plates: bottom, 2 sides, 2 gap slats, top front, top rear, front and back; holes accept M4 screws.- Parts in
- Bottom plate (bottom_plate.dxf; PCB standoff holes)laser.bottom-plate
- Side plate (side_plate.dxf; one file, cut two)laser.side-plate
- Gap slat (gap_slat.dxf; one file, cut two)laser.gap-slat
- Top front plate (top_front.dxf; optional mission-patch engraving PDFs)laser.top-front
- Top rear plate (top_rear.dxf)laser.top-rear
- Front plate (front_plate_standoff.dxf)laser.front-plate
- Back plate (back_plate_standoff.dxf; switch hole and power-meter cut-out)laser.back-plate
- Tools
- Laser cutter or an online service (SendCutSend premade cart, Sculpteo)
- Torque
- —
- Time
- —
- After
- Start
- Source
- github.com
- Wiring04
Build the 12 motor cables
Cut wire (length + 1 cm): servo 20 AWG 2x54 cm and 2x36 cm; encoder 22 AWG 4x36, 2x53, 2x46, 2x54 cm; power 18 AWG red/black pairs 2x3, 2x54, 2x41 cm. Build (1) 4x JST 4-pin to DuPont female 4-pin, 35 cm; (2) 4x DuPont male 4-pin to Molex PCI-E, 2x52 cm front ('F') and 2x45 cm back ('B'); (3) 2x JST 4-pin to Molex PCI-E, 53 cm, middle ('M'); (4) 6x female bullet pair to the free Molex slots (2 cm middle, 53 cm front, 40 cm back); (5) 4x DuPont male 3-pin to female 3-pin servo extensions (2x53 cm, 2x35 cm). Mark pinouts on each housing (JST: enB, enA, GND, 5V; PCI-E top 5V/enA/enB, bottom M+/M-/GND).
CHECK12 finished cables; every conductor beeps end to end on continuity and no pin is swapped against the pinout photos; each crimp survives a firm tug.- Parts in
- Stranded wire: 18 AWG red/black (motor power), 20 AWG white/red/black (servo), 22 AWG in 4 colours (encoder), 16 AWG for RoboClaw headers; ribbon style preferredcable.wire-spools
- 4-pin JST-XH encoder breakout cable to 4 x DuPont (premade, 300 mm)cable.jst-encoder-breakout
- 6-pin Molex PCI-E housings + female pins (6 drive-motor connectors)cable.molex-pcie-6pin
- DuPont connector kit (4x 3-pin and 8x 4-pin housings, male and female crimps)cable.dupont-kit
- Insulated female 3.5 mm bullet connectors (drive motor power)cable.bullet-3-5mm
- Cable sleeving / expandable braid and heat shrinkcable.sleeve-heatshrink
- Tools
- Crimping tool (JST, DuPont, Molex), Wire strippers, Heat gun, Multimeter, Marker
- Torque
- —
- Time
- 5 h
- After
- Start
- Source
- github.com
- Power05
Prepare the LiPo battery, charger, switch and meter leads
Safety · human-verified requiredBalance-charge the 4S LiPo with a charger that matches its chemistry and connector, inside a fire-proof bag, never unattended. Give the battery an XT30 (MH-FC) lead, and wire the ON-OFF-ON toggle (B9) and the DC power meter with XT30 plugs for the Switch, MM Load and MM DC headers. Insulate every joint; LiPo packs deliver very high short-circuit current. Do not discharge the pack too far (the rover powers down below about 13-14 V).
CHECKBattery reads over 14 V and cells are balanced; switch lead shows open/closed on continuity; no exposed conductor at any joint.This step can hurt a person or ruin parts. Its instructions need sign-off by a human who has done it before relying on them. Stop and ask if anything differs from what you see.
- Parts in
- 4S LiPo battery, over 14 V, 4000 mAh or more recommended, with XT30 (MH-FC) leadpower.battery-4s-lipo
- LiPo balance charger matching the battery chemistry and connector (e.g. B6)power.lipo-charger
- Fireproof LiPo battery bag (recommended)other.lipo-fire-bag
- B9: SWITCH TOGGLE ON-OFF-ON (main power switch)electronics.dk-b9
- DC power meter with LCD (voltage, current, power, energy; mounts in the rear plate cut-out; MM Load/MM DC XT30 headers)sensor.dc-power-meter
- XT30 connectors (board power headers J1/J3/J4/J5, battery, switch and meter leads)cable.xt30
- Tools
- Soldering iron, Multimeter, Heat shrink
- Torque
- —
- Time
- —
- After
- Start
- Source
- github.com
- Wheels06
Build six base wheel assemblies
On each of the six 5203 motors fit a clamping mount and a Hyper Hub, then bolt a Wasteland wheel to the hub (3 socket M4x16 per wheel) and the motor to its 2-hole U-channel (4 M4x10). Leave positions adjustable. Build left and right as mirror images: all U-channel openings point to the rear of the rover (the Onshape model shows them identical by mistake).
CHECKSix wheel assemblies spin freely by hand, three per side as mirror images.- Parts in
- Wasteland Wheel (144mm Diameter, 52mm Width)structure.wasteland-wheel-144
- 1401 Series 2-Side, 2-Post Clamping Mount (43mm Width, 36mm Bore)structure.clamping-mount-43-36
- 5203 Series Yellow Jacket Planetary Gear Motor (26.9:1, 24mm length 8mm REX shaft, 223 RPM, 3.3-5V encoder)actuator.yellow-jacket-5203-223rpm
- 1310 Series Hyper Hub (8mm REX Bore)structure.hyper-hub-8mm-rex
- 1120 Series U-Channel (2 Hole, 72mm Length) (6 for the wheels + 2 for the body)structure.u-channel-2h-72
- M4 x 16mm socket head screw - 25 Packfastener.m4x16-socket-25
- M4 x 10mm socket head screw - 25 Packfastener.m4x10-socket-25
- M4 x 10mm button head screw - 25 Packfastener.m4x10-button-25
- Tools
- 3 mm and 2.5 mm hex keys
- Torque
- —
- Time
- —
- After
- Start
- Source
- github.com
- Rocker-bogie07
Rocker-bogie joints and control arms (x2)
Assemble each joint on its 8 mm shaft: the 4 mm spacer (1522-0010-0040) on the clamp's protruding side, the 6 mm spacer on the flat side. Press the flanged bearing into the hub, then fix the hub to a control arm with 8 M4 x 12 (or 10) mm screws with washers so the bearing cannot fall out.
CHECKJoint has no side-to-side play and turns smoothly; bearings are captured.- Parts in
- 1309 Series Sonic Hub (8mm Bore)structure.sonic-hub-8mm
- 1611 Series Flanged Ball Bearing (8mm ID x 14mm OD, 5mm) - 2 Packstructure.flanged-bearing-8x14x5
- 1504 Series 32mm OD Pattern Spacer (2mm Length)structure.pattern-spacer-32-2mm
- 2100 Series Stainless Steel Round Shaft (8mm Diameter, 50mm Length)structure.shaft-8x50
- 1221 Series 2-Side, 2-Post Pattern Mount (32-2)structure.pattern-mount-32-2
- 1522 Series 8mm ID Spacer (10mm OD, 6mm Length) - 4 Packstructure.spacer-8id-6mm
- 1522 Series 8mm ID Spacer (10mm OD, 4mm Length) - 4 Packstructure.spacer-8id-4mm
- Plastic Hub-Mount Control Arm (72mm Length)structure.control-arm-72
- M4 x 12mm socket head screw - 25 Packfastener.m4x12-socket-25
- M4 washer (4mm ID x 8mm OD), zinc plated - 25 Packfastener.m4-washer-25
- Tools
- Hex keys
- Torque
- —
- Time
- —
- After
- Start
- Source
- github.com
- Body08
Body frame, bearing supports and plate hinges
Bottom frame: 2x 29-hole and 2x 41-hole beams with M4x16 screws, cross beams 1 hole in, plus a 29-hole beam at hole 16 from the front. Top frame the same. Verticals: 8x 12-hole beams at holes 1, 17, 25, 41 on both sides. Build two bearing supports (pillow blocks, hollow sides toward the centre) and fix them at hole 17 (M4x12 outboard, M4x8 inboard), on the 6th hole from the top and 5th from the bottom of the verticals. Hinges: 22 mm standoffs on 3x5 plates with M4x8, plates on the top front and rear beams, hinges on the standoffs.
CHECKFrame is square and rigid; both pillow-block bores line up across the body.- Parts in
- 1106 Series Square Beam (29 Hole, 232mm Length)structure.square-beam-29h
- 1106 Series Square Beam (41 Hole, 328mm Length)structure.square-beam-41h
- 1106 Series Square Beam (12 Hole, 96mm Length)structure.square-beam-12h
- 1604 Series 2-Side, 2-Post Pillow Block (32mm Bore)structure.pillow-block-32
- 1116 Series Grid Plate (3 x 5 Hole, 24 x 40mm) (4 for the rocker-bogies + 4 for the body hinges)structure.grid-plate-3x5
- 1501 Series M4 x 0.7mm Standoff (6mm OD, 22mm Length) - 4 Packfastener.standoff-m4-22
- Plastic Hinge - 2 Packstructure.plastic-hinge
- M4 x 16mm socket head screw - 25 Packfastener.m4x16-socket-25
- M4 x 12mm socket head screw - 25 Packfastener.m4x12-socket-25
- M4 x 8mm socket head screw - 25 Packfastener.m4x8-socket-25
- Tools
- Hex keys, 7 mm combination nut driver
- Torque
- —
- Time
- —
- After
- Start
- Source
- github.com
- Software09
Install Ubuntu, ROS 2 and the rover code on the Pi
Flash Ubuntu LTS with SSH, user, Wi-Fi and locale set; install ROS 2 (guide assumes Jazzy, `sudo apt install ros-jazzy-ros-base`). Then `mkdir -p ~/osr_ws/src && cd ~/osr_ws`, `source /opt/ros/${ROS_DISTRO}/setup.bash`, `cd src && git clone https://github.com/nasa-jpl/osr-rover-code.git && cd ..`, `python3 -m venv venv --system-site-packages`, `source ./venv/bin/activate`, `touch ./venv/COLCON_IGNORE`, `sudo rosdep init`, `rosdep update`, `rosdep install --from-paths src --ignore-src --rosdistro=$ROS_DISTRO -y`, `python3 -m pip install adafruit-circuitpython-servokit ina260 RPi.GPIO smbus`, `python3 -m colcon build --symlink-install`. Create `osr_params_mod.yaml` and `roboclaw_params_mod.yaml` in osr_bringup/config. Enable I2C and Serial (no login shell) in `sudo raspi-config`, copy udev rules `sudo cp ~/osr_ws/src/osr-rover-code/config/* /etc/udev/rules.d/`, add the user to tty, dialout and input, and reboot.
CHECK`ros2 topic list` runs, `echo $ROS_DISTRO` prints the distro, and `ls -l /dev/serial*` shows `/dev/serial0 -> ttyS0`.- Parts in
- Raspberry Pi 3, 4 or 5 (any RAM) + microSD card; only the Pi 5 can run the RoboClaw serial link and Bluetooth at the same timecompute.raspberry-pi
- Tools
- Raspberry Pi Imager, SSH client
- Torque
- —
- Time
- —
- After
- Start
- Source
- github.com
- Control board10
Motor board: power headers, fuse holder, R1 and D1
Fit M2.5 x 30 mm standoffs to the bare board as a work stand. Solder XT30 headers J1 (male), J3 (female), J4 (female), J5 (male) with plenty of solder, plus fuse holder F1, resistor R1 and diode D1 (check D1 orientation).
CHECKXT30 genders match the list and D1's band matches the silkscreen.- Parts in
- OSR Motor Board PCB v2.0.3 (gerber zip)electronics.pcb-motor-board
- XT30 connectors (board power headers J1/J3/J4/J5, battery, switch and meter leads)cable.xt30
- A7: FUSEHOLDER BLOCKS - PCB - CLIP Celectronics.dk-a7
- A5: DIODE SCHOTTKY 25V 10A TO220ACelectronics.dk-a5
- Metric M2.5 standoff kit (30, 20, 15, 12, 10, 6 mm lengths used on the PCBs)fastener.m2-5-standoff-kit
- Tools
- Soldering iron, Solder
- Torque
- —
- Time
- —
- After
- 02
- Source
- github.com
- Wheels11
Build four corner assemblies and route their cables
Take four of the six wheel assemblies. Fit grommets at both ends of each 144 mm goRAIL. Route a DuPont-to-JST encoder cable through the low-side U-channel, goRAIL and motor bracket (DuPont at top, JST at the motor), and the motor power leads the other way. Join with 3-4 M4x6 button screws inside the U-channel and 3-4 M4x8 socket screws at the top, loosely at first; sleeve the wires against sharp aluminium edges. Optionally notch the goRAIL above the U-channel for clearance. Build two mirrored pairs.
CHECKFour corners in two mirrored pairs; no wire pinched in the channel; JST plugs reach the motor encoders.- Parts in
- 1109 Series goRAIL (144mm Length)structure.gorail-144
- 1121 Series Low-Side U-Channel (4 Hole, 120mm Length)structure.low-side-u-channel-4h-120
- Plastic Grommet (14-1) - 12 Packother.grommet-14-1
- M4 x 6mm button head screw - 25 Packfastener.m4x6-button-25
- M4 x 8mm socket head screw - 25 Packfastener.m4x8-socket-25
- Cable sleeving / expandable braid and heat shrinkcable.sleeve-heatshrink
- Tools
- Hex keys, File (optional notch)
- Torque
- —
- Time
- —
- Source
- github.com
- Rocker-bogie12
Bogie, front servo and wiring (x2, mirrored)
Fix a 3x5 grid plate to two 96 mm goRAILs with M4x10 button screws (slits toward the plate's short side), then to a 3-hole flat beam and the bogie joint with M4x10 socket screws, slits facing the top. Add the 3-1 angle bracket on top and a 2-hole U-channel below. Fit grommets, route the front servo cable (with a 54 cm extension), front encoder, middle motor power and middle encoder cables. Put the servo into its ServoBlock, insert the set screw into the hollow shaft but leave it loose for calibration, and mount on the front bracket.
CHECKBoth bogies are mirror images with slits facing the same way; servo set screw is loose; cables sit inside the channels.- Parts in
- 1116 Series Grid Plate (3 x 5 Hole, 24 x 40mm) (4 for the rocker-bogies + 4 for the body hinges)structure.grid-plate-3x5
- 1118 Series Open goRAIL (96mm Length)structure.open-gorail-96
- 1102 Series Flat Beam (3 Hole, 24mm Length) - 2 Packstructure.flat-beam-3h-24
- 1111 Series Angle Pattern Bracket (3-1)structure.angle-bracket-3-1
- 1120 Series U-Channel (2 Hole, 72mm Length) (6 for the wheels + 2 for the body)structure.u-channel-2h-72
- ServoBlock (Standard Size, 25 Tooth Spline, Hub Shaft)structure.servoblock-25t
- 2000 Series Dual Mode Servo (25-2, Torque) (corner steering)actuator.servo-2000-25-2
- Plastic Grommet (14-1) - 12 Packother.grommet-14-1
- M4 x 10mm button head screw - 25 Packfastener.m4x10-button-25
- M4 x 10mm socket head screw - 25 Packfastener.m4x10-socket-25
- Tools
- Hex keys
- Torque
- —
- Time
- —
- Source
- github.com
- Body13
Differential pivot
Assemble the idler bearing hub per goBILDA's instructions. Fix the block mount to the 7-hole linkages with M4x10 button screws. Make two turnbuckles from threaded rod and a ball linkage on each end. Connect each turnbuckle to a 7-hole linkage (M4x20 socket + locknut) and to the second hole from the end of the U-beam (M4x16 button + locknut). Fix the pivot to the hub with two M4x6 button screws, add two 29-hole beams at holes 28 and 30 and mount the hub to them with M4x12 socket screws.
CHECKThe differential bar rotates freely about the hub with no binding at the turnbuckles.- Parts in
- Idler Bearing-Hub (32mm OD, 16mm Height)structure.idler-bearing-hub-32
- 1205 Series Dual Block Mount (1-4) - 2 Packstructure.dual-block-mount-1-4
- 1203 Series Block Mount (1-1) - 4 Packstructure.block-mount-1-1
- 1102 Series Flat Beam (7 Hole, 56mm Length) - 2 Packstructure.flat-beam-7h-56
- 2808 Series Stainless Steel Threaded Rod (M4 x 0.7mm, 50mm Length) - 2 Packstructure.threaded-rod-m4-50
- 2913 Series Steel Ball Linkage (Female M4 x 0.7mm, 24.1mm Length) - 2 Packstructure.ball-linkage-m4
- 1101 Series U-Beam (41 Hole, 328mm Length)structure.u-beam-41h
- M4 x 0.7 nylon-insert locknut (7mm hex) - 25 Packfastener.m4-locknut-25
- M4 x 20mm socket head screw - 25 Packfastener.m4x20-socket-25
- M4 x 16mm button head screw - 25 Packfastener.m4x16-button-25
- M4 x 10mm button head screw - 25 Packfastener.m4x10-button-25
- Tools
- Hex keys, Wrench
- Torque
- —
- Time
- —
- After
- 08
- Source
- github.com
- Control board14
First power: test the power path at 14.8 V / 1.0 A
Safety · human-verified requiredInsert the 10 A fuse (B1) in F1. Connect the Switch and meter leads, then a bench supply at 14.8 V DC current-limited to 1.0 A (or the battery). Measure between T4 (swt_out) and T2 (Batt-). Disconnect power before fitting any further parts.
CHECKT4-T2 reads the supply voltage (~14.8 V) and the power meter shows the same; supply stays below the current limit. A brief continuity beep on J5 is normal once capacitors are fitted.This step can hurt a person or ruin parts. Its instructions need sign-off by a human who has done it before relying on them. Stop and ask if anything differs from what you see.
- Parts in
- B1: FUSE GLASS 10A 125VAC 5X20MM (main fuse, 1 used + 1 spare)electronics.dk-b1
- Tools
- Bench power supply (current limited), Multimeter
- Torque
- —
- Time
- —
- Source
- github.com
- Rocker-bogie15
Rocker, back servo and 45-degree brackets (x2, mirrored)
Fix each control arm to the steel bracket and a 5-hole goRAIL nut with 7 socket screws and washers (no goRAIL nut: use 3 hurricane nuts, see the collapsed section). Route front/middle/rear cables through the slit and tighten fully. Fix the 1-hole U-channel to the 288 mm goRAIL with 3-4 M4x10 socket screws and mount the second ServoBlock + servo with 6 M4x10 button screws. Join front and back with the 45-degree brackets using hurricane nuts and M4x6 socket screws (longer screws hit the goRAIL). Fit the body-axis channel with 5 hurricane nuts, flush, cables inside.
CHECKTwo mirrored rocker-bogies; the joint pivots freely; all cables exit through the body-axis channel; hurricane nuts are locked in the rail.- Parts in
- 1126 Series Steel Flat Bracket (1-1) - 2 Packstructure.steel-flat-bracket-1-1
- goRAIL Nut (5 Hole) - 2 Packfastener.gorail-nut-5h
- 1118 Series Open goRAIL (288mm Length)structure.open-gorail-288
- 1120 Series U-Channel (1 Hole, 48mm Length)structure.u-channel-1h-48
- ServoBlock (Standard Size, 25 Tooth Spline, Hub Shaft)structure.servoblock-25t
- 2000 Series Dual Mode Servo (25-2, Torque) (corner steering)actuator.servo-2000-25-2
- 1111 Series Angle Pattern Bracket (1-1) (45 degree bracket)structure.angle-bracket-1-1
- 1137 Series Steel Flat Grid Bracket (1-1) - 2 Packstructure.steel-flat-grid-bracket-1-1
- 1118 Series Open goRAIL (120mm Length)structure.open-gorail-120
- Hurricane Nut for goRAIL - 25 Packfastener.hurricane-nut-25
- M4 x 6mm button head screw - 25 Packfastener.m4x6-button-25
- M4 x 8mm socket head screw - 25 Packfastener.m4x8-socket-25
- Tools
- Hex keys, Needle-nose pliers
- Torque
- —
- Time
- —
- After
- 12
- Source
- github.com
- Control board16
Motor board: INA260 (or bypass), 5 V, 12 V and 3.3 V regulators
Option 1: fit 8x1 and 3x1 (centre pin removed) female sockets on U1 underneath, male pins on the INA260, bridge pads A0 and A1 (I2C address 0x45) and plug it in. Option 2: no INA260, fit a 0 ohm link in R30. Then: 5 V regulator into U4 on two 4x1 + one 5x1 female headers; 12 V regulator into U3 on a 5x1 header with M2.5 x 10 mm standoffs; U7 3.3 V linear regulator and C7 (both polarity/orientation sensitive); R15, R24 and Q1 for the alert LED.
CHECKINA260 A0/A1 bridged (or R30 fitted); U7 and C7 match the orientation photos.- Parts in
- INA260 current/voltage/power breakout (optional; bypass with a 0 ohm link in R30 if absent)sensor.ina260
- Pololu 5 V step-down regulator (product 2881; U4, powers the 5 V motor bus)power.reg-5v
- Pololu 12 V step-down regulator (product 2855; U3)power.reg-12v
- A38: IC REG LINEAR 3.3V 750MA TO220-3electronics.dk-a38
- A4: CAP ALUM 10UF 20% 50V RADIALelectronics.dk-a4
- A21: TRANS PNP 40V 0.2A TO92-3electronics.dk-a21
- A25: RES 0 OHM JUMPER 1/4W AXIALelectronics.dk-a25
- Assorted female/male pin header kit (regulators, RoboClaws, INA260, PCA9685)electronics.header-kit
- B11: TERM BLOCK HDR 24POS VERT 5MM (break up for PCA9685 / INA260 power pins)electronics.dk-b11
- Tools
- Soldering iron
- Torque
- —
- Time
- —
- After
- 14
- Source
- github.com
- 17
Test every voltage rail
Safety · human-verified requiredPower the board at 14.8 V, current limited, and probe test points T7 to T12 on the left of the top side against the silkscreen values (3.3 V, 5 V, 12 V, Batt+, PWR). Disconnect power afterwards.
CHECKEach test point reads its silkscreen voltage; nothing warms up.This step can hurt a person or ruin parts. Its instructions need sign-off by a human who has done it before relying on them. Stop and ask if anything differs from what you see.
- Parts in
- —
- Tools
- Bench power supply, Multimeter
- Torque
- —
- Time
- —
- After
- 16
- Source
- github.com
- 18
Motor board: PCA9685, RoboClaws and remaining parts
Unpowered: U2 headers (6x1 + three 2x4 female) and the PCA9685 with its V+/GND fed by two short wires or 1x1 pins, then C3; R5 and C1 (INA260 helpers); J21, J20 (8x1 female) and R6-R10; R2-R4. For RC1-RC3: M2.5 x 15 mm standoffs, a 2x10 and a 5x1 female header each, and the four capacitors per footprint. Fit J16-J18 motor supply headers, wire each 6-pos terminal block to its RoboClaw 1:1 with ~5 cm of 16 AWG (18 AWG also fine), and seat the three RoboClaws. Finish with C5, C6, J19 servo header, C19 (polarity), LED array U5 (bevelled corner) and drive motor headers J8-J11, J13, J14.
CHECKThree RoboClaws seated; C19 and U5 orientation matches the photos; INA260 test from an Arduino at address 0x45 prints bus voltage near the supply voltage (optional).- Parts in
- PCA9685 16-channel PWM board (corner servo driver, U2)electronics.pca9685
- RoboClaw 2x7A motor controller (one per two drive motors)electronics.roboclaw-2x7a
- A9: TERM BLOCK HDR 6POS VERT 3.5MM (RoboClaw headers J16-J18)electronics.dk-a9
- B2: TERM BLOCK PLUG 6POS STR 3.5MM (RoboClaw terminal plugs)electronics.dk-b2
- A1: CAP CER 10000PF 50V X7R RADIALelectronics.dk-a1
- A2: CAP ALUM 100UF 20% 50V RADIALelectronics.dk-a2
- A3: CAP CER 0.1UF 50V X7R RADIALelectronics.dk-a3
- A6: DIODE GEN PURP 75V 300MA DO35electronics.dk-a6
- A10: CONN HEADER VERT 12POS 2.54MMelectronics.dk-a10
- A11: CONN HEADER VERT 8POS 2.54MMelectronics.dk-a11
- A12: CONN HDR 20POS 0.1 TIN PCBelectronics.dk-a12
- A13: CONN HEADER VERT 40POS 2.54MMelectronics.dk-a13
- A14: CONN HEADER VERT 6POS 2MMelectronics.dk-a14
- A16: CONN HEADER VERT 20POS 2.54MMelectronics.dk-a16
- A17: CONN HDR 2POS 0.1 TIN PCBelectronics.dk-a17
- A19: TERM BLK 2P SIDE ENT 5.08MM PCBelectronics.dk-a19
- A20: CONN HEADER VERT 6POS 4.2MM (drive motor headers)electronics.dk-a20
- A22: RES 100 OHM 5% 1/4W AXIALelectronics.dk-a22
- A23: RES 10K OHM 5% 1/4W AXIALelectronics.dk-a23
- A24: RES 4.7K OHM 5% 1/4W AXIALelectronics.dk-a24
- A26: RES 68 OHM 5% 1/8W AXIALelectronics.dk-a26
- A27: RES 82 OHM 5% 1/4W AXIALelectronics.dk-a27
- A28: RES 1K OHM 5% 1/4W AXIALelectronics.dk-a28
- A29: RES 680 OHM 5% 1/4W AXIALelectronics.dk-a29
- A30: RES 220 OHM 5% 1/4W AXIALelectronics.dk-a30
- A32: SWITCH SLIDE DIP SPDT 50MA 24Velectronics.dk-a32
- A37: LED BAR GRAPH 10SEG 570NM GRNelectronics.dk-a37
- Tools
- Soldering iron, Wire cutters
- Torque
- —
- Time
- —
- After
- 17
- Source
- github.com
- 19
Assemble the brain board, mount the Pi and mate the boards
Fit R11, R25-R29, R31-R35; switch SW1 (direction per footprint); LED array U6; J22/J23 ribbon headers (gaps to silkscreen); J25 3x4, J24 shrouded 1x6 (gap to the right), J30 8x1; J26 and C32 on the back (trim C32 leads); J27-J29; the E-stop and TX/RX LED parts Q2-Q6, R16-R23, R36-R38, C33, C34, D8, D9 (BJT and diode polarity). Mount the Pi with M2.5 x 20 mm standoffs and connect its GPIO ribbon to J22. Mate brain board onto motor board with M2.5 x 10 mm standoffs. For a Pi 5, power the Pi through a USB-C cable soldered to the motor board's 5 V and GND test points.
CHECKBrain board sits level on the motor board; the ribbon is keyed to J22; Q/D orientation matches Figure 4.5.- Parts in
- OSR Brain Board PCB v2.0.3 (gerber zip)electronics.pcb-brain-board
- Raspberry Pi 3, 4 or 5 (any RAM) + microSD card; only the Pi 5 can run the RoboClaw serial link and Bluetooth at the same timecompute.raspberry-pi
- Raspberry Pi GPIO ribbon cable (Pi to J22)cable.rpi-ribbon
- USB-C cable with power/ground broken out (Raspberry Pi 5 only; feeds the Pi from the board's 5 V test points)cable.usbc-power-breakout
- Metric M2.5 standoff kit (30, 20, 15, 12, 10, 6 mm lengths used on the PCBs)fastener.m2-5-standoff-kit
- Tools
- Soldering iron
- Torque
- —
- Time
- —
- After
- 18
- Source
- github.com
- 20
Bench-test motors and configure the RoboClaws
Safety · human-verified requiredSecure the board and lay the six wheel/motor assemblies around it on their correct headers, wheels free to spin. Power up. Per RoboClaw over USB in Motion Studio: update firmware; General Settings: Control Mode `Packet Serial`, enable Multi-Unit, address 128/129/130, baud `115200`, Encoder 1/2 `Quadrature`, Max Main Battery 18.5 V, Min 11.5 V. PWM tab: enable Space Bar Stop All, move each slider slowly; set `M1/M2 Reverse` or encoder invert until positive PWM spins the wheel forward and counts up. Velocity Settings: Autotune M1 and M2 with wheels off the ground. Then Device > Write Settings. Cut power before touching any wiring.
CHECKEach RoboClaw shows Model 2x7a, Logic 5 V, Main Battery 11.5-16.7 V; every motor spins the right way with rising encoder counts; settings persist after a power cycle.This step can hurt a person or ruin parts. Its instructions need sign-off by a human who has done it before relying on them. Stop and ask if anything differs from what you see.
- Parts in
- RoboClaw 2x7A motor controller (one per two drive motors)electronics.roboclaw-2x7a
- 5203 Series Yellow Jacket Planetary Gear Motor (26.9:1, 24mm length 8mm REX shaft, 223 RPM, 3.3-5V encoder)actuator.yellow-jacket-5203-223rpm
- Tools
- Basicmicro Motion Studio + USB RoboClaw Windows driver, Micro-USB cable, Bench supply or charged battery
- Torque
- —
- Time
- —
- Source
- github.com
- Integration21
Integrate rocker-bogies, wheels, corners and wiring
Mount the PCB stack on the bottom plate. Slide a 32 mm ID spacer onto each rocker-bogie axis, feed the cables then the axis through the body plate hole and pillow blocks, and secure with another spacer and a 2-hole flat beam. Attach the differential legs to the 45-degree brackets (M4x8). With a helper, flip the rover: fit the middle motors (3 button screws to the U-channel, 4 socket screws for the clamp), then each corner assembly to its servo output bracket with 3 socket screws, correct side. Plug PCI-E and servo DuPont connectors into the silkscreen-labelled headers. Use blue threadlocker on screws that can vibrate loose.
CHECKContinuity checks pass through every joint; both rocker-bogies rotate freely when the wheels are lifted; every connector sits in its labelled header.- Parts in
- 1506 Series 32mm ID Spacer (36mm OD, 6mm Length) - 2 Packstructure.spacer-32id-6mm
- 1102 Series Flat Beam (2 Hole, 16mm Length) - 2 Packstructure.flat-beam-2h-16
- 1120 Series U-Channel (2 Hole, 72mm Length) (6 for the wheels + 2 for the body)structure.u-channel-2h-72
- 1401 Series 2-Side, 2-Post Clamping Mount (43mm Width, 36mm Bore)structure.clamping-mount-43-36
- 1501 Series M4 x 0.7mm Standoff (6mm OD, 8mm Length) - 4 Packfastener.standoff-m4-8
- 1500 Series Plastic Spacer (6mm ID x 8mm OD, 1mm Thickness) - 12 Packfastener.plastic-spacer-6x8x1
- M4 x 0.7 hex nut (7mm hex), zinc plated - 25 Packfastener.m4-nut-25
- M4 x 16mm button head screw - 25 Packfastener.m4x16-button-25
- Blue (removable) threadlockerother.threadlocker-blue
- Tools
- Hex keys, Multimeter, A helper
- Torque
- —
- Time
- —
- Source
- github.com
- 22
Fit the body plates
Fit the laser-cut plates with low-profile button screws and nuts on the inside so nothing falls out while driving (screws.md counts 34 M4x16 button screws for the plates). Hinge the top plates, mount the toggle switch and power meter in the back plate.
CHECKAll plates are fixed, the top plates swing on their hinges, and the switch and meter are reachable from outside.- Parts in
- Bottom plate (bottom_plate.dxf; PCB standoff holes)laser.bottom-plate
- Side plate (side_plate.dxf; one file, cut two)laser.side-plate
- Gap slat (gap_slat.dxf; one file, cut two)laser.gap-slat
- Top front plate (top_front.dxf; optional mission-patch engraving PDFs)laser.top-front
- Top rear plate (top_rear.dxf)laser.top-rear
- Front plate (front_plate_standoff.dxf)laser.front-plate
- Back plate (back_plate_standoff.dxf; switch hole and power-meter cut-out)laser.back-plate
- M4 x 16mm button head screw - 25 Packfastener.m4x16-button-25
- M4 x 0.7 hex nut (7mm hex), zinc plated - 25 Packfastener.m4-nut-25
- Tools
- Hex keys, Nut driver
- Torque
- —
- Time
- —
- Source
- github.com
- Software23
Test serial to all three RoboClaws
With the rover powered: `cd ~/osr_ws/src/osr-rover-code/scripts`, then `python3 roboclawtest.py 128`, `python3 roboclawtest.py 129`, `python3 roboclawtest.py 130`. If one hangs or returns zeros, re-check address, baud and Multi-Unit mode on every controller, power-cycle, and test one controller at a time. Optionally `python3 test_ina260.py` (address 0x45).
CHECKEach address prints 'Connected to /dev/serial0', a 'USB Roboclaw 2x7a' version string, encoder counts and main battery voltage.- Parts in
- —
- Tools
- —
- Torque
- —
- Time
- —
- Source
- github.com
- Bring-up24
Calibrate the corner servos
Safety · human-verified requiredPut the body on a box. Unscrew the M3 screw holding each corner to its servo shaft and detach the corners. `cd ~/osr_ws/src/osr-rover-code/scripts` and run `python3 calibrate_servos.py 0 150` then 1, 2, 3 (back right, front right, front left, back left). Re-attach the corners with a drop of blue threadlocker, then trim each with e.g. `python3 calibrate_servos.py 0 160` until the wheel points straight, lifting the corner so it turns freely. Copy `ROS/osr_bringup/launch/osr_launch.py` to `osr_mod_launch.py` if it does not exist and set `centered_pulse_widths` to your four values. Keep hands clear: servos move as soon as a command is sent.
CHECKAll four wheels point straight ahead at their recorded values; the list in osr_mod_launch.py holds those four numbers.This step can hurt a person or ruin parts. Its instructions need sign-off by a human who has done it before relying on them. Stop and ask if anything differs from what you see.
- Parts in
- 2000 Series Dual Mode Servo (25-2, Torque) (corner steering)actuator.servo-2000-25-2
- Blue (removable) threadlockerother.threadlocker-blue
- Tools
- 2.5 mm hex key
- Torque
- —
- Time
- —
- After
- 23
- Source
- github.com
- 25
Map the gamepad and first drive
Safety · human-verified requiredPlug in the gamepad dongle, run `ros2 run joy joy_node` and in a second terminal `ros2 topic echo /joy` to find the axis/button indices; put them in `enable_button`, `axis_linear.x`, `axis_angular.yaw`, `axis_angular.pitch` in osr_mod_launch.py with `scale_linear`, `scale_angular` and `scale_linear_turbo` at 0.05. With the wheels off the ground, run `ros2 launch osr_bringup osr_mod_launch.py` and drive while holding the enable button. Then raise the scales (turbo = drive_no_load_rpm x 2pi/60 x 0.075 m; normal about 0.75 of that; angular = linear / 0.45 m). The rover is fast and strong enough to injure: drive slowly near people.
CHECKWheels spin and steer in the commanded directions (flip the sign of a scale factor if reversed); only one or two start-up 'Current Error' messages appear; the rover stops when the enable button is released.This step can hurt a person or ruin parts. Its instructions need sign-off by a human who has done it before relying on them. Stop and ask if anything differs from what you see.
- Parts in
- USB gamepad or RC transmitter with USB dongle (Xbox controller, or Spektrum WS2000 + DXs)other.gamepad
- Tools
- —
- Torque
- —
- Time
- —
- After
- 24
- Source
- github.com
- 26
Optional: start the rover code at boot
Only after manual launch works: in init_scripts/, `sudo ln -s $(pwd)/launch_osr.sh /usr/local/bin/launch_osr.sh`, `sudo ln -s $(pwd)/osr_paths.sh /usr/local/bin/osr_paths.sh`, `sudo cp osr_startup.service /etc/systemd/system/osr_startup.service`, `sudo chmod 644 /etc/systemd/system/osr_startup.service`, set User/Group in the unit file, then `sudo systemctl enable osr_startup.service`. Stop the service before recalibrating or launching by hand.
CHECK`sudo systemctl status osr_startup.service` is active after a reboot and the rover responds to the gamepad without SSH.- Parts in
- —
- Tools
- —
- Torque
- —
- Time
- —
- After
- 25
- Source
- github.com
Progress is stored in this browser only (localStorage). Nothing is sent anywhere.
Bring-up
Flash · calibrate · first policy- A
Flash firmware
TargetsRaspberry Pi 3/4/5 (Ubuntu + ROS 2, osr-rover-code), RoboClaw 2x7A x3 (Basicmicro firmware, addresses 128-130), PCA9685 (I2C, corner servos on channels 0-3), INA260 (I2C 0x45, optional)
Repogithub.com/nasa-jpl/osr-rover-code
RoboClaw firmware is updated from Motion Studio. The ROS 2 stack (osr_bringup, osr_control, osr_interfaces) takes /cmd_vel from joy_to_twist; `enable_odometry:=true` publishes wheel odometry. osr_gazebo holds a URDF and Gazebo Classic simulation (ROS 2 Humble, not built by default: remove COLCON_IGNORE). On a Pi 3/4, Bluetooth gamepads conflict with the UART used for the RoboClaws.
- B
Calibrate
CalibrationRoboClaws: Motion Studio, Packet Serial at 115200 with Multi-Unit on, quadrature encoders, direction and encoder sign set per motor, velocity Autotune per channel, then Device > Write Settings. Corner servos: `python3 calibrate_servos.py <0-3> 150`, remount, trim per channel and store the four centres in `centered_pulse_widths` in osr_mod_launch.py. Geometry and wheel radius overrides go in osr_params_mod.yaml.Log the output. It goes in your build report.
- C
First policy
No published policy in the package yet.
Run it in sim on humanoidrobots.training →
Try the policy in the browser sim before it touches hardware. Keep a hand near the power switch the first time a policy runs on the real robot.
Report your build
Moves JPL Open Source Rover toward L4 · BuiltA build report is the only thing that proves a package works. It raises the level, puts a point on the map, and tells the Foreman which steps to rewrite.
Level gate
Holds L1 · evidence, not confidence- L0Indexed
Known to exist. Atlas page only.
- 4 sources on record(met)
- L1Compiled
Package validates against the spec; every fact has a source.
- Build package compiled(met)
- 25 sources across robot and package(met)
- L2Sim-verified
Loads in browser and GPU sim, mass within tolerance of the BOM, holds a stand. Unlocks .training.
- URDF/MJCF is public(met)
- Sim load, mass tolerance and stand are checked on .training(checked elsewhere)
- L3Sourced
Every BOM line resolves to a live offer in at least two regions. Unlocks the one-click cart.
- 0/117 BOM lines have offers in 2+ regions(not met)
- L4Built
At least one community build report with photos and bring-up logs. Unlocks Build it as the main action.
- 0 reviewed build reports(not met)
- Review feed unreachable at last refresh; count is registry-only(checked elsewhere)
- L5Certified
The robot's maintainer signs the package. Unlocks certified teams and kit sales.
- Maintainer signature not recorded(not met)
Levels are cumulative and set by the registry from reviewed evidence. This panel shows what can be measured from the package today.
Same robot, other verbs
- Know ithumanoidrobots.systems/jpl/open-source-rover
- Build ithumanoidrobot.build/jpl/open-source-rover
- Train itpartialhumanoidrobots.training/jpl/open-source-roverURDF (xacro) and a Gazebo Classic sim in osr-rover-code (osr_gazebo, skipped by colcon unless you remove COLCON_IGNORE). No MJCF, no learned policies.
- Find its crewhumanoidrobots.team/jpl/open-source-rover
- See it on the maphumanoidrobots.earth/jpl/open-source-rover