Build package
Build Koch v1.1 Low-Cost Robot Arm
Alexander Koch / Hugging Face LeRobot · Arm · orphaned · 2024
Dynamixel-based low-cost leader/follower arm pair; an assembly-friendly revision of Alexander Koch's low_cost_robot, used in early LeRobot work.
Build is partial: Files are public but the maker is gone; uncertified, some parts may need alternates.
Two ways to get Koch v1.1 Low-Cost Robot Arm
Compare all →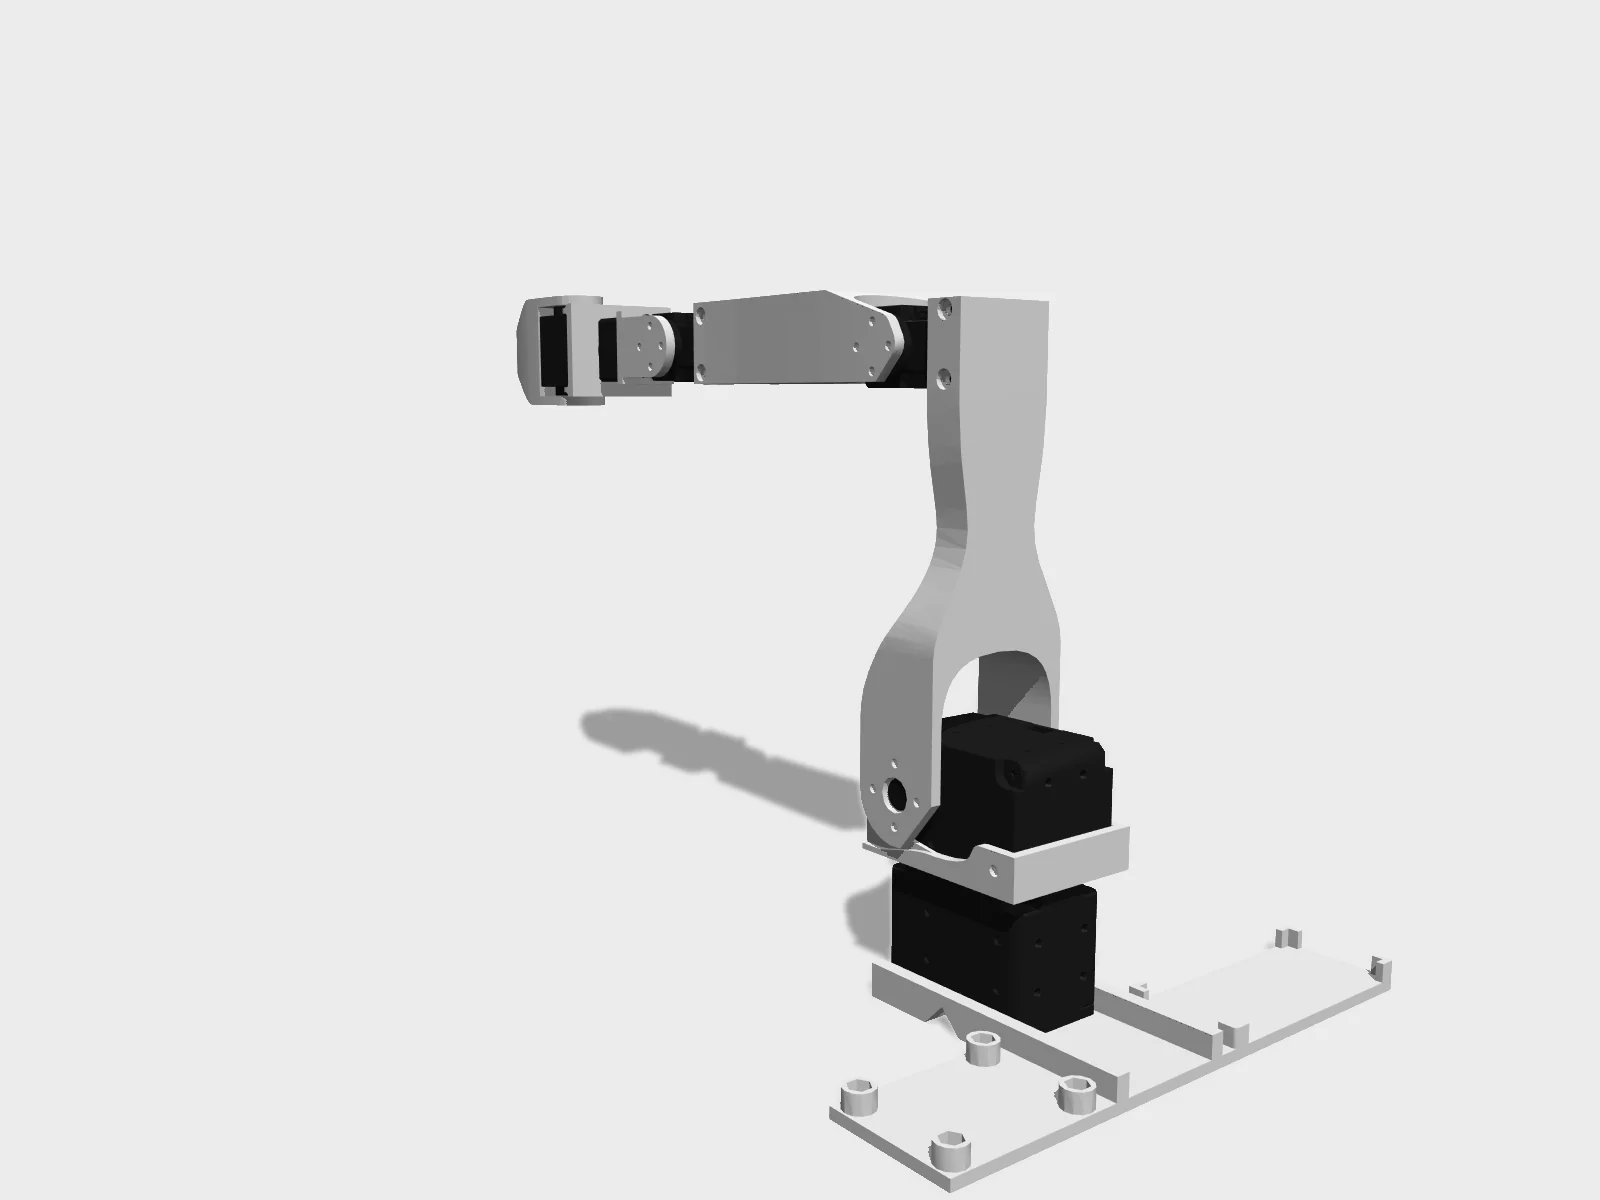
- Drawing
- /alexanderkoch/koch-v1-1
- Maker
- Alexander Koch / Hugging Face LeRobot
- Country
- Palo Alto, US
- Package rev
- v0.1.0
- Level
- L2 Sim-verified
- Availability
- DIY
- Openness
- 75/100
- HW licence
- Apache-2.0
- Last checked
- 2026-09-25
- Actuators
- Follower: Dynamixel XL430-W250-T x2 + XL330-M288-T x4; leader: XL330-M077-T x6
Repo last pushed Sep 2024; LeRobot community has largely moved to SO-101. Original low_cost_robot is MIT-licensed. Uses stock Dynamixel firmware (firmware=false). policies=false: only datasets are published upstream.
Configure
Saved in the URL. Share the link to share the build.Source
One cart across 2 vendors · prices in USD as listed19 lines · 34 parts · 2 without an offer in US · 17/19 lines sourced in 2+ regions (L3 gate)
| # | Part | Category | Qty | Unit | Line | Offer |
|---|---|---|---|---|---|---|
Robotis US6 lines · $367.00 | ||||||
| 1 | Dynamixel XL330-M077-T servo (leader arm, 5 V) actuator.leader.xl330-m077-t · MPN XL330-M077-T (902-0162-000) | actuator | 6 | $24.00 | $144.00 | Robotis US |
| 2 | XL330 frame and idler wheel set FPX330-H101, 4 pcs (leader; 3 of 4 used) structure.leader.fpx330-h101 · MPN FPX330-H101 | structure | 1 | $10.00 | $10.00 | Robotis US |
| 3 | Dynamixel XL430-W250-T servo (follower shoulder pan + shoulder lift, 12 V) actuator.follower.xl430-w250-t · MPN XL430-W250-T (902-0135-000) | actuator | 2 | $50.00 | $100.00 | Robotis US |
| 4 | Dynamixel XL330-M288-T servo (follower elbow, wrist flex, wrist roll, gripper; 5 V) actuator.follower.xl330-m288-t · MPN XL330-M288-T (902-0163-000) | actuator | 4 | $24.00 | $96.00 | Robotis US |
| 5 | XL330 frame and idler wheel set FPX330-H101, 4 pcs (follower; 3 of 4 used) structure.follower.fpx330-h101 · MPN FPX330-H101 | structure | 1 | $10.00 | $10.00 | Robotis US |
| 6 | XL430 idler wheel set HN11-I101 (follower) structure.follower.hn11-i101 · MPN HN11-I101 | structure | 1 | $7.00 | $7.00 | Robotis US |
Amazon11 lines · $94.00 | ||||||
| 7 | Waveshare Serial Bus Servo Driver Board (leader, run at 5 V) electronics.leader.servo-driver · MPN Amazon ASIN B0CTMM4LWK (wiring diagram) · 1 alt | electronics | 1 | $10.00 | $10.00 | Amazon |
| 8 | 5 V DC power supply (leader arm) power.leader.psu-5v | power | 1 | $6.00 | $6.00 | Amazon |
| 9 | Jumper wires, 3 x 40 pcs set (M-M, M-F, F-F) (leader) cable.leader.jumpers | cable | 1 | $7.00 | $7.00 | Amazon |
| 10 | Table clamp (leader) other.leader.table-clamp | other | 1 | $6.00 | $6.00 | Amazon |
| 11 | Waveshare Serial Bus Servo Driver Board (follower, 12 V) electronics.follower.servo-driver · MPN Amazon ASIN B0CTMM4LWK (wiring diagram) · 1 alt | electronics | 1 | $10.00 | $10.00 | Amazon |
| 12 | 12 V to 5 V voltage reducer (feeds the four XL330 servos) power.follower.voltage-reducer · MPN EP-JY-DC5 (wiring diagram) | power | 1 | $14.00 | $14.00 | Amazon |
| 13 | 12 V DC power supply (follower arm) power.follower.psu-12v | power | 1 | $12.00 | $12.00 | Amazon |
| 14 | Jumper wires, 3 x 40 pcs set (M-M, M-F, F-F) (follower) cable.follower.jumpers | cable | 1 | $7.00 | $7.00 | Amazon |
| 15 | Table clamp (follower) other.follower.table-clamp · 1 alt | other | 1 | $6.00 | $6.00 | Amazon |
| 16 | 1.5 mm star/cruciform precision screwdriver, 2 pcs set (shared by both arms) other.screwdriver-1-5mm | other | 1 | $7.00 | $7.00 | Amazon |
| 17 | USB C-A or C-C cable, 2 pcs set (one cable per arm; shared) cable.usb-c | cable | 1 | $9.00 | $9.00 | Amazon |
No offer in this region2 lines · unpriced | ||||||
| 18 | M2x5 machine screw (Leader_Platform to Leader_Base) fastener.leader.m2x5 | fastener | 4 | unpriced | — | No offer found yet |
| 19 | M2 nut (pockets under Leader_Platform) fastener.leader.m2-nut | fastener | 4 | unpriced | — | No offer found yet |
| Cart total · US | 34 | $461.00 | 2 lines unpriced, not in total | |||
Fabricate
Planned for a 256 mm bed- Fabricated parts
- 17
- Print time (sum)
- —
- Material (sum)
- —
- Plates · estimate
- —
No plate estimate: the package does not list grams per part yet, and we will not guess them. Slice the source files for your 256 mm bed.
| Part | Process | Material | Qty | h / part | g / part | Profile |
|---|---|---|---|---|---|---|
Leader_Base printed.leader.base | FDM | PLA+, ABS or PETG | 1 | — | — | <=0.2 mm layer height, <=0.4 mm nozzle, ~30% infill (author used 37%), glue stick on bed |
Leader_Shoulder_To_Elbow printed.leader.shoulder-to-elbow | FDM | PLA+, ABS or PETG | 1 | — | — | <=0.2 mm layer height, <=0.4 mm nozzle, ~30% infill |
Leader_Elbow_To_Wrist printed.leader.elbow-to-wrist | FDM | PLA+, ABS or PETG | 1 | — | — | <=0.2 mm layer height, <=0.4 mm nozzle, ~30% infill |
Leader_Elbow_To_Wrist_Extension printed.leader.elbow-to-wrist-extension | FDM | PLA+, ABS or PETG | 1 | — | — | <=0.2 mm layer height, <=0.4 mm nozzle, ~30% infill |
Leader_Gripper_Handle printed.leader.gripper-handle | FDM | PLA+, ABS or PETG | 1 | — | — | <=0.2 mm layer height, <=0.4 mm nozzle, ~30% infill |
Leader_Gripper_Trigger printed.leader.gripper-trigger | FDM | PLA+, ABS or PETG | 1 | — | — | <=0.2 mm layer height, <=0.4 mm nozzle, ~30% infill |
Leader_Platform (optional; lets the follower reach the floor) printed.leader.platform | FDM | PLA+, ABS or PETG | 1 | — | — | <=0.2 mm layer height, <=0.4 mm nozzle, ~30% infill; now fastened with M2 screws, not snap-fit |
Robotis_FPX330_S101 frame (printed instead of buying the Robotis FPX330-S101 set) printed.leader.fpx330-s101 | FDM | PLA+, ABS or PETG | 1 | — | — | <=0.2 mm layer height, <=0.4 mm nozzle, ~30% infill |
Follower_Base printed.follower.base | FDM | PLA+, ABS or PETG | 1 | — | — | <=0.2 mm layer height, <=0.4 mm nozzle, ~30% infill (author used 37%), glue stick on bed |
Follower_Shoulder_Rotation printed.follower.shoulder-rotation | FDM | PLA+, ABS or PETG | 1 | — | — | <=0.2 mm layer height, <=0.4 mm nozzle, ~30% infill |
Follower_Shoulder_To_Elbow printed.follower.shoulder-to-elbow | FDM | PLA+, ABS or PETG | 1 | — | — | <=0.2 mm layer height, <=0.4 mm nozzle, ~30% infill |
Follower_Elbow_To_Wrist printed.follower.elbow-to-wrist | FDM | PLA+, ABS or PETG | 1 | — | — | <=0.2 mm layer height, <=0.4 mm nozzle, ~30% infill |
Follower_Elbow_To_Wrist_Extension printed.follower.elbow-to-wrist-extension | FDM | PLA+, ABS or PETG | 1 | — | — | <=0.2 mm layer height, <=0.4 mm nozzle, ~30% infill |
Follower_Gripper_Static_Part printed.follower.gripper-static | FDM | PLA+, ABS or PETG | 1 | — | — | <=0.2 mm layer height, <=0.4 mm nozzle, ~30% infill |
Follower_Gripper_Moving_Part printed.follower.gripper-moving | FDM | PLA+, ABS or PETG | 1 | — | — | <=0.2 mm layer height, <=0.4 mm nozzle, ~30% infill; supports needed (original low_cost_robot README: only the moving gripper part needs supports) |
HuggingFace_Block (optional 2x4-Lego-size test object) printed.extras.huggingface-block | FDM | PLA+, ABS or PETG | 1 | — | — | source |
LeRobot_Block (optional 2x4-Lego-size test object) printed.extras.lerobot-block | FDM | PLA+, ABS or PETG | 1 | — | — | source |
Assemble
Every step ends in a check- Steps
- 16
- Subassemblies
- 8
- Hands-on time (sum)
- —
- Critical path
- —
- Your progress · this device
- —
16 steps have no time estimate; times above are lower bounds.
Steps, in build order
- Fabrication01
Print leader and follower parts
Print one of each STL in `hardware/leader/STL` and `hardware/follower/STL` (the extras blocks are optional). Level and clean the bed, apply a thin even glue-stick layer, print at 0.2 mm layers or finer with a nozzle of 0.4 mm or less and about 30% infill. Scrape parts off with the putty knife, remove supports and re-apply glue before the next print.
CHECKAn M2 screw passes through the 2.4 mm through holes without forcing, and mating holes line up when parts are held together (README footnote 7 allows about +/-0.2 mm).- Parts in
- Leader_Baseprinted.leader.base
- Leader_Shoulder_To_Elbowprinted.leader.shoulder-to-elbow
- Leader_Elbow_To_Wristprinted.leader.elbow-to-wrist
- Leader_Elbow_To_Wrist_Extensionprinted.leader.elbow-to-wrist-extension
- Leader_Gripper_Handleprinted.leader.gripper-handle
- Leader_Gripper_Triggerprinted.leader.gripper-trigger
- Leader_Platform (optional; lets the follower reach the floor)printed.leader.platform
- Robotis_FPX330_S101 frame (printed instead of buying the Robotis FPX330-S101 set)printed.leader.fpx330-s101
- Follower_Baseprinted.follower.base
- Follower_Shoulder_Rotationprinted.follower.shoulder-rotation
- Follower_Shoulder_To_Elbowprinted.follower.shoulder-to-elbow
- Follower_Elbow_To_Wristprinted.follower.elbow-to-wrist
- Follower_Elbow_To_Wrist_Extensionprinted.follower.elbow-to-wrist-extension
- Follower_Gripper_Static_Partprinted.follower.gripper-static
- Follower_Gripper_Moving_Partprinted.follower.gripper-moving
- Tools
- FDM printer (e.g. Prusa Mini+, Bambu P1, Ender 3), Glue stick, Putty knife
- Torque
- —
- Time
- —
- After
- Start
- Source
- github.com
- Software02
Install LeRobot with the Dynamixel extra
Follow the LeRobot installation guide (`conda create -y -n lerobot python=3.12`, `conda activate lerobot`, clone huggingface/lerobot and install it), then add the Dynamixel SDK: `pip install -e ".[dynamixel]"`.
CHECK`lerobot-find-port --help` and `lerobot-setup-motors --help` both run without an import error.- Parts in
- —
- Tools
- Linux or macOS computer, conda (miniforge)
- Torque
- —
- Time
- —
- After
- Start
- Source
- huggingface.co
- Follower arm03
Assemble the follower arm mechanics (per video)
Follow the follower part of the assembly video. XL430-W250-T servos go on shoulder pan and shoulder lift; XL330-M288-T on elbow, wrist flex, wrist roll and gripper. Keep the servos in the same orientation as the CAD and screw horns on in their default position. Per the LeRobot docs, do NOT plug in the motor cables and do NOT screw the controller board to the base yet; that happens after motor setup.
CHECKEvery joint turns by hand through its range without binding and the horn marks line up with the CAD pose; no 3-pin cables are connected yet.- Parts in
- Dynamixel XL430-W250-T servo (follower shoulder pan + shoulder lift, 12 V)actuator.follower.xl430-w250-t
- Dynamixel XL330-M288-T servo (follower elbow, wrist flex, wrist roll, gripper; 5 V)actuator.follower.xl330-m288-t
- XL330 frame and idler wheel set FPX330-H101, 4 pcs (follower; 3 of 4 used)structure.follower.fpx330-h101
- XL430 idler wheel set HN11-I101 (follower)structure.follower.hn11-i101
- Follower_Baseprinted.follower.base
- Follower_Shoulder_Rotationprinted.follower.shoulder-rotation
- Follower_Shoulder_To_Elbowprinted.follower.shoulder-to-elbow
- Follower_Elbow_To_Wristprinted.follower.elbow-to-wrist
- Follower_Elbow_To_Wrist_Extensionprinted.follower.elbow-to-wrist-extension
- Follower_Gripper_Static_Partprinted.follower.gripper-static
- Follower_Gripper_Moving_Partprinted.follower.gripper-moving
- Tools
- 1.5 mm cruciform screwdriver
- Torque
- —
- Time
- —
- After
- 01
- Source
- youtube.com
- Leader arm04
Assemble the leader arm mechanics (per video)
Follow the leader part of the assembly video: six XL330-M077-T servos, the gripper is replaced by a handle and trigger. As for the follower, leave motor cables unplugged and the controller board unscrewed until motor setup is done.
CHECKAll six leader joints and the trigger move freely by hand; handle and trigger are firmly attached to the last servo.- Parts in
- Dynamixel XL330-M077-T servo (leader arm, 5 V)actuator.leader.xl330-m077-t
- XL330 frame and idler wheel set FPX330-H101, 4 pcs (leader; 3 of 4 used)structure.leader.fpx330-h101
- Leader_Baseprinted.leader.base
- Leader_Shoulder_To_Elbowprinted.leader.shoulder-to-elbow
- Leader_Elbow_To_Wristprinted.leader.elbow-to-wrist
- Leader_Elbow_To_Wrist_Extensionprinted.leader.elbow-to-wrist-extension
- Leader_Gripper_Handleprinted.leader.gripper-handle
- Leader_Gripper_Triggerprinted.leader.gripper-trigger
- Robotis_FPX330_S101 frame (printed instead of buying the Robotis FPX330-S101 set)printed.leader.fpx330-s101
- Tools
- 1.5 mm cruciform screwdriver
- Torque
- —
- Time
- —
- After
- 01
- Source
- youtube.com
- Electronics05
Find the USB port of each controller board
Plug both boards into the computer by USB-C and run `lerobot-find-port`. Unplug the board it asks about and press Enter; it prints that board's port. On Linux grant access with `sudo chmod 666 /dev/ttyACM0` (and ACM1). On the Waveshare board set both jumpers to channel B (USB).
CHECK`lerobot-find-port` prints a distinct port for each arm (e.g. `/dev/ttyACM0` leader, `/dev/ttyACM1` follower) and the result is reproducible after re-plugging.- Parts in
- Waveshare Serial Bus Servo Driver Board (leader, run at 5 V)electronics.leader.servo-driver
- Waveshare Serial Bus Servo Driver Board (follower, 12 V)electronics.follower.servo-driver
- USB C-A or C-C cable, 2 pcs set (one cable per arm; shared)cable.usb-c
- Tools
- —
- Torque
- —
- Time
- —
- After
- 02
- Source
- huggingface.co
- Leader arm06
Fasten the Leader_Platform to the Leader_Base
The platform is now screwed, not snapped, in place (the video is outdated here). Insert four M2 nuts into the pockets under the Leader_Platform, then fasten it to the Leader_Base with four M2x5 screws. If the Waveshare board is already mounted, remove it temporarily to reach the two screws beneath it.
CHECKThe platform does not rock or lift when you press on either end, and all four screws are tight in their nuts.- Parts in
- Leader_Platform (optional; lets the follower reach the floor)printed.leader.platform
- M2x5 machine screw (Leader_Platform to Leader_Base)fastener.leader.m2x5
- M2 nut (pockets under Leader_Platform)fastener.leader.m2-nut
- Tools
- 1.5 mm cruciform screwdriver
- Torque
- —
- Time
- —
- After
- 04
- Source
- github.com
- Electronics07
Follower power wiring: 12 V board and 12 V to 5 V reducer
Safety · human-verified requiredPer the v1.1 wiring diagram: the driver board's V/G/D port feeds the two XL430-W250-T servos at 12 V. The EP-JY-DC5 reducer takes 12 V IN+/GND IN- from the board's V/G pins via jumper wires and its OUT+ 5 V / OUT- GND, together with the board's D (data) pin, feed the XL330-M288-T chain. The v1.1 reducer needs no soldering or trimming (README change 3). Do not connect any XL330 to a 12 V line.
CHECKWith the 12 V supply on and no servos connected, the multimeter reads about 12 V at the board's V/G pins and about 5 V at the reducer output, with correct polarity.This step can hurt a person or ruin parts. Its instructions need sign-off by a human who has done it before relying on them. Stop and ask if anything differs from what you see.
- Parts in
- Waveshare Serial Bus Servo Driver Board (follower, 12 V)electronics.follower.servo-driver
- 12 V to 5 V voltage reducer (feeds the four XL330 servos)power.follower.voltage-reducer
- 12 V DC power supply (follower arm)power.follower.psu-12v
- Jumper wires, 3 x 40 pcs set (M-M, M-F, F-F) (follower)cable.follower.jumpers
- Tools
- Digital multimeter
- Torque
- —
- Time
- —
- After
- 03
- Source
- github.com
- Follower arm08
Set follower motor IDs and baudrate
Safety · human-verified requiredRun `lerobot-setup-motors --robot.type=koch_follower --robot.port=<follower port>`. When prompted, connect ONLY the named motor straight to the board (starting with 'gripper', then 'wrist_roll', and so on down to 'shoulder_pan') and press Enter; each motor's ID and baudrate are written to EEPROM once. The LeRobot page says to power the board from the 5 V supply for this step. That matters: the XL330-M288-T is rated 3.7-6.0 V, so never plug an XL330 directly into the board while it is on 12 V (XL430-W250-T is rated 6.5-12.0 V, Robotis e-Manual).
CHECKThe script prints `'gripper' motor id set to 6` and so on down to shoulder_pan with id 1, then exits without a communication error.This step can hurt a person or ruin parts. Its instructions need sign-off by a human who has done it before relying on them. Stop and ask if anything differs from what you see.
- Parts in
- Dynamixel XL430-W250-T servo (follower shoulder pan + shoulder lift, 12 V)actuator.follower.xl430-w250-t
- Dynamixel XL330-M288-T servo (follower elbow, wrist flex, wrist roll, gripper; 5 V)actuator.follower.xl330-m288-t
- Waveshare Serial Bus Servo Driver Board (follower, 12 V)electronics.follower.servo-driver
- 5 V DC power supply (leader arm)power.leader.psu-5v
- Tools
- —
- Torque
- —
- Time
- —
- Source
- huggingface.co
- Leader arm09
Set leader motor IDs and baudrate
Safety · human-verified requiredPower the leader board from the 5 V supply only (README footnote 14: 5 V on a board rated 9-12.6 V is intended, the XL330-M077 are 5 V servos). Run `lerobot-setup-motors --teleop.type=koch_leader --teleop.port=<leader port>` and connect one motor at a time as prompted.
CHECKAll six leader motors report their new IDs (gripper 6 down to shoulder_pan 1) and the script finishes cleanly.This step can hurt a person or ruin parts. Its instructions need sign-off by a human who has done it before relying on them. Stop and ask if anything differs from what you see.
- Parts in
- Dynamixel XL330-M077-T servo (leader arm, 5 V)actuator.leader.xl330-m077-t
- Waveshare Serial Bus Servo Driver Board (leader, run at 5 V)electronics.leader.servo-driver
- 5 V DC power supply (leader arm)power.leader.psu-5v
- Tools
- —
- Torque
- —
- Time
- —
- Source
- huggingface.co
- Follower arm10
Daisy-chain follower motors and mount its board
Plug each motor's 3-pin cable into the next one, connect shoulder_pan (id 1) to the board, then screw the board and reducer to Follower_Base. Clamp the base to the table.
CHECKCables do not pull tight at any joint limit when you move the unpowered arm through its range, and the base does not move on the table.- Parts in
- Waveshare Serial Bus Servo Driver Board (follower, 12 V)electronics.follower.servo-driver
- Table clamp (follower)other.follower.table-clamp
- 1.5 mm star/cruciform precision screwdriver, 2 pcs set (shared by both arms)other.screwdriver-1-5mm
- Tools
- —
- Torque
- —
- Time
- —
- Source
- huggingface.co
- Leader arm11
Daisy-chain leader motors and mount its board
Chain the six leader motors, connect shoulder_pan to the board, screw the board to the Leader_Base and clamp the leader to the table next to the follower.
CHECKThe leader moves freely through its range with cables attached and the trigger returns without catching on a cable.- Parts in
- Waveshare Serial Bus Servo Driver Board (leader, run at 5 V)electronics.leader.servo-driver
- Jumper wires, 3 x 40 pcs set (M-M, M-F, F-F) (leader)cable.leader.jumpers
- Table clamp (leader)other.leader.table-clamp
- Tools
- —
- Torque
- —
- Time
- —
- Source
- huggingface.co
- Calibration12
Calibrate the follower
Safety · human-verified requiredRun `lerobot-calibrate --robot.type=koch_follower --robot.port=<follower port> --robot.id=my_awesome_follower_arm`. Move every joint to the middle of its range and press Enter, then move each joint through its full range of motion. Same procedure as SO-100/SO-101.
CHECKThe script shows a min/pos/max table where each joint's range spans its physical travel, and writes a calibration file named after the robot id.This step can hurt a person or ruin parts. Its instructions need sign-off by a human who has done it before relying on them. Stop and ask if anything differs from what you see.
- Parts in
- Dynamixel XL430-W250-T servo (follower shoulder pan + shoulder lift, 12 V)actuator.follower.xl430-w250-t
- Dynamixel XL330-M288-T servo (follower elbow, wrist flex, wrist roll, gripper; 5 V)actuator.follower.xl330-m288-t
- Tools
- —
- Torque
- —
- Time
- —
- After
- 10
- Source
- huggingface.co
- 13
Calibrate the leader
Run `lerobot-calibrate --teleop.type=koch_leader --teleop.port=<leader port> --teleop.id=my_awesome_leader_arm` and repeat the middle-of-range then full-range procedure.
CHECKThe calibration file for the leader id is written and the range table covers each joint's travel, including the trigger.- Parts in
- Dynamixel XL330-M077-T servo (leader arm, 5 V)actuator.leader.xl330-m077-t
- Tools
- —
- Torque
- —
- Time
- —
- After
- 11
- Source
- huggingface.co
- First motion14
First motion: leader-follower teleoperation
Safety · human-verified requiredClear the follower's workspace, then run `lerobot-teleoperate --robot.type=koch_follower --robot.port=<follower port> --robot.id=my_awesome_follower_arm --teleop.type=koch_leader --teleop.port=<leader port> --teleop.id=my_awesome_leader_arm`. Move the leader slowly first. Stop with Ctrl-C.
CHECKThe follower tracks the leader joint by joint in the same direction, the gripper closes when the trigger is pulled, and no joint overshoots or oscillates at rest.This step can hurt a person or ruin parts. Its instructions need sign-off by a human who has done it before relying on them. Stop and ask if anything differs from what you see.
- Parts in
- —
- Tools
- —
- Torque
- —
- Time
- —
- Source
- huggingface.co
- Policy15
Record a dataset
Add a camera and record with `lerobot-record --robot.type=koch_follower ... --robot.cameras="{ front: {type: opencv, index_or_path: 0, width: 1920, height: 1080, fps: 30}}" --teleop.type=koch_leader ... --dataset.repo_id=${HF_USER}/record-test --dataset.num_episodes=5 --dataset.single_task="Grab the block"`. The docs suggest at least 50 episodes (10 per location) for a first task. A camera is not part of the Koch BOM.
CHECKThe dataset appears on the Hub (or locally) with the expected number of episodes and plays back in the dataset visualizer with camera frames and joint states in sync.- Parts in
- HuggingFace_Block (optional 2x4-Lego-size test object)printed.extras.huggingface-block
- LeRobot_Block (optional 2x4-Lego-size test object)printed.extras.lerobot-block
- Tools
- —
- Torque
- —
- Time
- —
- After
- 14
- Source
- huggingface.co
- 16
Train an ACT policy on the recorded data
Run `lerobot-train --dataset.repo_id=${HF_USER}/<dataset> --policy.type=act --output_dir=outputs/train/act_koch --job_name=act_koch --policy.device=cuda --policy.repo_id=${HF_USER}/my_policy`, then evaluate on the arm by recording with `--policy.path` set to the checkpoint.
CHECKTraining loss decreases and checkpoints are written under `outputs/train/act_koch/checkpoints/`; the policy repeats the task on the real arm in several evaluation episodes.- Parts in
- —
- Tools
- NVIDIA GPU or Apple silicon
- Torque
- —
- Time
- —
- After
- 15
- Source
- huggingface.co
Progress is stored in this browser only (localStorage). Nothing is sent anywhere.
Bring-up
Flash · calibrate · first policy- A
Flash firmware
TargetsDynamixel XL430-W250-T (stock firmware), Dynamixel XL330-M288-T (stock firmware), Dynamixel XL330-M077-T (stock firmware), Waveshare Serial Bus Servo Driver Board (USB-serial, no user firmware)
Repogithub.com/huggingface/lerobot
No custom firmware. Motor IDs (1 shoulder_pan to 6 gripper) and baudrate are written to servo EEPROM by `lerobot-setup-motors`. The original low_cost_robot flow used Dynamixel Wizard 2 (baud 1 M) and the Dynamixel SDK (`pip install dynamixel-sdk`) with its own teleoperate_real_robot.py.
- B
Calibrate
Calibration`lerobot-calibrate --robot.type=koch_follower --robot.port=<port> --robot.id=<name>` and `lerobot-calibrate --teleop.type=koch_leader --teleop.port=<port> --teleop.id=<name>`: move all joints to mid-range, press Enter, then sweep every joint through its full range.Log the output. It goes in your build report.
- C
First policy
No published policy in the package yet.
Run it in sim on humanoidrobots.training →
Try the policy in the browser sim before it touches hardware. Keep a hand near the power switch the first time a policy runs on the real robot.
Report your build
Moves Koch v1.1 Low-Cost Robot Arm toward L4 · BuiltA build report is the only thing that proves a package works. It raises the level, puts a point on the map, and tells the Foreman which steps to rewrite.
Level gate
Holds L2 · evidence, not confidence- L0Indexed
Known to exist. Atlas page only.
- 5 sources on record(met)
- L1Compiled
Package validates against the spec; every fact has a source.
- Build package compiled(met)
- 15 sources across robot and package(met)
- L2Sim-verified
Loads in browser and GPU sim, mass within tolerance of the BOM, holds a stand. Unlocks .training.
- URDF/MJCF is public(met)
- Sim load, mass tolerance and stand are checked on .training(checked elsewhere)
- L3Sourced
Every BOM line resolves to a live offer in at least two regions. Unlocks the one-click cart.
- 17/19 BOM lines have offers in 2+ regions(not met)
- L4Built
At least one community build report with photos and bring-up logs. Unlocks Build it as the main action.
- 0 reviewed build reports(not met)
- Review feed unreachable at last refresh; count is registry-only(checked elsewhere)
- L5Certified
The robot's maintainer signs the package. Unlocks certified teams and kit sales.
- Orphaned: no maintainer left to sign(not met)
Levels are cumulative and set by the registry from reviewed evidence. This panel shows what can be measured from the package today.
Same robot, other verbs
- Know ithumanoidrobots.systems/alexanderkoch/koch-v1-1
- Build itpartialhumanoidrobot.build/alexanderkoch/koch-v1-1Files are public but the maker is gone; uncertified, some parts may need alternates.
- Train ithumanoidrobots.training/alexanderkoch/koch-v1-1
- Find its crewpartialhumanoidrobots.team/alexanderkoch/koch-v1-1
- See it on the mappartialhumanoidrobots.earth/alexanderkoch/koch-v1-1